crwdns2915892:0crwdne2915892:0
This guide shows how to remove and replace the control valve on the Toro Log Splitter 22618HD 2019 / LS-922.
crwdns2942213:0crwdne2942213:0
-
-
Grab the plastic housing at the end of the spark plug wire and pull firmly to disconnect it.
-
-
-
Flip the red engine ON/OFF switch to the OFF position.
-
-
-
Flip the fuel valve lever to the OFF position.
-
-
-
Use a 3/8 inch socket to remove the three bolts securing the control valve to the control valve bracket.
-
-
-
Use a 9/16 inch socket to remove the two bolts securing the control valve bracket to the frame.
-
-
-
Remove the control valve bracket.
-
-
-
Place a bucket underneath the device, below the control valve to catch any hydraulic fluid drips.
-
-
-
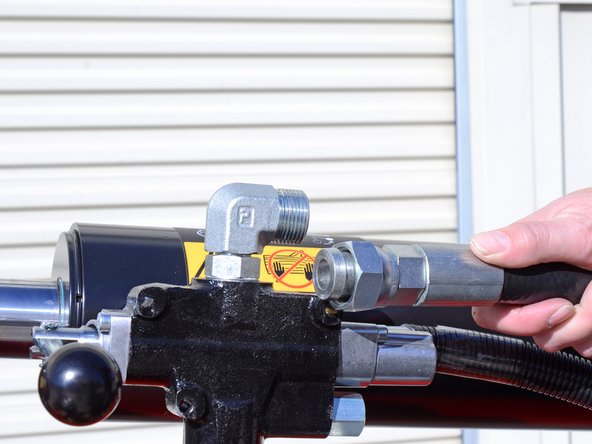
Use an adjustable wrench to loosen the nut securing the output hose to the L-fitting on top of the control valve.
-
-
-
-
Remove the output hose from the top L-fitting.
-
-
-
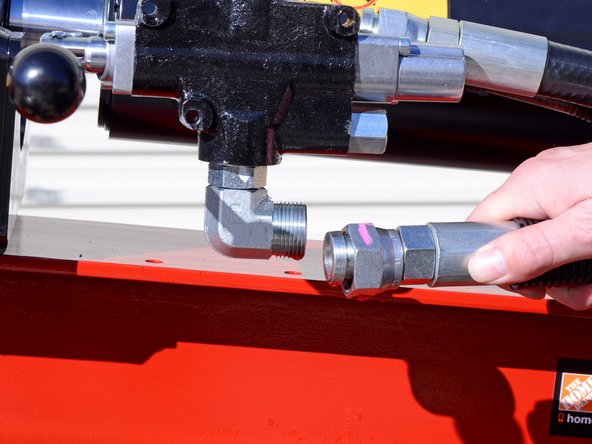
Use an adjustable wrench to loosen the nut holding the input hose to the L-fitting on the bottom of the control valve.
-
-
-
Remove the input hose from the bottom L-fitting.
-
-
-
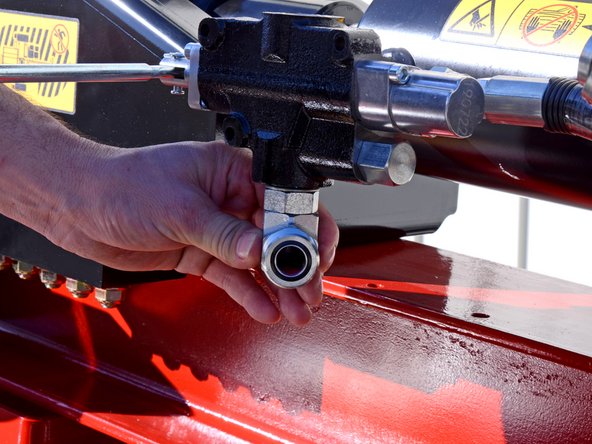
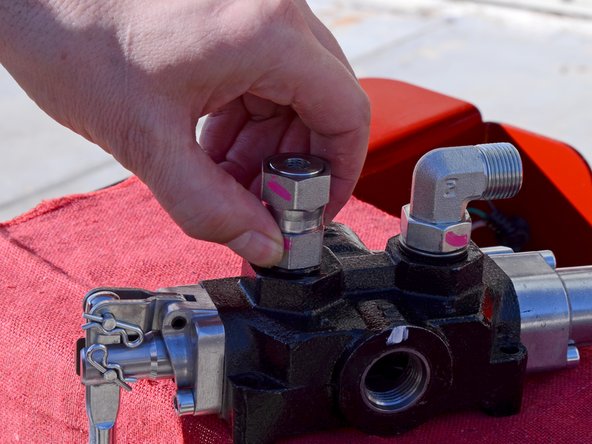
Use an adjustable wrench to loosen the nut securing the top L-fitting to the control valve.
-
-
-
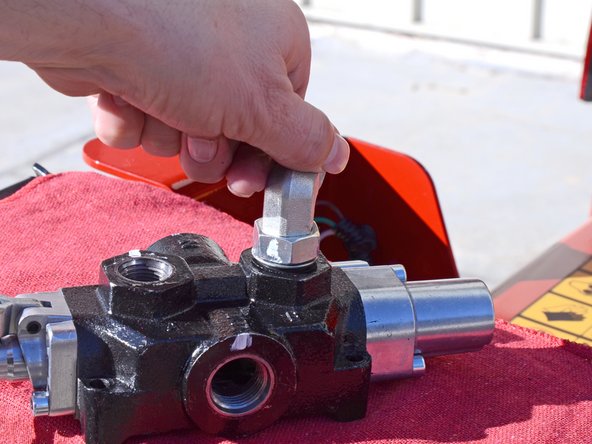
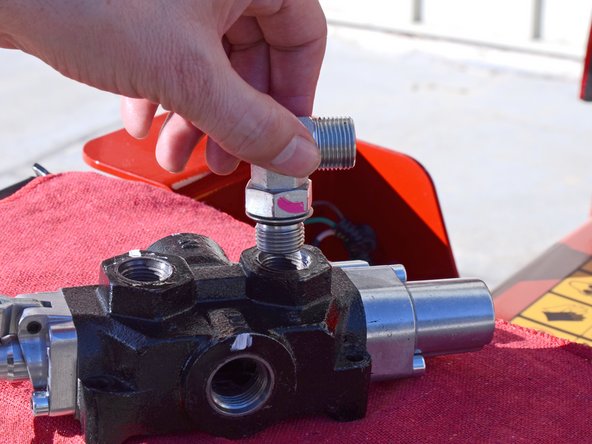
Spin the top L-fitting counter-clockwise to remove it.
-
-
-
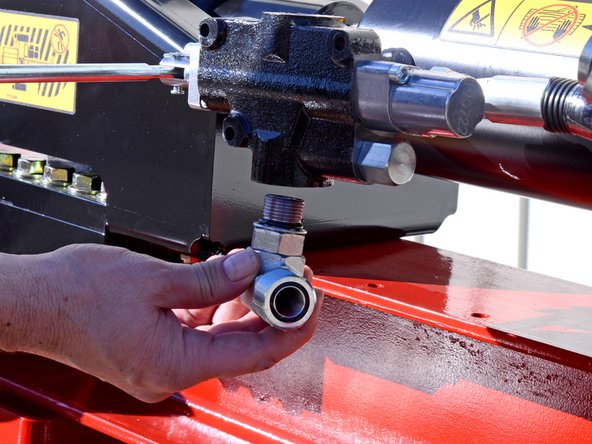
Use an adjustable wrench to loosen the nut securing the bottom L-fitting to the control valve.
-
-
-
Use an adjustable wrench to loosen the nut securing the piston extension hose to the L-fitting on the rear of the control valve.
-
-
-
Remove the piston extension hose from the rear L-fitting.
-
-
-
Use an adjustable wrench to loosen the nut securing the control valve to the cylinder.
-
-
-
Use an adjustable wrench to loosen the nut securing the piston contraction fitting to the control valve.
-
-
-
Spin the piston contraction fitting counter-clockwise to remove it.
-
-
-
Use an adjustable wrench to loosen the nut securing the L-fitting to the rear of the control valve.
-
-
-
Spin the L-fitting counter-clockwise to remove it.
-


To reassemble your device, follow these instructions in reverse order.
To reassemble your device, follow these instructions in reverse order.
crwdns2935221:0crwdne2935221:0
crwdns2935227:0crwdne2935227:0

