crwdns2933423:0crwdne2933423:0
crwdns2947577:0crwdnd2947577:0crwdne2947577:0

Toilet Pull Chain Spring Clasp Replacement

crwdns2942213:0crwdne2942213:0

    1. Toilet Pull Chain Spring Clasp Replacement, Tank Lid: crwdns2935265:01crwdnd2935265:01crwdnd2935265:03crwdne2935265:0 Toilet Pull Chain Spring Clasp Replacement, Tank Lid: crwdns2935265:01crwdnd2935265:02crwdnd2935265:03crwdne2935265:0 Toilet Pull Chain Spring Clasp Replacement, Tank Lid: crwdns2935265:01crwdnd2935265:03crwdnd2935265:03crwdne2935265:0
      • Lift the tank lid up and away from the toilet tank.

      • Use sturdy hands when lifting the tank lid, it might be heavy. Secure your fingers firmly on opposite sides and place the lid on a safe flat surface.

      crwdns2952109:0crwdne2952109:0

      crwdns2917038:0crwdne2917038:0

    2. Toilet Pull Chain Spring Clasp Replacement, Shutting off the Water Supply to a Toilet: crwdns2935265:02crwdnd2935265:01crwdnd2935265:02crwdne2935265:0 Toilet Pull Chain Spring Clasp Replacement, Shutting off the Water Supply to a Toilet: crwdns2935265:02crwdnd2935265:02crwdnd2935265:02crwdne2935265:0
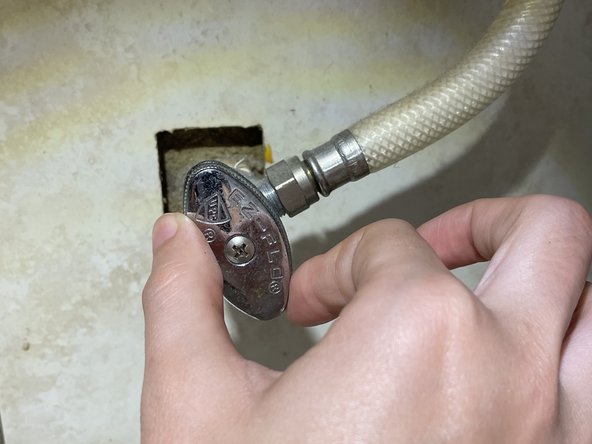
      • Shut off the stop valve underneath the toilet by turning it clockwise until it becomes hand tight.

      • The appearance of this valve may differ from toilet to toilet, but most operate the same. Some valves require multiple turns to stop the water while others only require a quarter turn.

      crwdns2952109:0crwdne2952109:0

      crwdns2917038:0crwdne2917038:0

    3. Toilet Pull Chain Spring Clasp Replacement, Draining a Toilet Tank: crwdns2935265:03crwdnd2935265:01crwdnd2935265:02crwdne2935265:0 Toilet Pull Chain Spring Clasp Replacement, Draining a Toilet Tank: crwdns2935265:03crwdnd2935265:02crwdnd2935265:02crwdne2935265:0
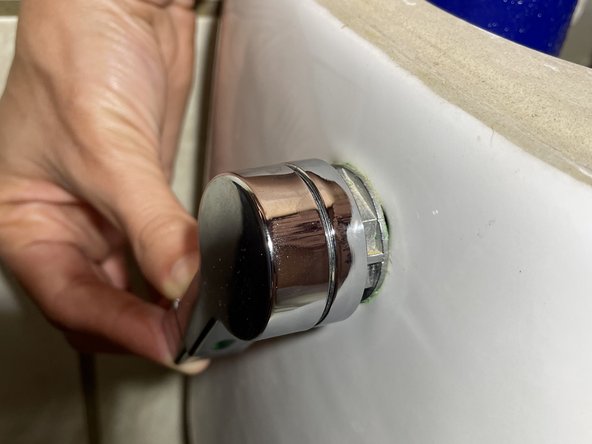
      • Push down the flush lever.

      • Hold the lever down until water stops draining from the tank.

      • A small amount of water will remain in the bottom of the tank.

      • If the flush lever or pull chain have become disconnected, lift up the toilet flapper to drain the tank.

      crwdns2952109:0crwdne2952109:0

      crwdns2917038:0crwdne2917038:0

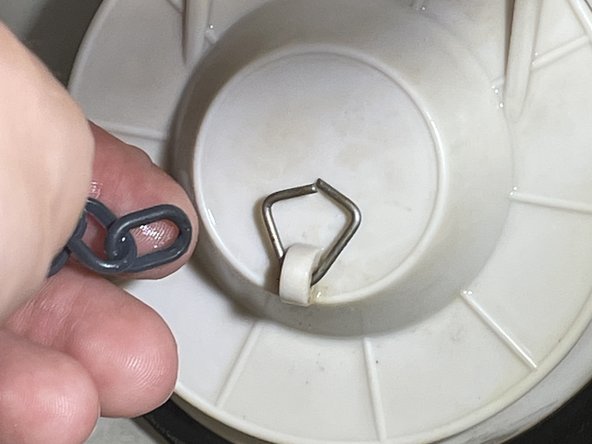
    4. Toilet Pull Chain Spring Clasp Replacement, Disassembling Toilet Pull Chain Spring Clasp from Tank Lever: crwdns2935265:04crwdnd2935265:01crwdnd2935265:03crwdne2935265:0 Toilet Pull Chain Spring Clasp Replacement, Disassembling Toilet Pull Chain Spring Clasp from Tank Lever: crwdns2935265:04crwdnd2935265:02crwdnd2935265:03crwdne2935265:0 Toilet Pull Chain Spring Clasp Replacement, Disassembling Toilet Pull Chain Spring Clasp from Tank Lever: crwdns2935265:04crwdnd2935265:03crwdnd2935265:03crwdne2935265:0
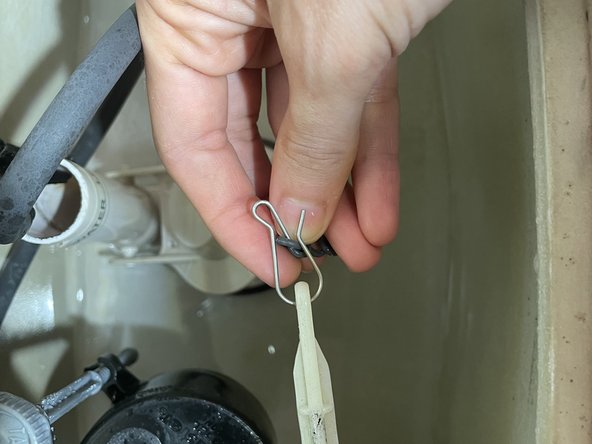
      • Squeeze open the spring clasp that connects the pull chain to the tank lever.

      • Disconnect the spring clasp from the tank lever.

      • Use both hands to disconnect the spring clasp from the tank lever.

      crwdns2952109:0crwdne2952109:0

      crwdns2917038:0crwdne2917038:0

    5. Toilet Pull Chain Spring Clasp Replacement, Disassembling Toilet Pull Chain Spring Clasp Bottom Part: crwdns2935265:05crwdnd2935265:01crwdnd2935265:03crwdne2935265:0 Toilet Pull Chain Spring Clasp Replacement, Disassembling Toilet Pull Chain Spring Clasp Bottom Part: crwdns2935265:05crwdnd2935265:02crwdnd2935265:03crwdne2935265:0 Toilet Pull Chain Spring Clasp Replacement, Disassembling Toilet Pull Chain Spring Clasp Bottom Part: crwdns2935265:05crwdnd2935265:03crwdnd2935265:03crwdne2935265:0
      crwdns2935267:0crwdne2935267:0
      Tweezers
      $4.99
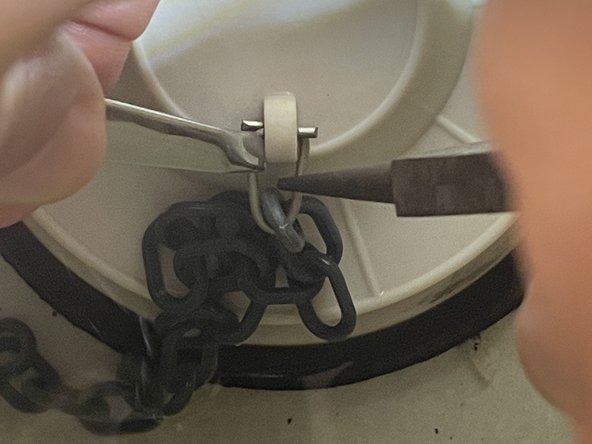
      • Use tweezers to grab the folded aluminum that is holding the chain.

      • Use pincers to grab the other side of the aluminum and pull on opposite directions to unfold the aluminum and release the chain.

      • Use the second picture as a reference to place the tweezers and pincers. Then pull-on opposite sides to open. View the last picture for results.

      • To reassemble your device, instead of pulling to opposite sides, fold the aluminum to its original form with the new chain inside.

      crwdns2952109:0crwdne2952109:0

      crwdns2917038:0crwdne2917038:0

crwdns2915888:0crwdne2915888:0

To reassemble your device, follow these instructions in reverse order.

crwdns2935221:0crwdne2935221:0

crwdns2935227:0crwdne2935227:0

SABRINA A VALDES-RAMOS

crwdns2935283:003/23/22crwdne2935283:0

145 crwdns2915208:0crwdne2915208:0

crwdns2935295:0crwdne2935295:0

crwdns2947412:00crwdne2947412:0

crwdns2917038:0crwdne2917038:0

crwdns2936625:0crwdne2936625:0:

crwdns2936751:024crwdne2936751:0 3

crwdns2936753:07crwdne2936753:0 18

crwdns2936753:030crwdne2936753:0 61

crwdns2942667:0crwdne2942667:0 1,107