crwdns2933423:0crwdne2933423:0

Timex T132 "iMac" Alarm Clock Disassembly

crwdns2942213:0crwdne2942213:0

  1. Timex T132 "iMac" Alarm Clock Disassembly, Battery: crwdns2935265:01crwdnd2935265:01crwdnd2935265:01crwdne2935265:0
    • To prevent any injury, unplug the power cord from the outlet so the device is powered off.

    • Hold the clock so it is upside down. You should be able to view its caution labels.

    • Wedge the small tip plastic opening tool between the battery cover and the edge of its slot.

    • Firmly push against the battery cover (away from its outer edge) until it slides off of the base clock.

  2. Timex T132 "iMac" Alarm Clock Disassembly: crwdns2935265:02crwdnd2935265:01crwdnd2935265:03crwdne2935265:0 Timex T132 "iMac" Alarm Clock Disassembly: crwdns2935265:02crwdnd2935265:02crwdnd2935265:03crwdne2935265:0 Timex T132 "iMac" Alarm Clock Disassembly: crwdns2935265:02crwdnd2935265:03crwdnd2935265:03crwdne2935265:0
    • Rotate the device so the clock's display is facing away from you.

    • Use the flat end of the spudger to pry out the battery.

    • Once fully lifted, grab the end of the battery and pull out the rest of the battery.

    • Do not remove the battery all the way because it is still connected. Doing so may result in damaging the power wires.

  3. Timex T132 "iMac" Alarm Clock Disassembly: crwdns2935265:03crwdnd2935265:01crwdnd2935265:01crwdne2935265:0
    • Place the clock upside down on a flat surface.

    • Because the device is irregularly shaped, you may have to manually or externally balance it.

    • Grab the blue connector covering tab near the power wires and peel the snap connector off the battery terminals to disconnect it.

    • Do not pull out the snap connector and its wires because it is still connected to the device. Doing so may result in damaging the power wires.

    • Remove the battery.

  4. Timex T132 "iMac" Alarm Clock Disassembly, Timex T132 "iMac" Alarm Clock Disassembly: crwdns2935265:04crwdnd2935265:01crwdnd2935265:01crwdne2935265:0
    • Remove the three, 11mm Phillips #1 screws that secure the housing onto the base of the clock.

    • The housing may begin to separate once the screws are removed.

  5. Timex T132 "iMac" Alarm Clock Disassembly: crwdns2935265:05crwdnd2935265:01crwdnd2935265:03crwdne2935265:0 Timex T132 "iMac" Alarm Clock Disassembly: crwdns2935265:05crwdnd2935265:02crwdnd2935265:03crwdne2935265:0 Timex T132 "iMac" Alarm Clock Disassembly: crwdns2935265:05crwdnd2935265:03crwdnd2935265:03crwdne2935265:0
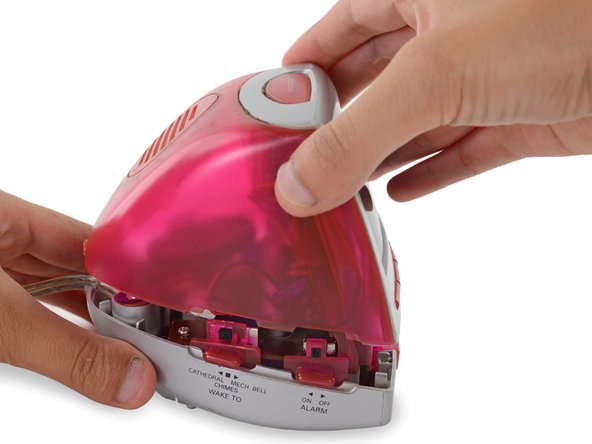
    • Support the base and top cover of the clock.

    • Turn over the clock and place it base-down on a flat surface.

    • Support the back of the base with one hand and grasp the housing with the other.

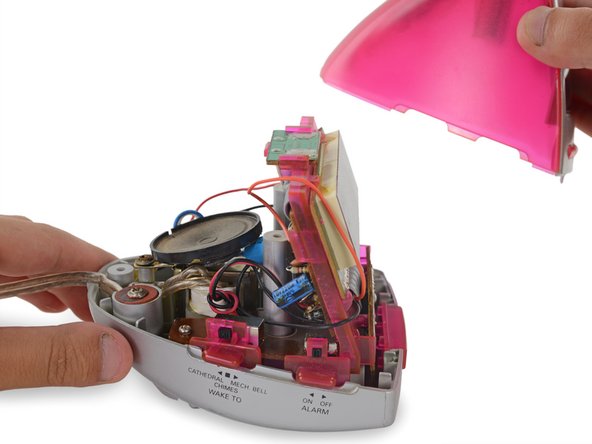
    • Lift and separate the housing from the base of the clock.

    • You may have to wiggle the housing prior to lifting it.

  6. Timex T132 "iMac" Alarm Clock Disassembly: crwdns2935265:06crwdnd2935265:01crwdnd2935265:03crwdne2935265:0 Timex T132 "iMac" Alarm Clock Disassembly: crwdns2935265:06crwdnd2935265:02crwdnd2935265:03crwdne2935265:0 Timex T132 "iMac" Alarm Clock Disassembly: crwdns2935265:06crwdnd2935265:03crwdnd2935265:03crwdne2935265:0
    crwdns2935267:0crwdne2935267:0
    Tweezers
    $4.99
    crwdns2942207:0crwdne2942207:0
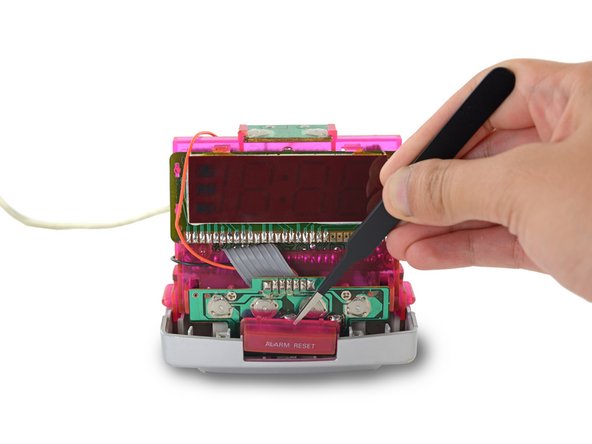
    • Rotate the clock so you are viewing the LCD display.

    • Use your fingers or the tweezers to secure the lip of the ALARM RESET button located at the middle of the base and remove the button from its compartment.

crwdns2915888:0crwdne2915888:0

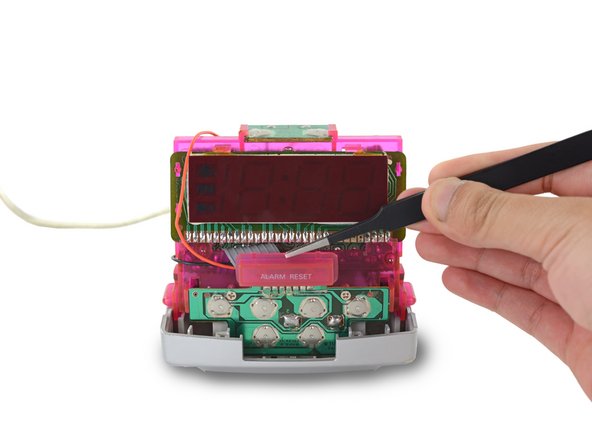
To reassemble your device, follow these instructions in reverse order.

crwdns2935227:0crwdne2935227:0

Tyler Price

crwdns2935283:004/07/14crwdne2935283:0

1,038 crwdns2915208:0crwdne2915208:0

crwdns2935297:06crwdne2935297:0

crwdns2915084:0crwdne2915084:0

Cal Poly, Team 6-2, Forte Spring 2014 crwdns2935289:0Cal Poly, Team 6-2, Forte Spring 2014crwdne2935289:0

CPSU-FORTE-S14S6G2

crwdns2931471:05crwdne2931471:0

crwdns2935297:020crwdne2935297:0

crwdns2944067:00crwdne2944067:0

crwdns2917038:0crwdne2917038:0

crwdns2936625:0crwdne2936625:0:

crwdns2936751:024crwdne2936751:0 0

crwdns2936753:07crwdne2936753:0 8

crwdns2936753:030crwdne2936753:0 12

crwdns2942667:0crwdne2942667:0 622