crwdns2933423:0crwdne2933423:0
crwdns2947577:0crwdnd2947577:0crwdne2947577:0

Texas Instruments TI-80 Keyboard Mat Replacement

crwdns2942213:0crwdne2942213:0

    1. Texas Instruments TI-80 Keyboard Mat Replacement, Batteries: crwdns2935265:01crwdnd2935265:01crwdnd2935265:01crwdne2935265:0
      • Locate battery cover on the back of the case.

      • Slide battery cover to the right reveal the batteries.

      crwdns2952109:0crwdne2952109:0

      crwdns2917038:0crwdne2917038:0

    2. Texas Instruments TI-80 Keyboard Mat Replacement: crwdns2935265:02crwdnd2935265:01crwdnd2935265:01crwdne2935265:0
      • Remove battery cover.

      • Slide the red lock down.

      • Slide the metal tab to the right of the top battery.

      • Remove the 3-Volt Lithium Coin Cell Battery.

      • Slide the red lock up.

      • Slide the metal tab to the right of the bottom battery.

      • Remove the 3-Volt Lithium Coin Cell Battery.

      crwdns2952109:0crwdne2952109:0

      crwdns2917038:0crwdne2917038:0

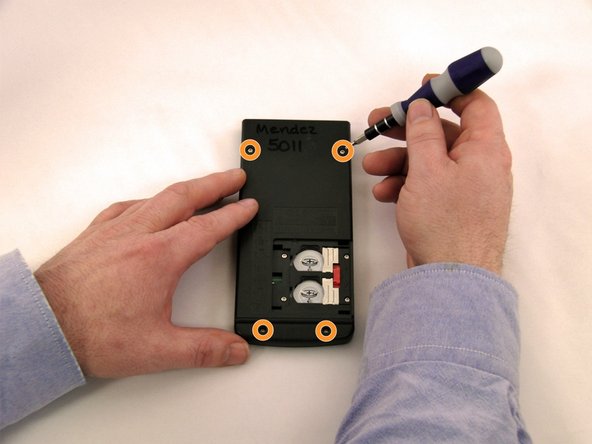
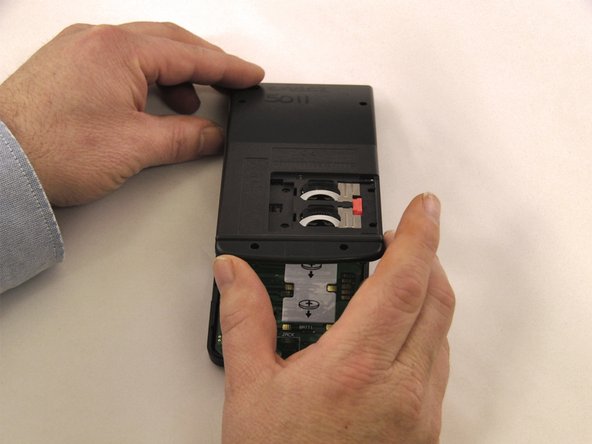
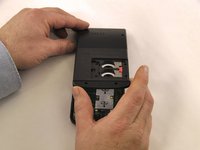
    1. Texas Instruments TI-80 Keyboard Mat Replacement, Back Case: crwdns2935265:03crwdnd2935265:01crwdnd2935265:03crwdne2935265:0 Texas Instruments TI-80 Keyboard Mat Replacement, Back Case: crwdns2935265:03crwdnd2935265:02crwdnd2935265:03crwdne2935265:0 Texas Instruments TI-80 Keyboard Mat Replacement, Back Case: crwdns2935265:03crwdnd2935265:03crwdnd2935265:03crwdne2935265:0
      • Using a Torx, T-6 star-bit screwdriver, unscrew four 7.38 mm screws from battery housing.

      • Unscrew four 7.15 mm screws from back casing.

      • Using the blue plastic opener tool along the seam of the case, pry off front casing.

      • Start prying from the bottom of the calculator as the casing hooks into the top.

      crwdns2952109:0crwdne2952109:0

      crwdns2917038:0crwdne2917038:0

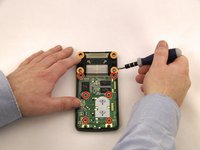
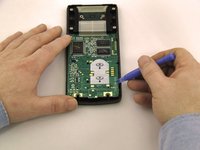
    1. Texas Instruments TI-80 Keyboard Mat Replacement, Motherboard and Screen: crwdns2935265:04crwdnd2935265:01crwdnd2935265:02crwdne2935265:0 Texas Instruments TI-80 Keyboard Mat Replacement, Motherboard and Screen: crwdns2935265:04crwdnd2935265:02crwdnd2935265:02crwdne2935265:0
      • Using a Philips PH0 screwdriver, remove the 6 screws. 2 from the top of the Motherboard, 2 from the middle, and 2 from the bottom of the Motherboard.

      • Using a Phillips Ph0 screwdriver, remove 4 screws from the screen mount.

      • Using the blue plastic opening tool, pry the Motherboard up.

      • Using the blue plastic opening tool, pry up the screen from the screen mount.

      crwdns2952109:0crwdne2952109:0

      crwdns2917038:0crwdne2917038:0

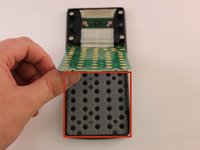
    1. Texas Instruments TI-80 Keyboard Mat Replacement, Check keyboard mat: crwdns2935265:05crwdnd2935265:01crwdnd2935265:02crwdne2935265:0 Texas Instruments TI-80 Keyboard Mat Replacement, Check keyboard mat: crwdns2935265:05crwdnd2935265:02crwdnd2935265:02crwdne2935265:0
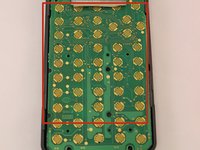
      • Check the rubber mat for damage or obstruction at the location of non-functioning buttons.

      • Flip the mat over to assess dirt and damage.

      • Replace the mat if it is damaged.

      • Clean off the back of the Motherboard as necessary. The mat lies on top, so dirt and debris may build up. Repeat cleaning as needed.

      crwdns2952109:0crwdne2952109:0

      crwdns2917038:0crwdne2917038:0

crwdns2915888:0crwdne2915888:0

To reassemble your device, follow these instructions in reverse order.

crwdns2935221:0crwdne2935221:0

brian decater

crwdns2935283:001/13/15crwdne2935283:0

301 crwdns2915208:0crwdne2915208:0

crwdns2935297:03crwdne2935297:0

crwdns2935287:0crwdne2935287:0

Eastern Washington University, Team 1-1, Carnegie Winter 2015 crwdns2935289:0Eastern Washington University, Team 1-1, Carnegie Winter 2015crwdne2935289:0

EWU-CARNEGIE-W15S1G1

crwdns2931471:04crwdne2931471:0

crwdns2935297:018crwdne2935297:0

crwdns2947412:00crwdne2947412:0

crwdns2917038:0crwdne2917038:0

crwdns2936625:0crwdne2936625:0:

crwdns2936751:024crwdne2936751:0 1

crwdns2936753:07crwdne2936753:0 12

crwdns2936753:030crwdne2936753:0 31

crwdns2942667:0crwdne2942667:0 641