crwdns2933423:0crwdne2933423:0

Texas Instruments TI-80 Button Replacement

crwdns2942213:0crwdne2942213:0

  1. Texas Instruments TI-80 Button Replacement, Batteries: crwdns2935265:01crwdnd2935265:01crwdnd2935265:01crwdne2935265:0
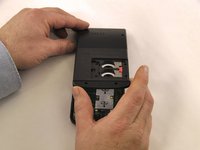
    • Locate battery cover on the back of the case.

    • Slide battery cover to the right reveal the batteries.

  2. Texas Instruments TI-80 Button Replacement: crwdns2935265:02crwdnd2935265:01crwdnd2935265:01crwdne2935265:0
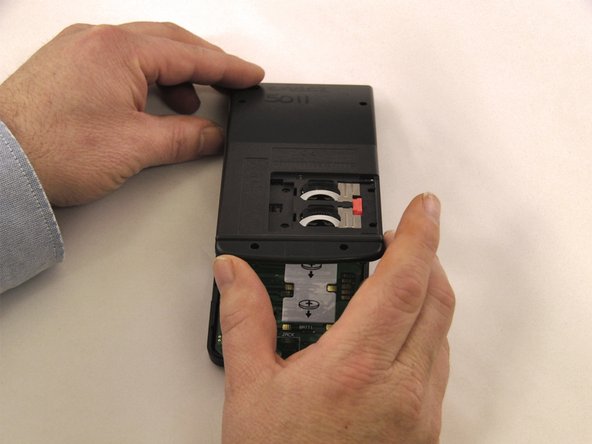
    • Remove battery cover.

    • Slide the red lock down.

    • Slide the metal tab to the right of the top battery.

    • Remove the 3-Volt Lithium Coin Cell Battery.

    • Slide the red lock up.

    • Slide the metal tab to the right of the bottom battery.

    • Remove the 3-Volt Lithium Coin Cell Battery.

  3. Texas Instruments TI-80 Button Replacement, Back Case: crwdns2935265:03crwdnd2935265:01crwdnd2935265:03crwdne2935265:0 Texas Instruments TI-80 Button Replacement, Back Case: crwdns2935265:03crwdnd2935265:02crwdnd2935265:03crwdne2935265:0 Texas Instruments TI-80 Button Replacement, Back Case: crwdns2935265:03crwdnd2935265:03crwdnd2935265:03crwdne2935265:0
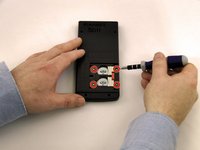
    • Using a Torx, T-6 star-bit screwdriver, unscrew four 7.38 mm screws from battery housing.

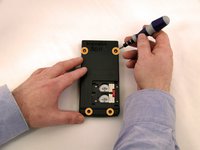
    • Unscrew four 7.15 mm screws from back casing.

    • Using the blue plastic opener tool along the seam of the case, pry off front casing.

    • Start prying from the bottom of the calculator as the casing hooks into the top.

  4. Texas Instruments TI-80 Button Replacement, Motherboard and Screen: crwdns2935265:04crwdnd2935265:01crwdnd2935265:02crwdne2935265:0 Texas Instruments TI-80 Button Replacement, Motherboard and Screen: crwdns2935265:04crwdnd2935265:02crwdnd2935265:02crwdne2935265:0
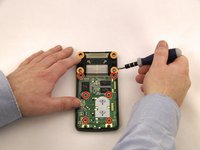
    • Using a Philips PH0 screwdriver, remove the 6 screws. 2 from the top of the Motherboard, 2 from the middle, and 2 from the bottom of the Motherboard.

    • Using a Phillips Ph0 screwdriver, remove 4 screws from the screen mount.

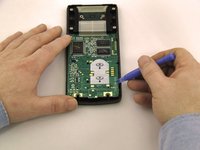
    • Using the blue plastic opening tool, pry the Motherboard up.

    • Using the blue plastic opening tool, pry up the screen from the screen mount.

  5. Texas Instruments TI-80 Button Replacement, Check keyboard mat: crwdns2935265:05crwdnd2935265:01crwdnd2935265:02crwdne2935265:0 Texas Instruments TI-80 Button Replacement, Check keyboard mat: crwdns2935265:05crwdnd2935265:02crwdnd2935265:02crwdne2935265:0
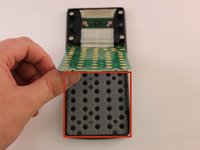
    • Check the rubber mat for damage or obstruction at the location of non-functioning buttons.

    • Flip the mat over to assess dirt and damage.

    • Replace the mat if it is damaged.

    • Clean off the back of the Motherboard as necessary. The mat lies on top, so dirt and debris may build up. Repeat cleaning as needed.

  6. Texas Instruments TI-80 Button Replacement, Check Buttons: crwdns2935265:06crwdnd2935265:01crwdnd2935265:01crwdne2935265:0
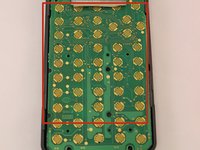
    • Check the back of the buttons for damage or obstructions.

    • If obstructions are present, clear them.

    • Do not tilt the calculator, or buttons may fall out.

  7. Texas Instruments TI-80 Button Replacement, Replace Buttons: crwdns2935265:07crwdnd2935265:01crwdnd2935265:01crwdne2935265:0
    • If a button is damaged, use tweezers to lift the button out of the facing.

  8. Texas Instruments TI-80 Button Replacement, Insert new Buttons: crwdns2935265:08crwdnd2935265:01crwdnd2935265:01crwdne2935265:0
    • Insert new button, making sure that it is positioned properly.

    • For all buttons, there is an extrusion in the upper left quadrant when looking at the back of the key. These should be aligned with the top of the calculator.

crwdns2915888:0crwdne2915888:0

To reassemble your device, follow these instructions in reverse order.

Calvin

crwdns2935283:001/08/15crwdne2935283:0

201 crwdns2915208:0crwdne2915208:0

crwdns2935297:02crwdne2935297:0

crwdns2915084:0crwdne2915084:0

Eastern Washington University, Team 1-1, Carnegie Winter 2015 crwdns2935289:0Eastern Washington University, Team 1-1, Carnegie Winter 2015crwdne2935289:0

EWU-CARNEGIE-W15S1G1

crwdns2931471:04crwdne2931471:0

crwdns2935297:08crwdne2935297:0

crwdns2944067:00crwdne2944067:0

crwdns2917038:0crwdne2917038:0

crwdns2936625:0crwdne2936625:0:

crwdns2936751:024crwdne2936751:0 0

crwdns2936753:07crwdne2936753:0 0

crwdns2936753:030crwdne2936753:0 2

crwdns2942667:0crwdne2942667:0 317