crwdns2933423:0crwdne2933423:0

Tamiya 1/10 Scale Grasshopper Brushed Motor Replacement

crwdns2942213:0crwdne2942213:0

  1. Tamiya 1/10 Scale Grasshopper Brushed Motor Replacement, 1/10 Scale Brushed Motor: crwdns2935265:01crwdnd2935265:01crwdnd2935265:03crwdne2935265:0 Tamiya 1/10 Scale Grasshopper Brushed Motor Replacement, 1/10 Scale Brushed Motor: crwdns2935265:01crwdnd2935265:02crwdnd2935265:03crwdne2935265:0 Tamiya 1/10 Scale Grasshopper Brushed Motor Replacement, 1/10 Scale Brushed Motor: crwdns2935265:01crwdnd2935265:03crwdnd2935265:03crwdne2935265:0
    • Remove the four screws with a Phillips #00 screwdriver.

  2. Tamiya 1/10 Scale Grasshopper Brushed Motor Replacement: crwdns2935265:02crwdnd2935265:01crwdnd2935265:03crwdne2935265:0 Tamiya 1/10 Scale Grasshopper Brushed Motor Replacement: crwdns2935265:02crwdnd2935265:02crwdnd2935265:03crwdne2935265:0 Tamiya 1/10 Scale Grasshopper Brushed Motor Replacement: crwdns2935265:02crwdnd2935265:03crwdnd2935265:03crwdne2935265:0
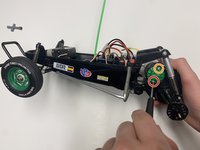
    • Slowly remove the body, lifting it upward from the chassis.

    • Hold the front and back of the body with both hands when removing it.

    • Lift the body past the antenna to avoid damaging it.

  3. Tamiya 1/10 Scale Grasshopper Brushed Motor Replacement: crwdns2935265:03crwdnd2935265:01crwdnd2935265:03crwdne2935265:0 Tamiya 1/10 Scale Grasshopper Brushed Motor Replacement: crwdns2935265:03crwdnd2935265:02crwdnd2935265:03crwdne2935265:0 Tamiya 1/10 Scale Grasshopper Brushed Motor Replacement: crwdns2935265:03crwdnd2935265:03crwdnd2935265:03crwdne2935265:0
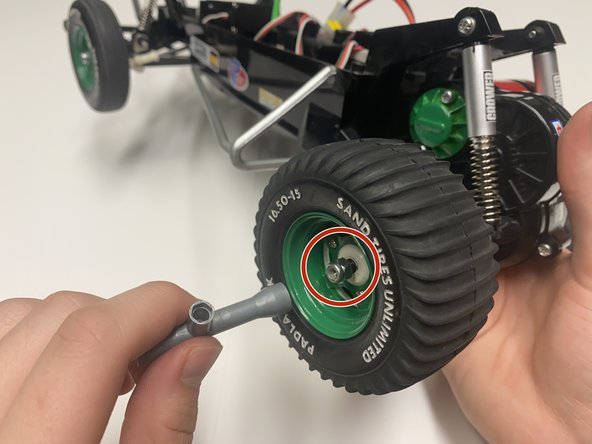
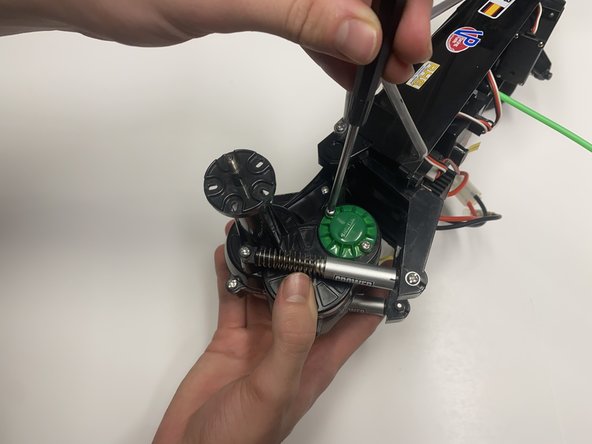
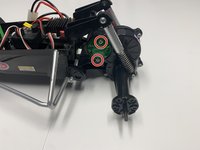
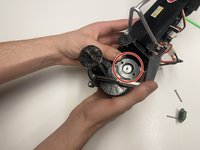
    • Attach your box wrench with the 7mm side facing into the rim onto the hex-nut.

    • Twist the box wrench left (counter-clockwise) and unscrew the hex-nut until it comes off.

    • Hold the tire in place to prevent the tire from spinning with your box wrench.

  4. Tamiya 1/10 Scale Grasshopper Brushed Motor Replacement: crwdns2935265:04crwdnd2935265:01crwdnd2935265:03crwdne2935265:0 Tamiya 1/10 Scale Grasshopper Brushed Motor Replacement: crwdns2935265:04crwdnd2935265:02crwdnd2935265:03crwdne2935265:0 Tamiya 1/10 Scale Grasshopper Brushed Motor Replacement: crwdns2935265:04crwdnd2935265:03crwdnd2935265:03crwdne2935265:0
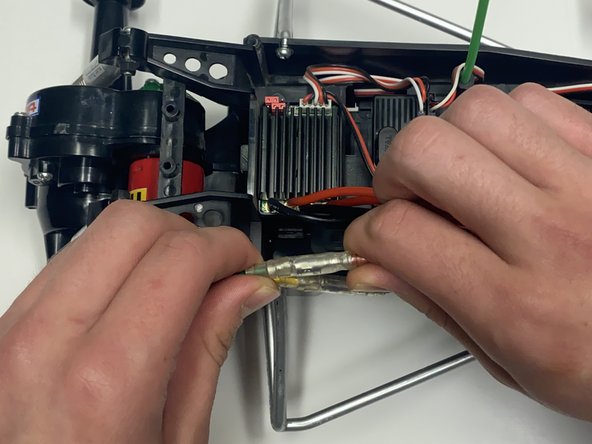
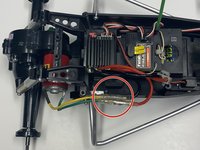
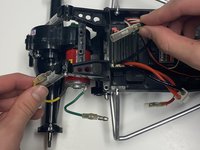
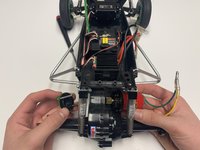
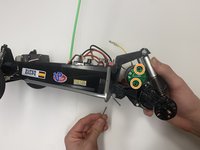
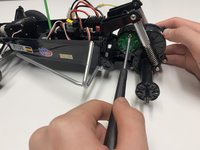
    • Grab both the yellow and black wire as well as the green and orange wire and pull them apart.

    • The wire connectors may be difficult to remove. Do not hesitate to use more force to remove them from each other, if necessary.

    • It does not matter which wires you disconnect or connect first.

  5. Tamiya 1/10 Scale Grasshopper Brushed Motor Replacement: crwdns2935265:05crwdnd2935265:01crwdnd2935265:03crwdne2935265:0 Tamiya 1/10 Scale Grasshopper Brushed Motor Replacement: crwdns2935265:05crwdnd2935265:02crwdnd2935265:03crwdne2935265:0 Tamiya 1/10 Scale Grasshopper Brushed Motor Replacement: crwdns2935265:05crwdnd2935265:03crwdnd2935265:03crwdne2935265:0
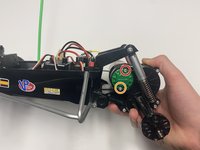
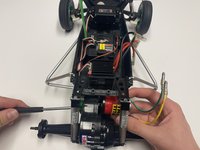
    • Loosen the first screw on the motor cover using a Phillips #00 screwdriver.

    • Loosen the bottom screw next, and you will feel the motor come loose.

    • The bottom screw has more leverage on the motor, so reverse these steps when re-assembling.

    • The motor cover is black, mine is spray-painted green.

  6. Tamiya 1/10 Scale Grasshopper Brushed Motor Replacement: crwdns2935265:06crwdnd2935265:01crwdnd2935265:03crwdne2935265:0 Tamiya 1/10 Scale Grasshopper Brushed Motor Replacement: crwdns2935265:06crwdnd2935265:02crwdnd2935265:03crwdne2935265:0 Tamiya 1/10 Scale Grasshopper Brushed Motor Replacement: crwdns2935265:06crwdnd2935265:03crwdnd2935265:03crwdne2935265:0
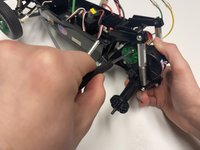
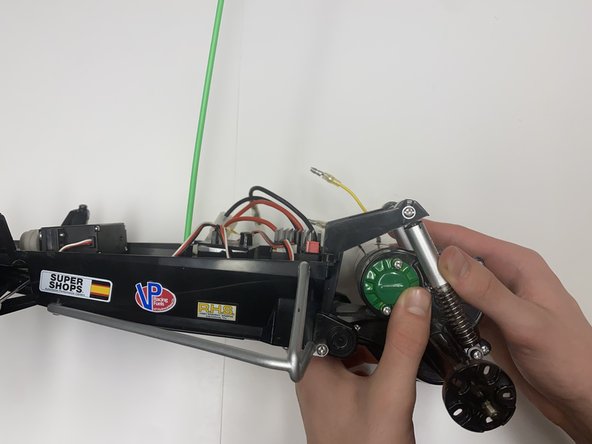
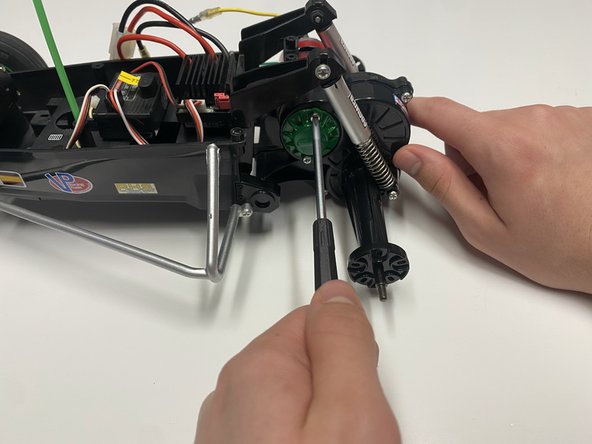
    • Finish loosening the long screws with your Phillips #00 screwdriver.

    • Slowly pull the motor cover away from the gearbox, with the two long Phillips screws still inside the motor cover.

    • Pull the motor away from the gearbox.

    • Do not force the motor out. Let it slide into your hand if necessary to avoid damaging components or gears inside the gearbox.

  7. Tamiya 1/10 Scale Grasshopper Brushed Motor Replacement: crwdns2935265:07crwdnd2935265:01crwdnd2935265:03crwdne2935265:0 Tamiya 1/10 Scale Grasshopper Brushed Motor Replacement: crwdns2935265:07crwdnd2935265:02crwdnd2935265:03crwdne2935265:0 Tamiya 1/10 Scale Grasshopper Brushed Motor Replacement: crwdns2935265:07crwdnd2935265:03crwdnd2935265:03crwdne2935265:0
    • Gently slide your 540 motor into the gearbox. Make sure it is correctly inline with the pinion (the middle gear segment).

    • Slide the motor cover, then the long screws into the left side of the gearbox to align the motor with the gearbox.

    • Make sure all the holes to the motor cover, motor, and gearbox line up with the two long screws that hold the motor cover on.

  8. Tamiya 1/10 Scale Grasshopper Brushed Motor Replacement: crwdns2935265:08crwdnd2935265:01crwdnd2935265:03crwdne2935265:0 Tamiya 1/10 Scale Grasshopper Brushed Motor Replacement: crwdns2935265:08crwdnd2935265:02crwdnd2935265:03crwdne2935265:0 Tamiya 1/10 Scale Grasshopper Brushed Motor Replacement: crwdns2935265:08crwdnd2935265:03crwdnd2935265:03crwdne2935265:0
    • Tighten the bottom screw with your Phillips #00 screwdriver.

    • Lay the buggy down and tighten the top screw next, to help ensure the motor is properly in place.

    • If you tighten the motor to the gearbox, but your pinion misaligned with the main gear, your motor will NOT move the car, which may cause damage to the motor.

crwdns2915888:0crwdne2915888:0

To reassemble your device, follow these instructions in reverse order.

crwdns2935227:0crwdne2935227:0

Eric Traccitto

crwdns2935283:009/20/22crwdne2935283:0

157 crwdns2915208:0crwdne2915208:0

crwdns2935295:0crwdne2935295:0

crwdns2915084:0crwdne2915084:0

York University, Team B-8, Allen Fall 2022 crwdns2935289:0York University, Team B-8, Allen Fall 2022crwdne2935289:0

YORK-ALLEN-F22SBG8

crwdns2931471:02crwdne2931471:0

crwdns2935297:02crwdne2935297:0

crwdns2944067:00crwdne2944067:0

crwdns2917038:0crwdne2917038:0

crwdns2936625:0crwdne2936625:0:

crwdns2936751:024crwdne2936751:0 3

crwdns2936753:07crwdne2936753:0 5

crwdns2936753:030crwdne2936753:0 27

crwdns2942667:0crwdne2942667:0 384