crwdns2933423:0crwdne2933423:0
crwdns2947577:0crwdnd2947577:0crwdne2947577:0

Tagital T7X Motherboard Replacement

crwdns2942213:0crwdne2942213:0

  1. Tagital T7X Motherboard Replacement, Case: crwdns2935265:01crwdnd2935265:01crwdnd2935265:03crwdne2935265:0 Tagital T7X Motherboard Replacement, Case: crwdns2935265:01crwdnd2935265:02crwdnd2935265:03crwdne2935265:0 Tagital T7X Motherboard Replacement, Case: crwdns2935265:01crwdnd2935265:03crwdnd2935265:03crwdne2935265:0
    • Place the Tagital T7X on a sturdy surface.

    • Insert the plastic opening tool into the crack and pry open the tablet. Move the tool along the edge, while continuing to pry up the casing.

    crwdns2952109:0crwdne2952109:0
  2. Tagital T7X Motherboard Replacement, Speaker: crwdns2935265:02crwdnd2935265:01crwdnd2935265:03crwdne2935265:0 Tagital T7X Motherboard Replacement, Speaker: crwdns2935265:02crwdnd2935265:02crwdnd2935265:03crwdne2935265:0 Tagital T7X Motherboard Replacement, Speaker: crwdns2935265:02crwdnd2935265:03crwdnd2935265:03crwdne2935265:0
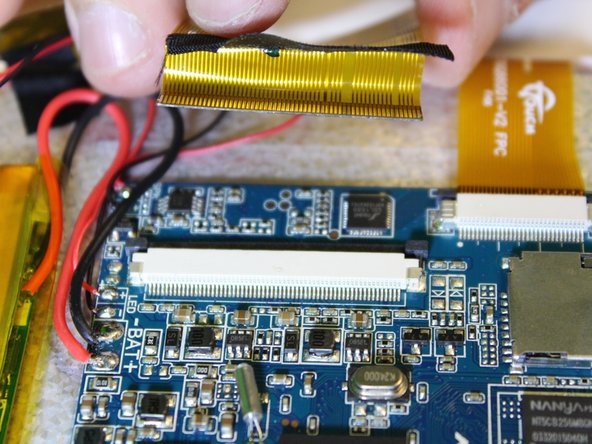
    • Remove the ribbon cable on the top left corner of the mother board.

    • Gently lift the black tape up to see the ribbon cable socket.

    crwdns2952109:0crwdne2952109:0
  3. Tagital T7X Motherboard Replacement: crwdns2935265:03crwdnd2935265:01crwdnd2935265:03crwdne2935265:0 Tagital T7X Motherboard Replacement: crwdns2935265:03crwdnd2935265:02crwdnd2935265:03crwdne2935265:0 Tagital T7X Motherboard Replacement: crwdns2935265:03crwdnd2935265:03crwdnd2935265:03crwdne2935265:0
    • Push both side buttons away from the socket by using a spudger.

    crwdns2952109:0crwdne2952109:0
  4. Tagital T7X Motherboard Replacement: crwdns2935265:04crwdnd2935265:01crwdnd2935265:02crwdne2935265:0 Tagital T7X Motherboard Replacement: crwdns2935265:04crwdnd2935265:02crwdnd2935265:02crwdne2935265:0
    • Gently pull the ribbon cable away from the socket.

    • Don't be afraid to use some force for this step.

    crwdns2952109:0crwdne2952109:0
  5. Tagital T7X Motherboard Replacement: crwdns2935265:05crwdnd2935265:01crwdnd2935265:02crwdne2935265:0 Tagital T7X Motherboard Replacement: crwdns2935265:05crwdnd2935265:02crwdnd2935265:02crwdne2935265:0
    • The soldering iron can destroy components on the motherboard. Only touch the soldering iron to the solder already on the board.

    • Touch the tip of the soldering iron to the solder connecting the positive (red) wire.

    • Pull back on the wire with the iron in place, removing it from the hot solder.

    • Repeat this step for the negative wire.

    • The solder will be melted almost instantly. There is no need to hold the iron on the solder for than a second or two. Visit IFixit's soldering guide for more info.

    crwdns2952109:0crwdne2952109:0
  6. Tagital T7X Motherboard Replacement: crwdns2935265:06crwdnd2935265:01crwdnd2935265:02crwdne2935265:0 Tagital T7X Motherboard Replacement: crwdns2935265:06crwdnd2935265:02crwdnd2935265:02crwdne2935265:0
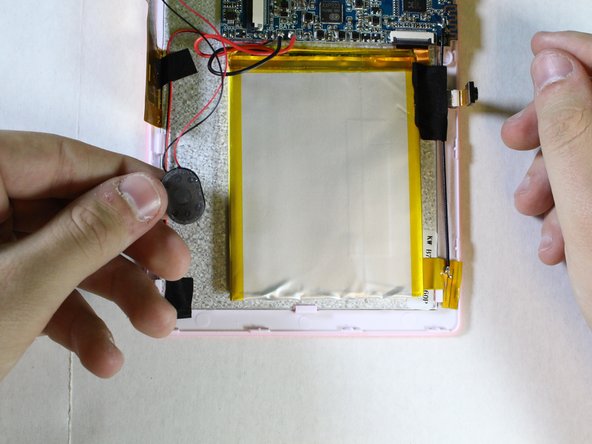
    • Remove the speaker from the motherboard.

    crwdns2952109:0crwdne2952109:0
  7. Tagital T7X Motherboard Replacement, Battery: crwdns2935265:07crwdnd2935265:01crwdnd2935265:02crwdne2935265:0 Tagital T7X Motherboard Replacement, Battery: crwdns2935265:07crwdnd2935265:02crwdnd2935265:02crwdne2935265:0
    • Follow the attached wires to the positive and negative connections.

    crwdns2952109:0crwdne2952109:0
  8. Tagital T7X Motherboard Replacement: crwdns2935265:08crwdnd2935265:01crwdnd2935265:03crwdne2935265:0 Tagital T7X Motherboard Replacement: crwdns2935265:08crwdnd2935265:02crwdnd2935265:03crwdne2935265:0 Tagital T7X Motherboard Replacement: crwdns2935265:08crwdnd2935265:03crwdnd2935265:03crwdne2935265:0
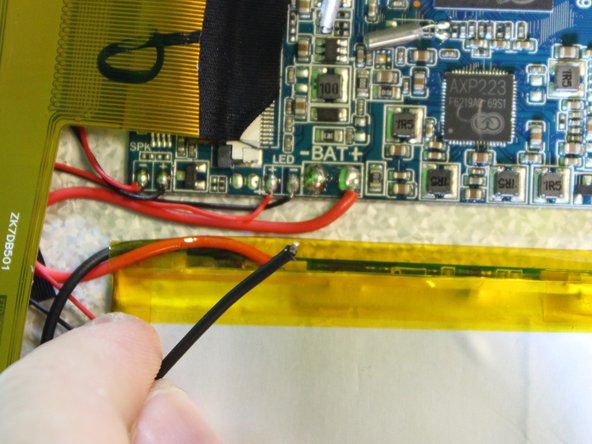
    • The soldering iron can destroy components on the motherboard. Only touch the soldering iron to the solder already on the board.

    • Touch the tip of the soldering iron to the solder connecting the negative wire.

    • Pull back on the wire with the iron in place, removing it from the hot solder.

    • The solder will be melted almost instantly. There is no need to hold the iron on the solder for more than a second or two. Visit iFixit's soldering guide for more info.

    • Repeat this step for the positive wire.

    crwdns2952109:0crwdne2952109:0
  9. Tagital T7X Motherboard Replacement: crwdns2935265:09crwdnd2935265:01crwdnd2935265:03crwdne2935265:0 Tagital T7X Motherboard Replacement: crwdns2935265:09crwdnd2935265:02crwdnd2935265:03crwdne2935265:0 Tagital T7X Motherboard Replacement: crwdns2935265:09crwdnd2935265:03crwdnd2935265:03crwdne2935265:0
    • Use the nylon spudger to pry the battery from the back of the screen. Work your way around the edges, similar to opening the casing.

    • The adhesive used to hold the battery down is very strong. Don't be afraid to use some force.

    crwdns2952109:0crwdne2952109:0
  10. Tagital T7X Motherboard Replacement, Motherboard: crwdns2935265:010crwdnd2935265:01crwdnd2935265:02crwdne2935265:0 Tagital T7X Motherboard Replacement, Motherboard: crwdns2935265:010crwdnd2935265:02crwdnd2935265:02crwdne2935265:0
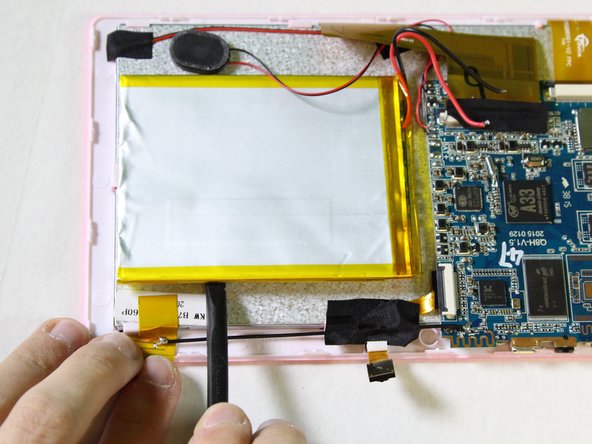
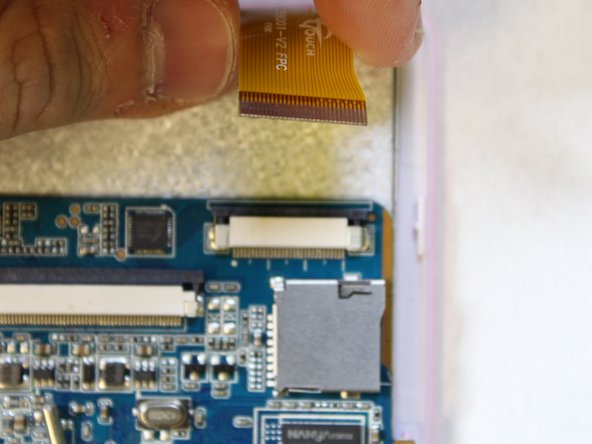
    • Next we will disconnect the digitizer ribbon cable from the motherboard.

    • Using the black spudger, gently push the tabs on each side of the socket to free the ribbon cable.

    crwdns2952109:0crwdne2952109:0
  11. Tagital T7X Motherboard Replacement: crwdns2935265:011crwdnd2935265:01crwdnd2935265:02crwdne2935265:0 Tagital T7X Motherboard Replacement: crwdns2935265:011crwdnd2935265:02crwdnd2935265:02crwdne2935265:0
    • Gently pull on the ribbon cable, separating it from the socket.

    crwdns2952109:0crwdne2952109:0
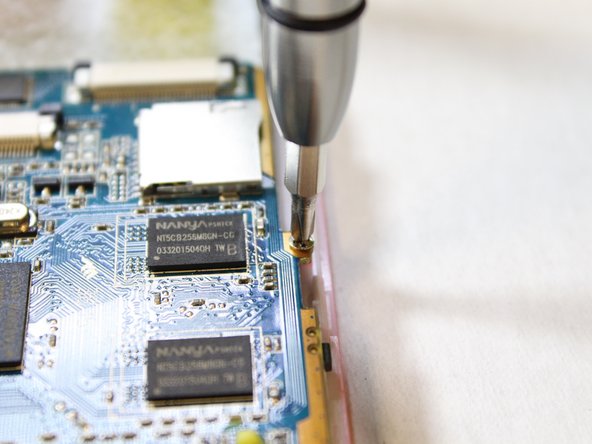
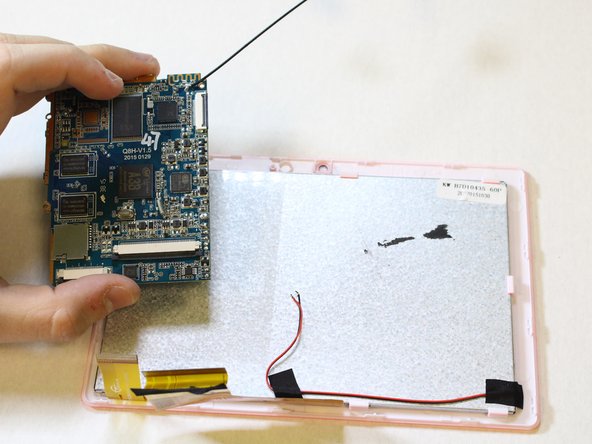
  12. Tagital T7X Motherboard Replacement: crwdns2935265:012crwdnd2935265:01crwdnd2935265:03crwdne2935265:0 Tagital T7X Motherboard Replacement: crwdns2935265:012crwdnd2935265:02crwdnd2935265:03crwdne2935265:0 Tagital T7X Motherboard Replacement: crwdns2935265:012crwdnd2935265:03crwdnd2935265:03crwdne2935265:0
    • Next, we will unscrew the three PH#0 screws anchoring the motherboard into the case.

    • You will need the Phillips Screw #0 to remove the screws of the motherboard.

    • Using the screwdriver, with the PH#0 attachment, carefully unscrew the screws of the motherboard in order to remove it from the device.

    crwdns2952109:0crwdne2952109:0
crwdns2915888:0crwdne2915888:0

To reassemble your device, follow these instruction in reverse order.

crwdns2935229:02crwdne2935229:0

Nikki Falato

crwdns2935283:002/10/16crwdne2935283:0

254 crwdns2915208:0crwdne2915208:0

crwdns2935295:0crwdne2935295:0

crwdns2935287:0crwdne2935287:0

USF Tampa, Team 2-1, Sullivan Spring 2016 crwdns2935289:0USF Tampa, Team 2-1, Sullivan Spring 2016crwdne2935289:0

USFT-SULLIVAN-S16S2G1

crwdns2931471:04crwdne2931471:0

crwdns2935297:012crwdne2935297:0

crwdns2947412:00crwdne2947412:0

crwdns2917038:0crwdne2917038:0

crwdns2936625:0crwdne2936625:0:

crwdns2936751:024crwdne2936751:0 4

crwdns2936753:07crwdne2936753:0 17

crwdns2936753:030crwdne2936753:0 100

crwdns2942667:0crwdne2942667:0 770