crwdns2915892:0crwdne2915892:0
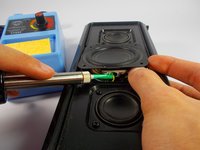
The middle speaker can be taken apart and replaced if needed. A thin tool is required to take off the speaker guard as well as a Phillip's head screwdriver and a soldering iron to remove the speaker. Be careful when soldering the wires in the speaker.
crwdns2942213:0crwdne2942213:0
-
-
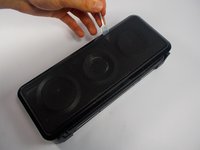
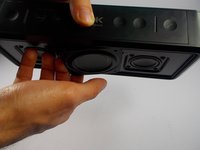
Push the nylon or metal spudger in the corner of the speaker guard.
-
-
-
Slowly lift the speaker up enough so that you can slide around the speaker guard.
-
-
-
Slide the nylon or metal spudger all around the speaker guard.
-
-
-
-
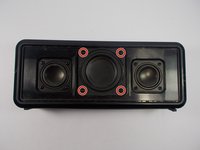
Remove the speaker guard. You can now replace the speaker guard on your TDK Life on Record A33.
-
-
-
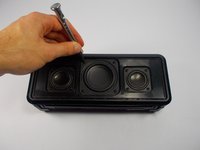
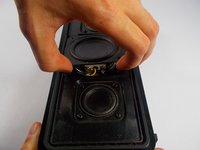
Remove all (4) 3mm screws in the middle speaker using a Phillip's head screwdriver.
-
-
-
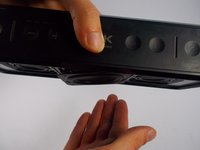
Create an opening in the speaker by holding the device up and carefully grabbing the side of the speaker that pops out.
-
-
-
Remove the solder that connects the wires to the speaker. You should be able to now remove the speaker and replace it.
-


To reassemble your device, follow these instructions in reverse order.
To reassemble your device, follow these instructions in reverse order.
crwdns2935221:0crwdne2935221:0
crwdns2935229:02crwdne2935229:0
crwdns2915084:0crwdne2915084:0

UMass Dartmouth, Team 4-2, Catania Fall 2015 crwdns2935289:0UMass Dartmouth, Team 4-2, Catania Fall 2015crwdne2935289:0
UMASSD-CATANIA-F15S4G2
crwdns2931471:04crwdne2931471:0
crwdns2935297:05crwdne2935297:0
crwdns2947412:03crwdne2947412:0
Where can I buy the woofer?
Really, stevealvarado! What's The point of taking this all apart if you don't have a replacement to put in?
If l need a second opinion about which speaker is blown, who or where can can l get it diagnosed?