crwdns2933423:0crwdne2933423:0

Syntus ST150 Ultrasonic Plate Replacement

crwdns2942213:0crwdne2942213:0

  1. Syntus ST150 Ultrasonic Plate Replacement, Ultrasonic Plate: crwdns2935265:01crwdnd2935265:01crwdnd2935265:01crwdne2935265:0
    • First, make sure the water tank inside the diffuser is completely dry to avoid any water from contacting the internal components.

    • Make sure the diffuser is disconnected from the power source to avoid electrical hazards.

  2. Syntus ST150 Ultrasonic Plate Replacement: crwdns2935265:02crwdnd2935265:01crwdnd2935265:02crwdne2935265:0 Syntus ST150 Ultrasonic Plate Replacement: crwdns2935265:02crwdnd2935265:02crwdnd2935265:02crwdne2935265:0
    • With a Phillips #1 screwdriver, remove the three 10 mm screws on the bottom of the diffuser.

  3. Syntus ST150 Ultrasonic Plate Replacement: crwdns2935265:03crwdnd2935265:01crwdnd2935265:03crwdne2935265:0 Syntus ST150 Ultrasonic Plate Replacement: crwdns2935265:03crwdnd2935265:02crwdnd2935265:03crwdne2935265:0 Syntus ST150 Ultrasonic Plate Replacement: crwdns2935265:03crwdnd2935265:03crwdnd2935265:03crwdne2935265:0
    • Lift the water tank while holding the base of the diffuser.

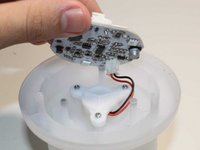
    • Disconnect the three cables form the board.

    • Make sure when reassembling the diffuser to plug in each cable to its assigned port.

  4. Syntus ST150 Ultrasonic Plate Replacement: crwdns2935265:04crwdnd2935265:01crwdnd2935265:03crwdne2935265:0 Syntus ST150 Ultrasonic Plate Replacement: crwdns2935265:04crwdnd2935265:02crwdnd2935265:03crwdne2935265:0 Syntus ST150 Ultrasonic Plate Replacement: crwdns2935265:04crwdnd2935265:03crwdnd2935265:03crwdne2935265:0
    • To separate the board from the water tank, unscrew the three Phillips #1 10 mm screws securing the board.

  5. Syntus ST150 Ultrasonic Plate Replacement: crwdns2935265:05crwdnd2935265:01crwdnd2935265:03crwdne2935265:0 Syntus ST150 Ultrasonic Plate Replacement: crwdns2935265:05crwdnd2935265:02crwdnd2935265:03crwdne2935265:0 Syntus ST150 Ultrasonic Plate Replacement: crwdns2935265:05crwdnd2935265:03crwdnd2935265:03crwdne2935265:0
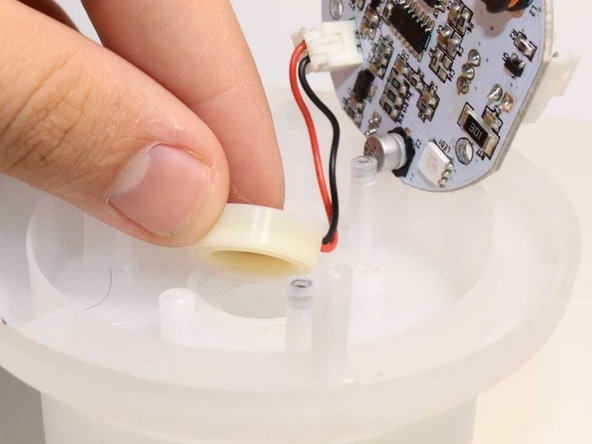
    • With a Phillips #0 screwdriver, remove the three 7 mm screws from the ultrasonic sensor cover.

    • Remove the cover to expose the ultrasonic sensor.

  6. Syntus ST150 Ultrasonic Plate Replacement: crwdns2935265:06crwdnd2935265:01crwdnd2935265:03crwdne2935265:0 Syntus ST150 Ultrasonic Plate Replacement: crwdns2935265:06crwdnd2935265:02crwdnd2935265:03crwdne2935265:0 Syntus ST150 Ultrasonic Plate Replacement: crwdns2935265:06crwdnd2935265:03crwdnd2935265:03crwdne2935265:0
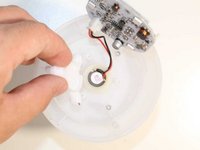
    • Detach the ultrasonic sensor from the water tank.

    • Detach the ultrasonic sensor connector from the board.

  7. Syntus ST150 Ultrasonic Plate Replacement: crwdns2935265:07crwdnd2935265:01crwdnd2935265:01crwdne2935265:0
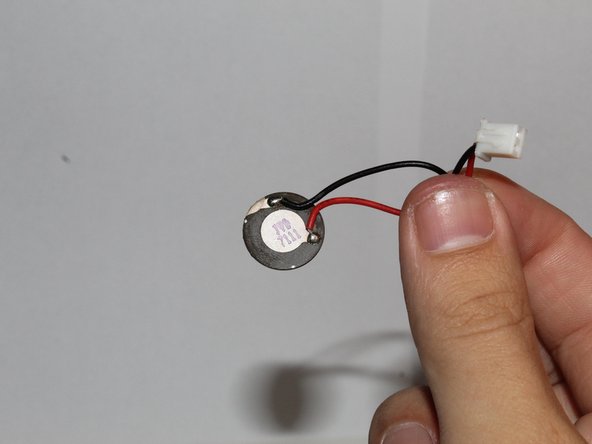
    • Remove the rubber cover from the ultrasonic plate.

  8. Syntus ST150 Ultrasonic Plate Replacement: crwdns2935265:08crwdnd2935265:01crwdnd2935265:01crwdne2935265:0
    • Now you can replace the ultrasonic plate of your diffuser.

crwdns2915888:0crwdne2915888:0

To reassemble your device, follow these instructions in reverse order.

Alejandro R. Calderin Anzueta

crwdns2935283:003/23/22crwdne2935283:0

157 crwdns2915208:0crwdne2915208:0

crwdns2935295:0crwdne2935295:0

crwdns2915084:0crwdne2915084:0

University of Puerto Rico Mayagüez, Team 2-26, Cools Stephens Spring 2022 crwdns2935289:0University of Puerto Rico Mayagüez, Team 2-26, Cools Stephens Spring 2022crwdne2935289:0

UPRM-COOLS STEPHENS-S22S2G26

crwdns2934841:01crwdne2934841:0

crwdns2935297:02crwdne2935297:0

crwdns2944067:00crwdne2944067:0

crwdns2917038:0crwdne2917038:0

crwdns2936625:0crwdne2936625:0:

crwdns2936751:024crwdne2936751:0 0

crwdns2936753:07crwdne2936753:0 9

crwdns2936753:030crwdne2936753:0 27

crwdns2942667:0crwdne2942667:0 537