crwdns2942213:0crwdne2942213:0
-
-
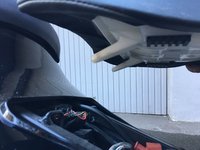
First you have to remove the screws with an Imbus key (size 4) on the left and right side.
-
-
-
-
You can now completely remove the seat.
-
-
-
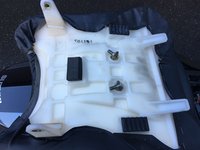
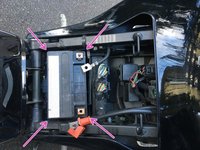
The screws can now be removed from the battery with a screwdriver PH 3 (alternatively a wrench or a socket wrench size 10 can be used).
-
Attention! There are nuts under the screws. These are not attached, so care must be taken when removing the screws that the nuts are not lost.
-
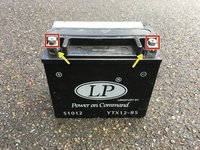
Before installation, both battery poles should be treated with polar grease or polish spray. Otherwise it can lead to corrosion, which can lead to contact problems.
-
-
-
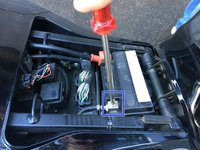
You can now seat the battery in its slot
-
-
-
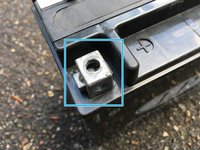
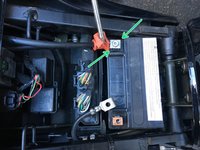
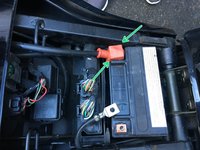
After the positive pole is attached, it should be protected with the cover provided. If the cover is defective, it must be replaced. This protection is also a relevant criterion for TÜV.
-
After the plus pole is attached and protected, the negative pole can be attached.
-


To put the device back together follow the steps in reverse order.
To put the device back together follow the steps in reverse order.
crwdns2935221:0crwdne2935221:0
crwdns2935229:04crwdne2935229:0
crwdns2934873:0crwdne2934873:0
100%


crwdns2934885:0crwdne2934885:0 crwdns2934875:0crwdne2934875:0
crwdns2934877:0crwdne2934877:0 ›