crwdns2933423:0crwdne2933423:0

Stylophone Beat analog sync out MOD

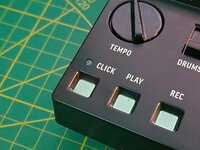
crwdns2942213:0crwdne2942213:0

  1. Stylophone Beat analog sync out MOD, Safety: crwdns2935265:01crwdnd2935265:01crwdnd2935265:01crwdne2935265:0
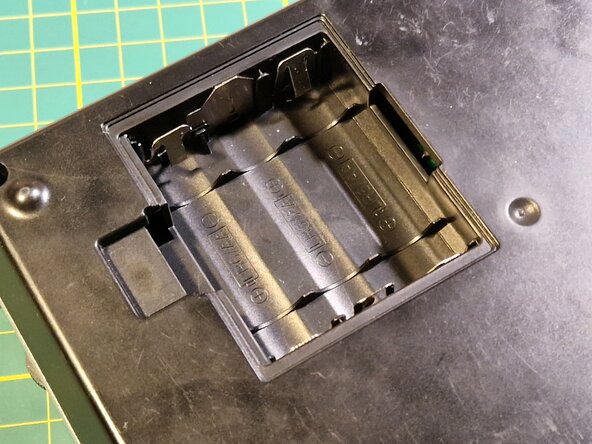
    • Switch your Stylophone off and remove the batteries hidden behind a door on the bottom side of your device.

  2. Stylophone Beat analog sync out MOD, Remove the screws: crwdns2935265:02crwdnd2935265:01crwdnd2935265:02crwdne2935265:0 Stylophone Beat analog sync out MOD, Remove the screws: crwdns2935265:02crwdnd2935265:02crwdnd2935265:02crwdne2935265:0
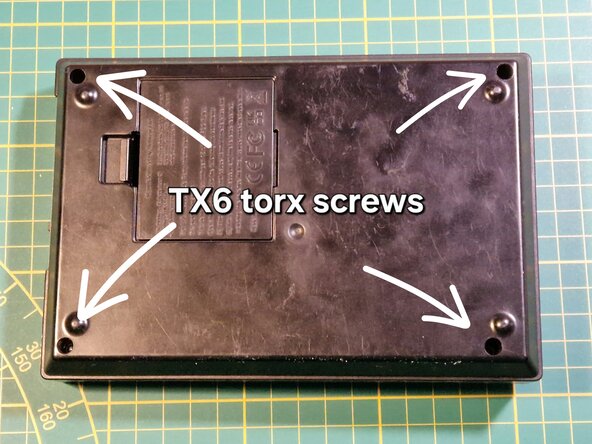
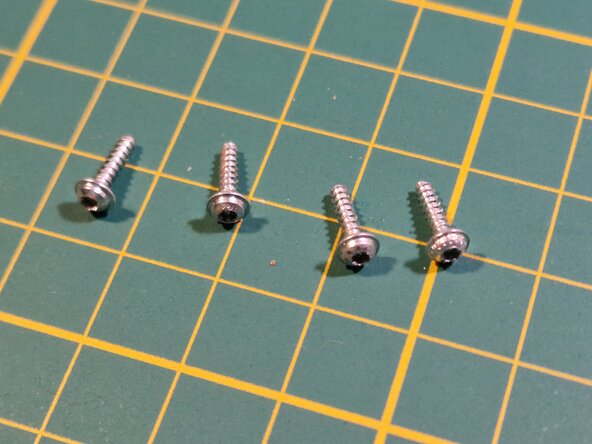
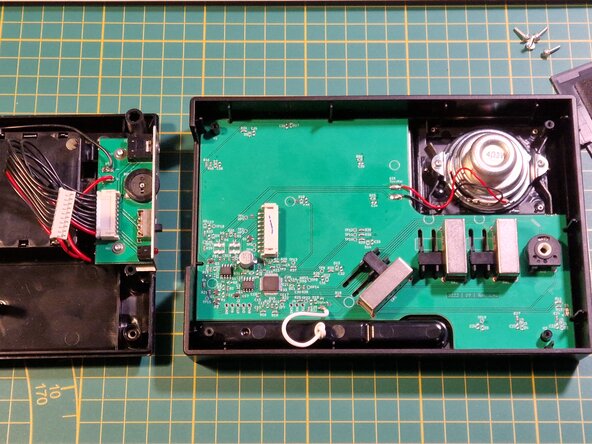
    • Remove 4 Torx T6 screws holding the device together. Beware that you will need a screwdriver with a long shaft.

  3. Stylophone Beat analog sync out MOD, Open the Beat: crwdns2935265:03crwdnd2935265:01crwdnd2935265:03crwdne2935265:0 Stylophone Beat analog sync out MOD, Open the Beat: crwdns2935265:03crwdnd2935265:02crwdnd2935265:03crwdne2935265:0 Stylophone Beat analog sync out MOD, Open the Beat: crwdns2935265:03crwdnd2935265:03crwdnd2935265:03crwdne2935265:0
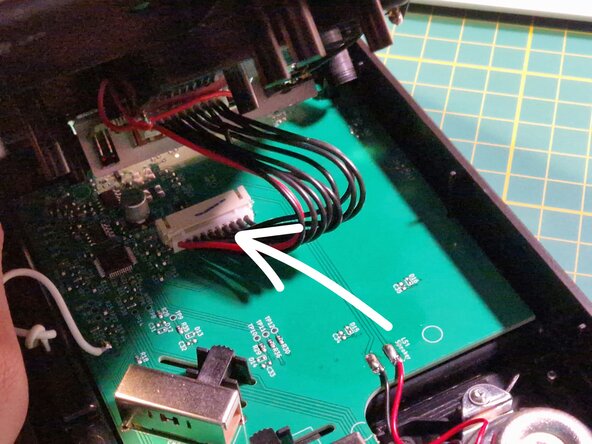
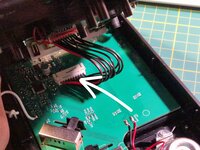
    • Slowly and carefully lift the bottom plate up and very carefully remove this small connector.

    • When lifting the bottom shell up, circuit board will become loose inside. the LED lens and metronome tempo dial might fall off. You don't have to worry about the dial, it can be inserted after the device is assembled.

    • Always keep an eye for the metronome LED lens, it may come loose and it will be hard to find! When it comes off, you should insert it in the spot shown on the third picture (underneath the circuit board).

  4. Stylophone Beat analog sync out MOD, Locate the points of interest: crwdns2935265:04crwdnd2935265:01crwdnd2935265:02crwdne2935265:0 Stylophone Beat analog sync out MOD, Locate the points of interest: crwdns2935265:04crwdnd2935265:02crwdnd2935265:02crwdne2935265:0
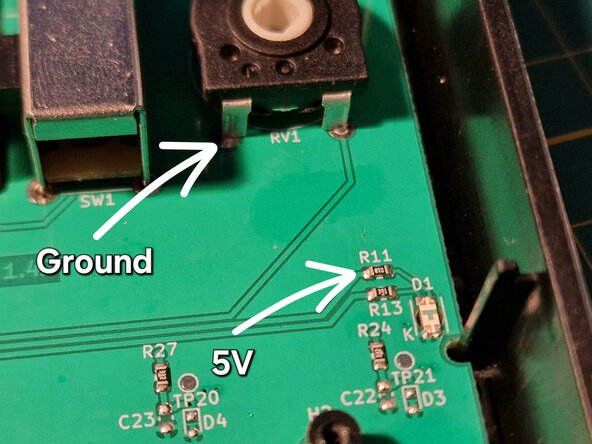
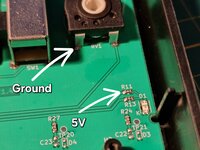
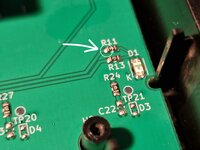
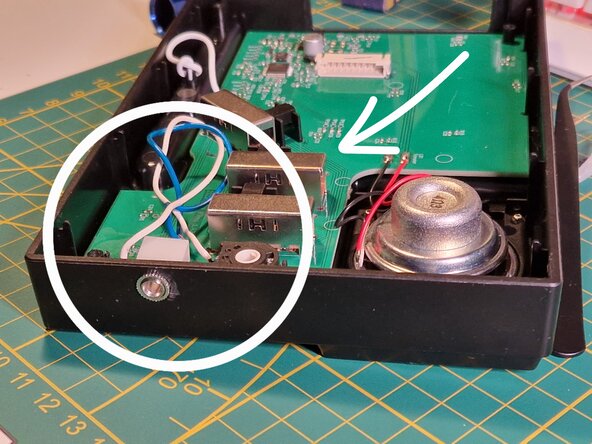
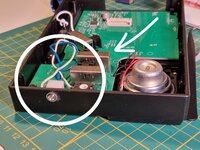
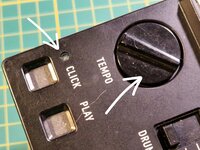
    • Look around the circuit board of the device, You should find a potentiometer and a component labeled "R11".

    • You will be soldering to these two points

  5. Stylophone Beat analog sync out MOD, Soldering to the board: crwdns2935265:05crwdnd2935265:01crwdnd2935265:01crwdne2935265:0
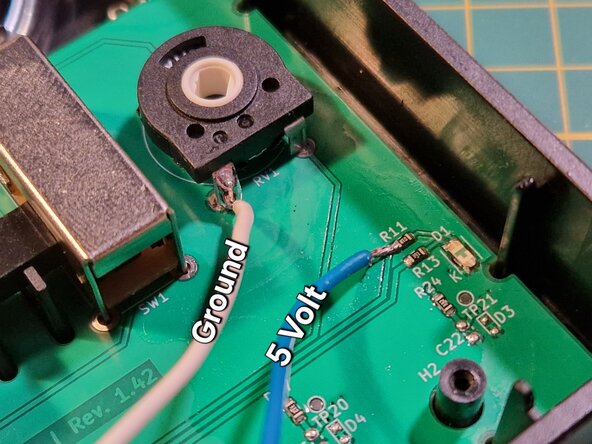
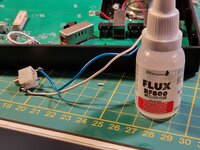
    • Solder two wires to the points shown earlier. Blue wire will transmit a 5 volt pulse every metronome tick.

    • Flux is highly recommended here. The "R11" is a really tiny component.

  6. Stylophone Beat analog sync out MOD, Soldering to the 3.5mm jack: crwdns2935265:06crwdnd2935265:01crwdnd2935265:02crwdne2935265:0 Stylophone Beat analog sync out MOD, Soldering to the 3.5mm jack: crwdns2935265:06crwdnd2935265:02crwdnd2935265:02crwdne2935265:0
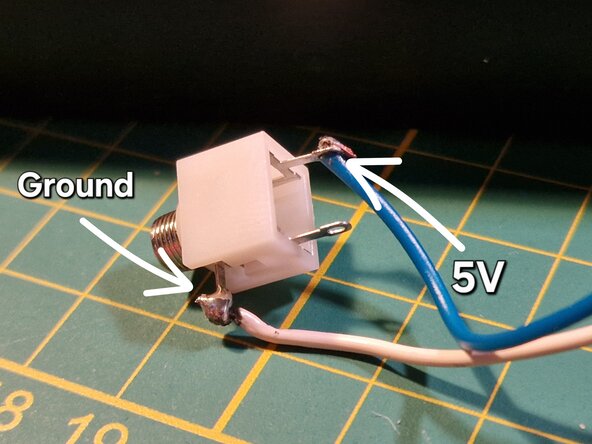
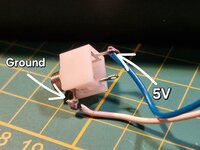
    • Now you should solder a mono/stereo (does not matter which one) audio jack to the ends of wires from the previous step.

    • 5V blue wire goes to the "tip" of the jack. Ground, white wire goes to the sleeve of the jack.

    • Soldering the wires incorrectly may damage other synthesizers or sequencers plugged in to our newly made sync-out!

  7. Stylophone Beat analog sync out MOD, Mounting the sync-out: crwdns2935265:07crwdnd2935265:01crwdnd2935265:03crwdne2935265:0 Stylophone Beat analog sync out MOD, Mounting the sync-out: crwdns2935265:07crwdnd2935265:02crwdnd2935265:03crwdne2935265:0 Stylophone Beat analog sync out MOD, Mounting the sync-out: crwdns2935265:07crwdnd2935265:03crwdnd2935265:03crwdne2935265:0
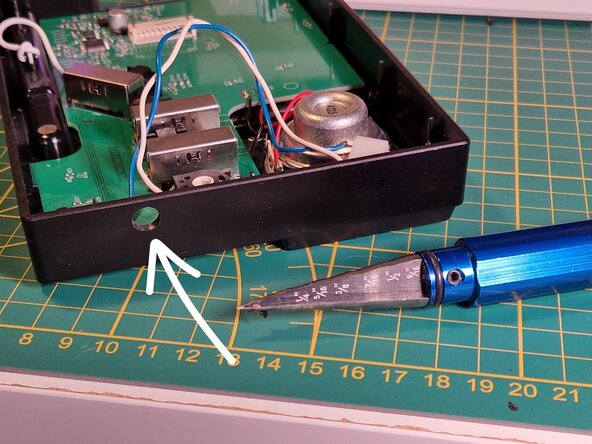
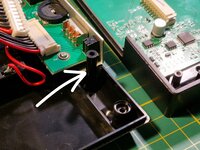
    • Drill a small opening for our sync jack. remember to use an appropriately sized drill bit!

    • Insert the sync jack.

    • Audio jack with a screw nut end is recommended here, you can stabilize it in place with help of some hot glue.

    • When deciding on a hole location, remember that there are multiple posts inside, on the other half of the device, to keep the circuit board stable (third picture). Drill in a place that is relatively empty.

  8. Stylophone Beat analog sync out MOD, Reassembly: crwdns2935265:08crwdnd2935265:01crwdnd2935265:02crwdne2935265:0 Stylophone Beat analog sync out MOD, Reassembly: crwdns2935265:08crwdnd2935265:02crwdnd2935265:02crwdne2935265:0
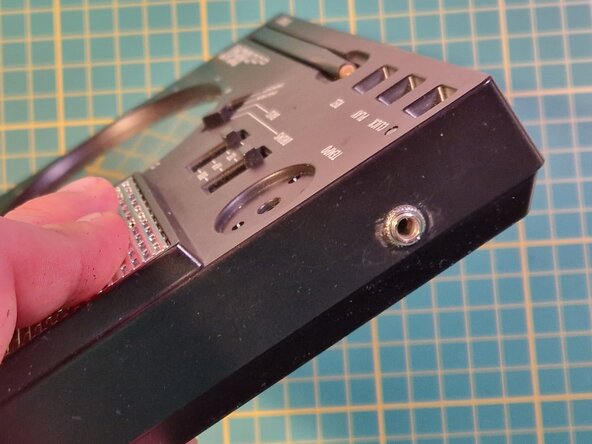
    • After securing the sync jack, reassemble the device by repeating the steps 1-3 in the reverse order

    • Before screwing everything together remember about the LED lens (second picture)

    • After reassembly you can reattach a tempo dial

  9. Stylophone Beat analog sync out MOD, Complete: crwdns2935265:09crwdnd2935265:01crwdnd2935265:02crwdne2935265:0 Stylophone Beat analog sync out MOD, Complete: crwdns2935265:09crwdnd2935265:02crwdnd2935265:02crwdne2935265:0
    • Your stylophone will now transmit Sync out signal at 2PPQN

    • You may notice that after the mod, when sync-out is plugged in, the tempo LED will be slightly dimmer than before.

crwdns2915888:0crwdne2915888:0

Your Stylophone will now transmit Sync-out signal at 2PPQN

To reassemble your device, follow steps one to three in reverse order.

crwdns2935227:0crwdne2935227:0

Peter Andy

crwdns2935283:010/01/25crwdne2935283:0

169 crwdns2915208:0crwdne2915208:0

crwdns2935295:0crwdne2935295:0

crwdns2947412:00crwdne2947412:0

crwdns2917038:0crwdne2917038:0

crwdns2936625:0crwdne2936625:0:

crwdns2936751:024crwdne2936751:0 1

crwdns2936753:07crwdne2936753:0 16

crwdns2936753:030crwdne2936753:0 74

crwdns2942667:0crwdne2942667:0 188