crwdns2933423:0crwdne2933423:0

Spin Master Boxer Robot Speaker Replacement

crwdns2942213:0crwdne2942213:0

  1. Spin Master Boxer Robot Speaker Replacement, Robot Screen: crwdns2935265:01crwdnd2935265:01crwdnd2935265:01crwdne2935265:0
    • Set Spin Master Boxer on your workspace so that the bottom panel faces upwards.

  2. Spin Master Boxer Robot Speaker Replacement: crwdns2935265:02crwdnd2935265:01crwdnd2935265:01crwdne2935265:0
    • Using a Phillips #00 screw driver, unscrew the four 4mm screws in each corner of the bottom panel.

  3. Spin Master Boxer Robot Speaker Replacement: crwdns2935265:03crwdnd2935265:01crwdnd2935265:01crwdne2935265:0
    • Carefully remove the bottom panel of the Spin Master Boxer by lifting up, away from the main body of robot.

  4. Spin Master Boxer Robot Speaker Replacement: crwdns2935265:04crwdnd2935265:01crwdnd2935265:02crwdne2935265:0 Spin Master Boxer Robot Speaker Replacement: crwdns2935265:04crwdnd2935265:02crwdnd2935265:02crwdne2935265:0
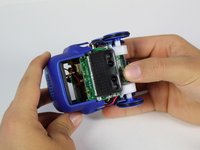
    • While holding onto the axels of the wheels, gently pull the top panel of the robot away from its body.

    • Be aware when removing the panel that multiple wires connect it to the body of the Spin Master Boxer.

  5. Spin Master Boxer Robot Speaker Replacement: crwdns2935265:05crwdnd2935265:01crwdnd2935265:01crwdne2935265:0
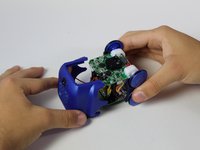
    • Remove the plastic screen from the body of the robot. It should come off easily as it is not attached by anything.

  6. Spin Master Boxer Robot Speaker Replacement, Robot Speaker: crwdns2935265:06crwdnd2935265:01crwdnd2935265:02crwdne2935265:0 Spin Master Boxer Robot Speaker Replacement, Robot Speaker: crwdns2935265:06crwdnd2935265:02crwdnd2935265:02crwdne2935265:0
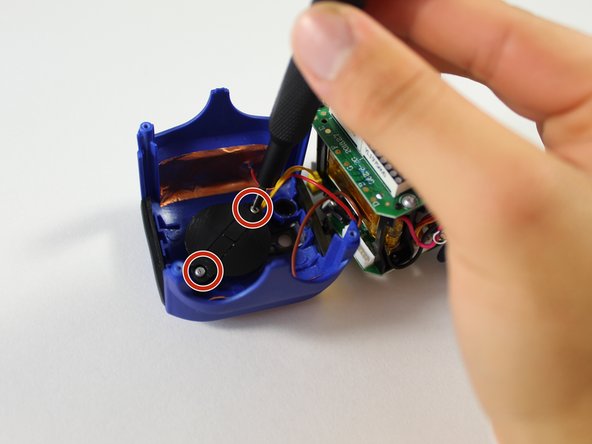
    • Using a Phillips #00 screwdriver, unscrew the two 3mm screws connecting the black speaker cover to the top panel.

  7. Spin Master Boxer Robot Speaker Replacement: crwdns2935265:07crwdnd2935265:01crwdnd2935265:01crwdne2935265:0
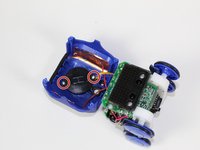
    • Remove the speaker cover and you will be left looking at the speaker.

    • The speaker is soldered onto the top panel so additional measures must be taken to completely remove it. See How To Solder and Desolder Connections

crwdns2915888:0crwdne2915888:0

To reassemble your device, follow these instructions in reverse order.

Lauren Roide

crwdns2935283:004/16/19crwdne2935283:0

739 crwdns2915208:0crwdne2915208:0

crwdns2935297:05crwdne2935297:0

crwdns2915084:0crwdne2915084:0

Cal Poly, Team S1-G1, Maness Spring 2019 crwdns2935289:0Cal Poly, Team S1-G1, Maness Spring 2019crwdne2935289:0

CPSU-MANESS-S19S1G1

crwdns2931471:04crwdne2931471:0

crwdns2935297:010crwdne2935297:0

crwdns2944067:00crwdne2944067:0

crwdns2917038:0crwdne2917038:0

crwdns2936625:0crwdne2936625:0:

crwdns2936751:024crwdne2936751:0 0

crwdns2936753:07crwdne2936753:0 5

crwdns2936753:030crwdne2936753:0 9

crwdns2942667:0crwdne2942667:0 952