crwdns2942213:0crwdne2942213:0
-
-
Flip the camera upside down, and observe where the battery door and switch are located on the camera.
-
-
-
Slide the switch over to the right side to open the battery door.
-
-
-
Depress the blue lever to allow the battery to pop out slightly.
-
-
-
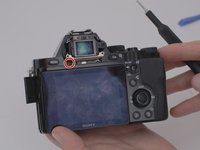
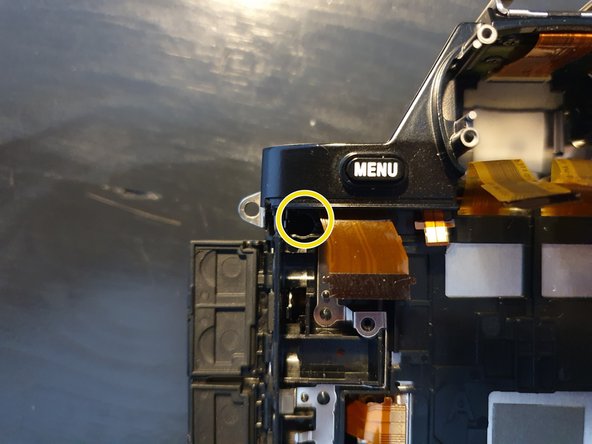
Remove the eyepiece cover by removing the four M1.5x4mm screws with a PH00 Phillips screwdriver.
-
Remove the M1.5x4mm screw that retains the adjustment wheel with a PH00 Phillips screwdriver.
-
-
-
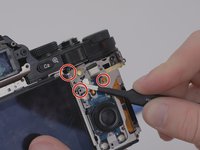
Remove the six M1.5x4mm screws with a PH00 Phillips screwdriver.
-
-
-
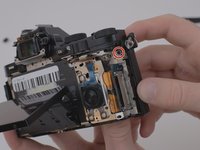
Remove one M1.5x4mm screw with a PH00 Phillips screwdriver.
-
-
-
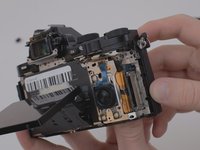
Once the screws have been removed, unsnap and lift the rear plastic cover off of the camera.
-
-
crwdns2935267:0crwdne2935267:0Tweezers$4.99
-
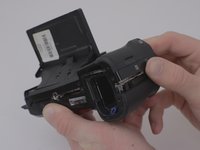
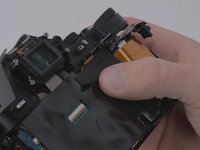
Using the blunt tweezers, remove the blue ribbon cable.
-
-
-
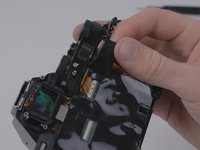
Place the tweezers on the side of the circuit board and lift it from underneath so as to free it from the three retaining tabs.
-
-
-
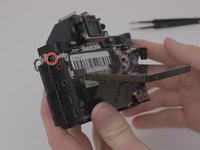
Remove four M1.5x4mm screws using a PH00 Phillips screwdriver.
-
-
-
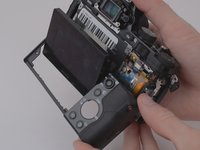
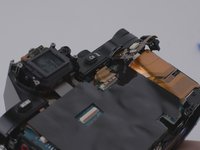
Lift the metal plate and LCD screen away from the camera body.
-
-
-
-
Detach the amber ribbon cable from the motherboard.
-
-
-
Peel off the small adhesive tape located on the top right side of the motherboard.
-
-
-
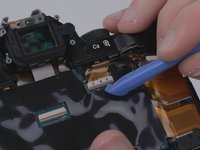
Remove the exposed ribbon cable by using the iFixit opening tools
-
-
-
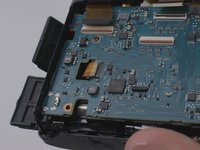
Peel off the large black protective adhesive from the motherboard.
-
-
-
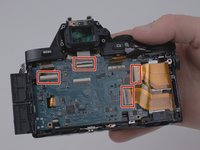
Remove the four visible ribbon cables by using the spudger.
-
-
-
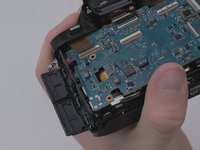
Remove the one U.FL plug by using the spudger.
-
Using the spudger, remove the four remaining ribbon cables.
-
For additional guidance and tips on how to properly attach and detach connector cables, please reference iFixit's guide to connector cables here.
-
-
-
Remove one M1.5x2mm screw with a PH00 Phillips screwdriver.
-
Remove one coarse threaded 5mm screw with a PH00 Phillips screwdriver.
-
-
-
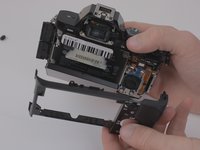
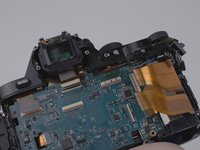
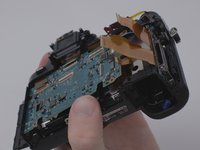
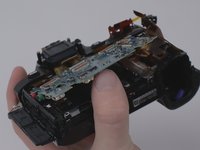
Lift the motherboard from the camera body.
-
-
-
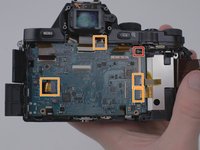
Remove the two visible ribbon cables by using the forceps.
-
-
-
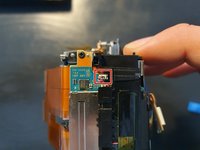
Gently pull the viewfinder out ouf the housing
-
-
-
Remove the two M 1.5x2mm screws.
-
Remove the M1.5x4mm screw.
-
-
-
Remove the two M1.5x4mm screws.
-
Pull of the grip to the front
-
-
-
Remove the M1.5x4mm screw.
-
Pull the grip of to the front
-
-
-
Grab the top part on the sides and gently remove it to the top direction.
-
-
-
Remove the two M1.5x4mm self tapping and the M1.5x4mm screw.
-
Pull of the small metal plate.
-
-
-
Remove the cable from the ribbon connection.
-
Remove the adapter cable.
-
-
-
Remove the three M1.5x4mm self tapping screws.
-
Remove the M1.5x4mm screw.
-
-
-
Gently pull of the back cover. Pay attetion to the ribbon cables.
-
Remove the tripod thread.
-
-
-
Remove the M1.5x2mm screw.
-
Remove the connector on the side of the camera.
-
Pull out the battery housing to the back.
-
-
-
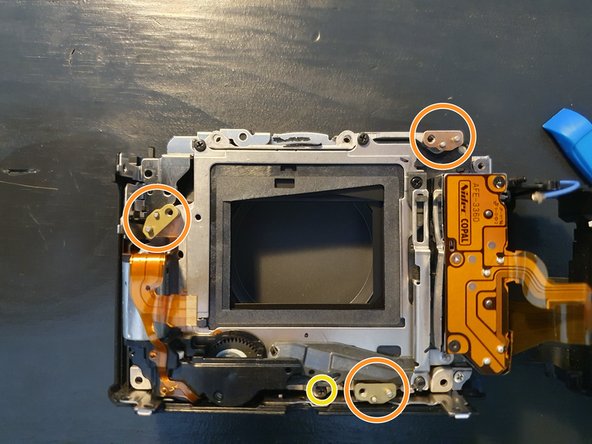
Remove the two M1.5x5mm screws
-
Remove the copper plate from by lifting it from the right side.
-
-
-
Remove the M1.5x5mm screw.
-
Gently remove the sensor board.
-
-
-
Remove the M1.5x5mm self tapping screw.
-
Remove the four small support plates.
-
Remove the front cover of the camera.
-
-
-
Remove the three M1.5x4mm screws.
-
Lift of the shutter assembly.
-
-
-
Remove the special screw on the backside of the shutter.
-
-
-
Remove the shutter curtain from the shutter drive.
-
Done :)
-


To reassemble your device, follow these instructions in reverse order.
To reassemble your device, follow these instructions in reverse order.
crwdns2935221:0crwdne2935221:0
crwdns2935229:06crwdne2935229:0
crwdns2947412:04crwdne2947412:0
Incomplete /slightly incorrect guide, missed some connectors on the board as in the photos they were already unplugged so it almost caused me to rip a ribbon cable.
Could you please let me know the exact step where the instructions are missing so that the missing information can be added? I hope this guide was still from value for you and that you could repair your gear!
Marco -
Very nice guide, it helped me repair my A7 locked shutter (which mechanism was blocked by a small piece of metal). On step 19 there was a small ribbon that was missing in your guide, you can see it is already removed on the top left. There were a couple more small details, but overall such fantastic help, thank you!!
Found this after I done the job. Shame I did not search more. How to return count to zero after fitting the new unit? The count shows previous total, I hoped for zero to show. tia.