crwdns2915892:0crwdne2915892:0
This is a pre-requisite list of steps that will act as a placeholder for all other applicable guides pertaining to the Sony a7.
crwdns2942213:0crwdne2942213:0
-
-
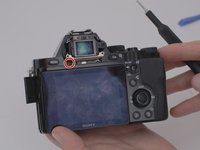
Remove the eyepiece cover by removing the four M1.5x4mm screws with a PH00 Phillips screwdriver.
-
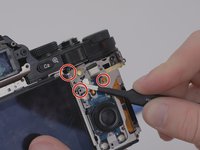
Remove the M1.5x4mm screw that retains the adjustment wheel with a PH00 Phillips screwdriver.
-
-
-
Remove the six M1.5x4mm screws with a PH00 Phillips screwdriver.
-
-
-
Remove one M1.5x4mm screw with a PH00 Phillips screwdriver.
-
-
-
-
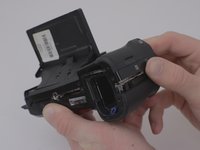
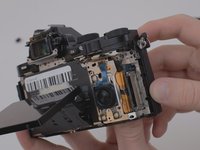
Once the screws have been removed, unsnap and lift the rear plastic cover off of the camera.
-
-
crwdns2935267:0crwdne2935267:0Tweezers$4.99
-
Using the blunt tweezers, remove the blue ribbon cable.
-
-
-
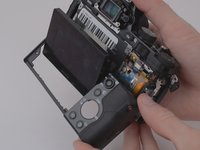
Place the tweezers on the side of the circuit board and lift it from underneath so as to free it from the three retaining tabs.
-
-
-
Remove four M1.5x4mm screws using a PH00 Phillips screwdriver.
-
-
-
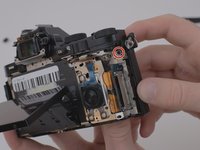
Lift the metal plate and LCD screen away from the camera body.
-
-
-
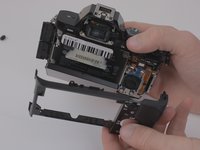
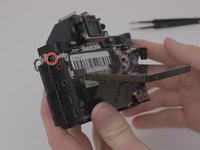
Detach the amber ribbon cable from the motherboard.
-


To reassemble your device, follow these instructions in reverse order.
crwdns2935221:0crwdne2935221:0
crwdns2935229:09crwdne2935229:0

crwdns2935287:0crwdne2935287:0

Embry-Riddle Aeronautical University, Team S16-G2, Branham Spring 2020 crwdns2935289:0Embry-Riddle Aeronautical University, Team S16-G2, Branham Spring 2020crwdne2935289:0
ERAU-BRANHAM-S20S16G2
crwdns2931471:03crwdne2931471:0
crwdns2935297:015crwdne2935297:0