crwdns2915892:0crwdne2915892:0
This guide provides step by step instructions on how to properly replace the screen of the Sony Xperia Z5 Compact.
crwdns2942213:0crwdne2942213:0
-
-
Power off and remove SIM card tray.
-
-
-
Heat up the back cover to soften the adhesive.
-
Place the suction cup to open a gap from top side, then insert guitar picks and slide it to cut the adhesive underneath.
-
Remove back cover.
-
-
-
Remove all 10 Phillips screws.
-
Disconnect NFC clip and flashlight clip.
-
-
-
Remove the plastic bracket.
-
Pry up and remove back frame.
-
-
-
-
Release charging port connector.
-
Remove plastic protective bar.
-
Pry up motherboard assembly from this side. There are three flex connectors connecting the motherboard underneath. So pry up the motherboard assembly gently.
-
-
-
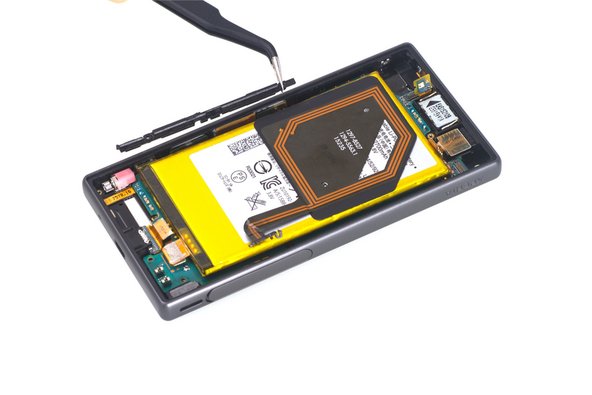
Remove the motherboard/battery assembly.
-
Using a spudger, release the battery connector from the motherboard.
-
-
-
Using a suction cup, create a space between the screen and the phone.
-
Using an opening tool, pry the LCD screen up.
-


To reassemble your device, follow these instructions in reverse order.
To reassemble your device, follow these instructions in reverse order.
crwdns2935221:0crwdne2935221:0
crwdns2935227:0crwdne2935227:0

crwdns2915084:0crwdne2915084:0

The Citadel Military College of South Carolina, Team S2-G9, Eggleston Spring 2020 crwdns2935289:0The Citadel Military College of South Carolina, Team S2-G9, Eggleston Spring 2020crwdne2935289:0
CMCSC-EGGLESTON-S20S2G9
crwdns2931471:03crwdne2931471:0
crwdns2935297:06crwdne2935297:0