crwdns2915892:0crwdne2915892:0
If your device is not recognizing any headset you plug in, and performing a software repair did not fix this problem, replacing the headphone jack may solve this problem.
crwdns2942213:0crwdne2942213:0
-
-
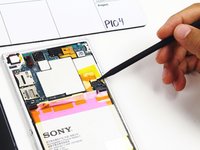
Use the small suction cup to lift the back panel:
-
Press the small suction cup on to the middle of the back panel.
-
-
-
While holding the Sony Xperia Z ultra down with your left hand, slightly pull the small suction cup upwards to create a small opening between the back panel and the front panel.
-
While continuing to pull the small suction cup upwards, insert the spudger in the small opening.
-
Pry the front panel downwards with the spudger while continuing to pull the small suction cup upwards.
-
-
-
Remove the back panel by pulling the small suction cup upwards.
-
-
-
Remove the following six screws with a Phillips #000 screwdriver:
-
five silver 2.1 mm screws
-
one gold 3.1 mm screw
-
-
-
Pry the plastic motherboard shield open by placing the spudger under the shield and running it along the edges.
-
-
-
Remove the motherboard shield by lifting the lower end upwards first.
-
-
-
-
Detach the battery connection cable by prying it upward with the spudger.
-
-
-
Pry the upper end of the antenna upwards with the spudger.
-
-
-
Detach the antenna by pulling the upper end upwards and outwards.
-
-
-
Insert the spudger underneath the battery and run it back and forth to remove any adhesive.
-
-
-
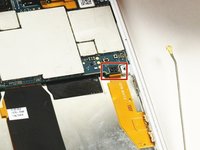
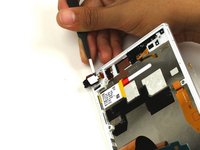
Detach the headphone jack connection by prying it upwards with the spudger.
-
-
-
Detach the earphone jack connection by prying it upwards with the spudger.
-
-
-
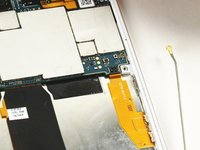
Disconnect the ribbon cable at the bottom right of the motherboard. (It's shown tucked under the motherboard in this photo, which is incorrect—don't do this!)
-
-
-
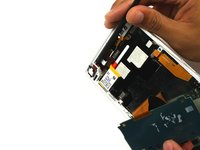
Detach the upper end of the motherboard by pulling the top end upwards.
-
-
crwdns2935267:0crwdne2935267:0Tweezers$4.99
-
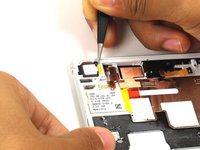
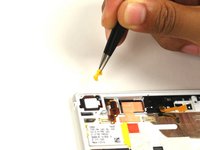
Remove the yellow clip that secures the headphone jack slot with a pair of tweezers.
-
-
-
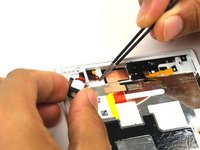
Push the red stopper of the headphone jack connection through the plastic tunnel with the spudger.
-
While holding the back end of the headphone jack connection, grasp the headphone jack connection with the pair of tweezers and guide it through the plastic tunnel.
-
Remove the headphone jack connection from the device.
-


To reassemble your device, follow these instructions in reverse order.
To reassemble your device, follow these instructions in reverse order.
crwdns2935221:0crwdne2935221:0
crwdns2935229:02crwdne2935229:0
crwdns2915084:0crwdne2915084:0

Cal Poly, Team 4-6, Maness Fall 2015 crwdns2935289:0Cal Poly, Team 4-6, Maness Fall 2015crwdne2935289:0
CPSU-MANESS-F15S4G6
crwdns2931471:04crwdne2931471:0
crwdns2935297:010crwdne2935297:0