crwdns2915892:0crwdne2915892:0
This guide will show you how to remove the front camera from your Sony Xperia XA1 Ultra. The front camera should be replaced if the camera is cracked or damaged. A heat gun or hairdryer is needed to open the back panel, which can become hot and potentially damage the phone. In addition, a T5 screwdriver is needed to remove screws.
crwdns2942213:0crwdne2942213:0
-
-
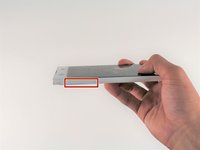
Wedge your finger under the bottom ridge of the SD card insert.
-
Pull outwards with your fingers to remove the SD card from the left side of device.
-
-
-
Use a hair dryer to heat each corner of the phone.
-
Alternate heating each corner for a minute to loosen the adhesive binding the back cover to the phone.
-
-
-
Press a suction cup on a heated corner of the device.
-
Hold the phone down and gently lift the suction cup to create a small gap.
-
-
-
crwdns2935267:0crwdne2935267:0Plastic Cards$2.99
-
Insert your iFixit Opening Tool in the small gap between your phone and the back cover.
-
Lift up on the iFixit Opening Tool and insert your plastic card in the small gap between your phone and the back cover.
-
-
-
Slide your plastic card along the side of your phone to loosen the adhesive.
-
Move the card along the sides of the phone to lift all of the corners.
-
-
-
Lift up the back cover by lifting up the sides of the phone with your hand.
-
-
-
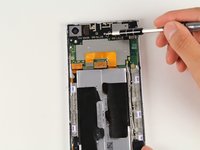
Remove the four 4mm T5 screws on the top of the black panel securing the antenna module to the device.
-
-
-
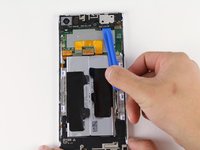
Insert your iFixit Opening Tool underneath the antenna module.
-
Lift up gently with the iFixit Opening Tool to remove the antenna module.
-
-
-
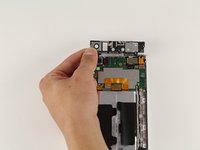
Insert your iFixit Opening Tool underneath the front camera and gently lift up.
-
Remove the front camera by lifting the front camera up with your hands.
-


To reassemble your device, follow these instructions in reverse order.
To reassemble your device, follow these instructions in reverse order.
crwdns2935221:0crwdne2935221:0
crwdns2935227:0crwdne2935227:0
crwdns2915084:0crwdne2915084:0

Cal Poly, Team S16-G3, Livingston Spring 2018 crwdns2935289:0Cal Poly, Team S16-G3, Livingston Spring 2018crwdne2935289:0
CPSU-LIVINGSTON-S18S16G3
crwdns2931471:04crwdne2931471:0
crwdns2935297:09crwdne2935297:0