crwdns2933423:0crwdne2933423:0
crwdns2947577:0crwdnd2947577:0crwdne2947577:0

Sony Xperia XA1 USB-C Module Replacement

crwdns2942213:0crwdne2942213:0

    1. Sony Xperia XA1 USB-C Module Replacement, Phone Back Cover: crwdns2935265:01crwdnd2935265:01crwdnd2935265:03crwdne2935265:0 Sony Xperia XA1 USB-C Module Replacement, Phone Back Cover: crwdns2935265:01crwdnd2935265:02crwdnd2935265:03crwdne2935265:0 Sony Xperia XA1 USB-C Module Replacement, Phone Back Cover: crwdns2935265:01crwdnd2935265:03crwdnd2935265:03crwdne2935265:0
      • Using a hair dryer, apply heat evenly around the edges of the back of the phone. This will loosen the adhesive and allow you to remove the back panel.

      • As you're heating up the phone, begin to pry open the back starting from the middle, and going to the corners.

      • Do not apply heat in one area for too long.

      crwdns2952109:0crwdne2952109:0

      crwdns2917038:0crwdne2917038:0

    1. Sony Xperia XA1 USB-C Module Replacement, Speaker: crwdns2935265:02crwdnd2935265:01crwdnd2935265:03crwdne2935265:0 Sony Xperia XA1 USB-C Module Replacement, Speaker: crwdns2935265:02crwdnd2935265:02crwdnd2935265:03crwdne2935265:0 Sony Xperia XA1 USB-C Module Replacement, Speaker: crwdns2935265:02crwdnd2935265:03crwdnd2935265:03crwdne2935265:0
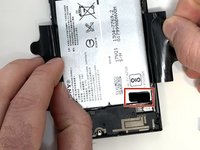
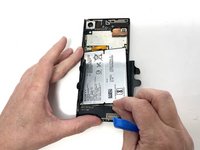
      • Use a plastic opening tool to lift the battery connector.

      • Lift the flaps on both sides of the battery.

      crwdns2952109:0crwdne2952109:0

      crwdns2917038:0crwdne2917038:0

    2. Sony Xperia XA1 USB-C Module Replacement: crwdns2935265:03crwdnd2935265:01crwdnd2935265:03crwdne2935265:0 Sony Xperia XA1 USB-C Module Replacement: crwdns2935265:03crwdnd2935265:02crwdnd2935265:03crwdne2935265:0 Sony Xperia XA1 USB-C Module Replacement: crwdns2935265:03crwdnd2935265:03crwdnd2935265:03crwdne2935265:0
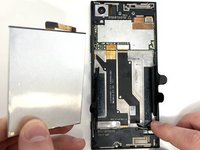
      • Pinch the pull tab at the bottom of the battery.

      • Gently lift the battery out.

      • Handle the battery with caution. It is very fragile.

      crwdns2952109:0crwdne2952109:0

      crwdns2917038:0crwdne2917038:0

    3. Sony Xperia XA1 USB-C Module Replacement: crwdns2935265:04crwdnd2935265:01crwdnd2935265:02crwdne2935265:0 Sony Xperia XA1 USB-C Module Replacement: crwdns2935265:04crwdnd2935265:02crwdnd2935265:02crwdne2935265:0
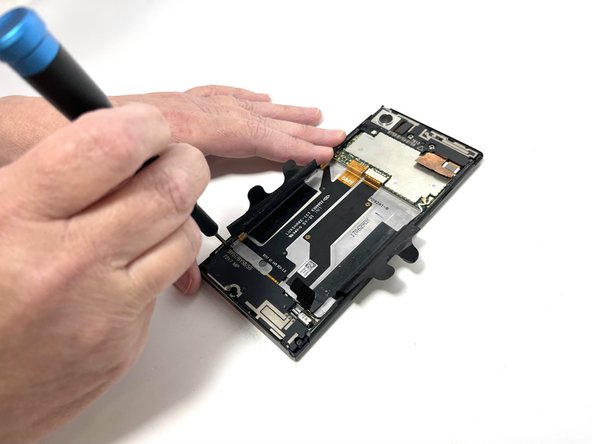
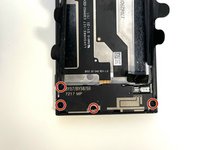
      • Use a Phillips #000 screwdriver to remove the four 3 mm screws that secure the bottom component.

      crwdns2952109:0crwdne2952109:0

      crwdns2917038:0crwdne2917038:0

    4. Sony Xperia XA1 USB-C Module Replacement: crwdns2935265:05crwdnd2935265:01crwdnd2935265:03crwdne2935265:0 Sony Xperia XA1 USB-C Module Replacement: crwdns2935265:05crwdnd2935265:02crwdnd2935265:03crwdne2935265:0 Sony Xperia XA1 USB-C Module Replacement: crwdns2935265:05crwdnd2935265:03crwdnd2935265:03crwdne2935265:0
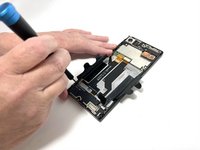
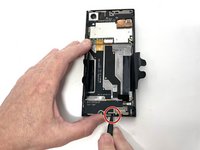
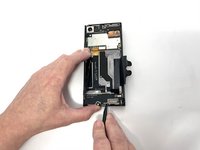
      • Insert a spudger into the opening above the charging port, and apply gentle pressure to free the speaker piece.

      • Once the piece is loose, use your hand to remove the speaker from the phone.

      crwdns2952109:0crwdne2952109:0

      crwdns2917038:0crwdne2917038:0

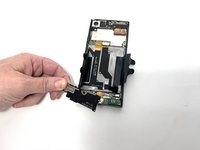
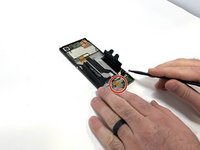
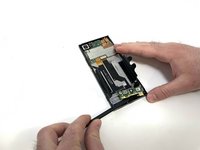
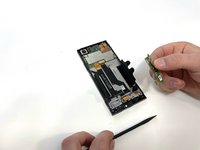
    1. Sony Xperia XA1 USB-C Module Replacement, USB-C Module: crwdns2935265:06crwdnd2935265:01crwdnd2935265:03crwdne2935265:0 Sony Xperia XA1 USB-C Module Replacement, USB-C Module: crwdns2935265:06crwdnd2935265:02crwdnd2935265:03crwdne2935265:0 Sony Xperia XA1 USB-C Module Replacement, USB-C Module: crwdns2935265:06crwdnd2935265:03crwdnd2935265:03crwdne2935265:0
      • Locate the connecting cable and use a spudger or iFixit Opening Tool to remove the connector.

      • Disconnect the wifi/Bluetooth antenna wire, located at the top right of the USB-C charger board.

      crwdns2952109:0crwdne2952109:0

      crwdns2917038:0crwdne2917038:0

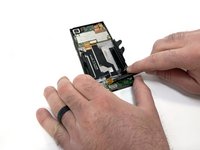
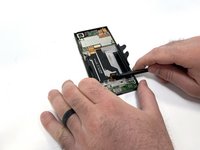
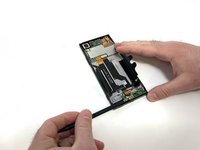
    2. Sony Xperia XA1 USB-C Module Replacement: crwdns2935265:07crwdnd2935265:01crwdnd2935265:03crwdne2935265:0 Sony Xperia XA1 USB-C Module Replacement: crwdns2935265:07crwdnd2935265:02crwdnd2935265:03crwdne2935265:0 Sony Xperia XA1 USB-C Module Replacement: crwdns2935265:07crwdnd2935265:03crwdnd2935265:03crwdne2935265:0
      • After removing the connector and antennas, you are able to pry the USB-C board using a plastic spudger.

      • Be cautious, little effort is required to lift up the board, if too much force is applied this could damage the board.

      crwdns2952109:0crwdne2952109:0

      crwdns2917038:0crwdne2917038:0

crwdns2915888:0crwdne2915888:0

To reassemble your device, follow these instructions in reverse order.

crwdns2935221:0crwdne2935221:0

sebastianh034

crwdns2935283:002/14/23crwdne2935283:0

253 crwdns2915208:0crwdne2915208:0

crwdns2935297:03crwdne2935297:0

crwdns2935287:0crwdne2935287:0

Utah Tech University, Team 1-4, McMurrin Spring 2023 crwdns2935289:0Utah Tech University, Team 1-4, McMurrin Spring 2023crwdne2935289:0

UTAHTECH-MCMURRIN-S23S1G4

crwdns2931471:03crwdne2931471:0

crwdns2935297:084crwdne2935297:0

crwdns2947410:01crwdne2947410:0

thanks a lot, super clear, done everything in ~10 minutes

Eugene - crwdns2934203:0crwdne2934203:0 crwdns2950251:0crwdne2950251:0
crwdns2917038:0crwdne2917038:0

crwdns2936625:0crwdne2936625:0:

crwdns2936751:024crwdne2936751:0 0

crwdns2936753:07crwdne2936753:0 7

crwdns2936753:030crwdne2936753:0 42

crwdns2942667:0crwdne2942667:0 864