crwdns2933423:0crwdne2933423:0

Sony Vaio VPCEB11FM Keyboard Replacement

crwdns2942213:0crwdne2942213:0

  1. Sony Vaio VPCEB11FM Keyboard Replacement, Battery: crwdns2935265:01crwdnd2935265:01crwdnd2935265:01crwdne2935265:0
    • Power down and disconnect the laptop from power supply.

    • Using your fingers, unlock the tab by pushing on the slide.

  2. Sony Vaio VPCEB11FM Keyboard Replacement: crwdns2935265:02crwdnd2935265:01crwdnd2935265:01crwdne2935265:0
    • While holding the release slide, use your thumb to lift the lip of the battery to pull it out.

  3. Sony Vaio VPCEB11FM Keyboard Replacement: crwdns2935265:03crwdnd2935265:01crwdnd2935265:01crwdne2935265:0
    • Pull the battery out.

  4. Sony Vaio VPCEB11FM Keyboard Replacement, DVD Drive: crwdns2935265:04crwdnd2935265:01crwdnd2935265:02crwdne2935265:0 Sony Vaio VPCEB11FM Keyboard Replacement, DVD Drive: crwdns2935265:04crwdnd2935265:02crwdnd2935265:02crwdne2935265:0
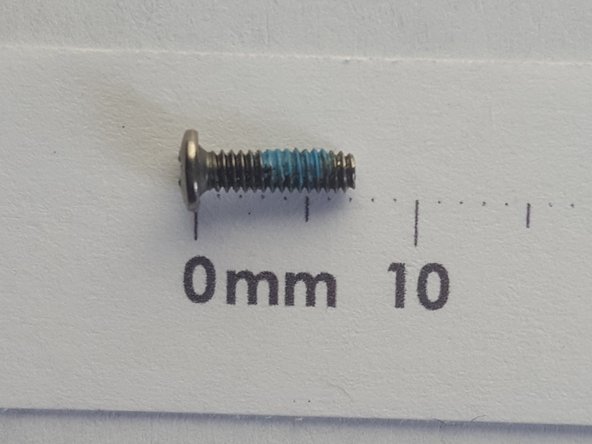
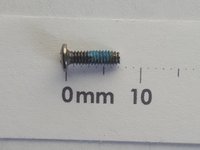
    • Remove the 7mm screws with the Phillips #1 Screwdriver.

  5. Sony Vaio VPCEB11FM Keyboard Replacement: crwdns2935265:05crwdnd2935265:01crwdnd2935265:01crwdne2935265:0
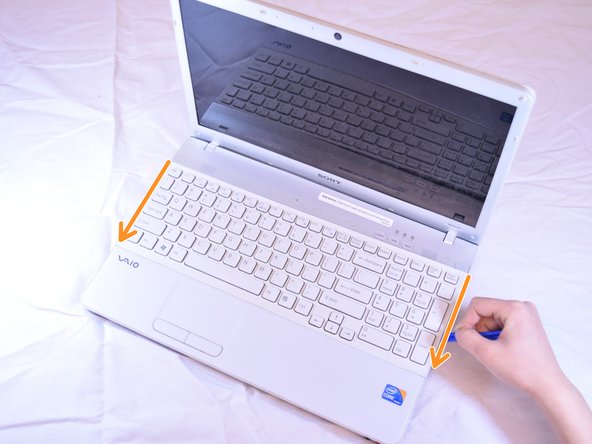
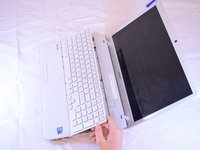
    • Grasp the DVD drive's face plate with your fingers and pull out.

  6. Sony Vaio VPCEB11FM Keyboard Replacement, Keyboard: crwdns2935265:06crwdnd2935265:01crwdnd2935265:03crwdne2935265:0 Sony Vaio VPCEB11FM Keyboard Replacement, Keyboard: crwdns2935265:06crwdnd2935265:02crwdnd2935265:03crwdne2935265:0 Sony Vaio VPCEB11FM Keyboard Replacement, Keyboard: crwdns2935265:06crwdnd2935265:03crwdnd2935265:03crwdne2935265:0
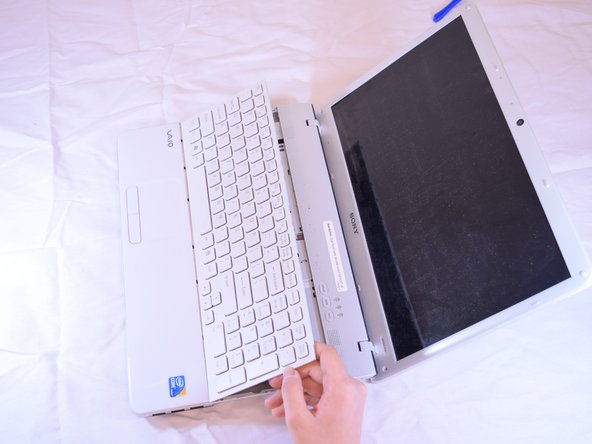
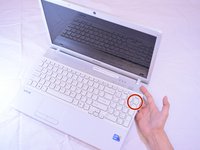
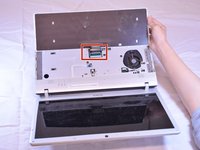
    • Within the DVD drive compartment, press on the hole to push the keyboard out of its placement.

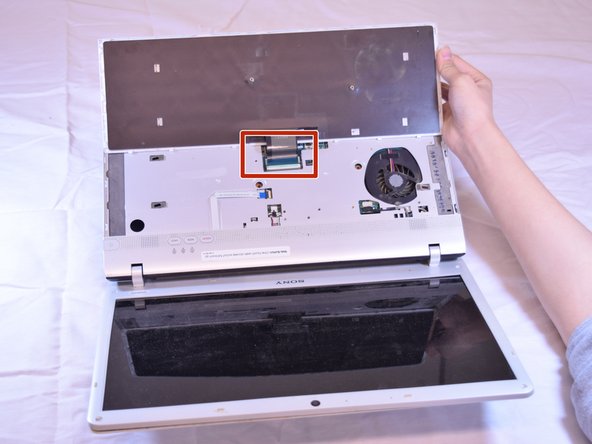
    • The keyboard may need to be loosened on its edges with a plastic spudger.

  7. Sony Vaio VPCEB11FM Keyboard Replacement: crwdns2935265:07crwdnd2935265:01crwdnd2935265:03crwdne2935265:0 Sony Vaio VPCEB11FM Keyboard Replacement: crwdns2935265:07crwdnd2935265:02crwdnd2935265:03crwdne2935265:0 Sony Vaio VPCEB11FM Keyboard Replacement: crwdns2935265:07crwdnd2935265:03crwdnd2935265:03crwdne2935265:0
    • Carefully pull the keyboard back to expose ribbon connector.

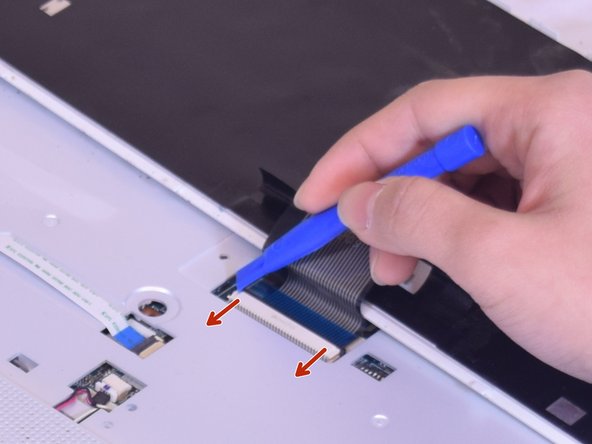
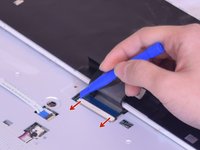
    • Using a spudger, or your finger tips, carefully slide the the ribbon keeper open.

crwdns2915888:0crwdne2915888:0

To reassemble your device, follow these instructions in reverse order.

crwdns2935227:0crwdne2935227:0

Maxine Filcher

crwdns2935283:001/30/17crwdne2935283:0

1,135 crwdns2915208:0crwdne2915208:0

crwdns2935297:08crwdne2935297:0

crwdns2915084:0crwdne2915084:0

UW Tacoma, Team 1-5, Rose Winter 2017 crwdns2935289:0UW Tacoma, Team 1-5, Rose Winter 2017crwdne2935289:0

UWT-ROSE-W17S1G5

crwdns2931471:04crwdne2931471:0

crwdns2935297:016crwdne2935297:0

crwdns2944067:00crwdne2944067:0

crwdns2917038:0crwdne2917038:0

crwdns2936625:0crwdne2936625:0:

crwdns2936751:024crwdne2936751:0 2

crwdns2936753:07crwdne2936753:0 7

crwdns2936753:030crwdne2936753:0 15

crwdns2942667:0crwdne2942667:0 1,933