crwdns2933423:0crwdne2933423:0

Sony Vaio PCG-161L Speakers Replacement

crwdns2942213:0crwdne2942213:0

  1. Sony Vaio PCG-161L Speakers Replacement, Keyboard: crwdns2935265:01crwdnd2935265:01crwdnd2935265:01crwdne2935265:0
    • Turn your device upside down and remove the 6 10mm screws attaching the back casing to the device using a phillips head screwdriver.

  2. Sony Vaio PCG-161L Speakers Replacement: crwdns2935265:02crwdnd2935265:01crwdnd2935265:02crwdne2935265:0 Sony Vaio PCG-161L Speakers Replacement: crwdns2935265:02crwdnd2935265:02crwdnd2935265:02crwdne2935265:0
    • Lift up underneath the keyboard using the iFixit opening tool to expose the ribbon wires connecting the keyboard to the motherboard.

  3. Sony Vaio PCG-161L Speakers Replacement: crwdns2935265:03crwdnd2935265:01crwdnd2935265:02crwdne2935265:0 Sony Vaio PCG-161L Speakers Replacement: crwdns2935265:03crwdnd2935265:02crwdnd2935265:02crwdne2935265:0
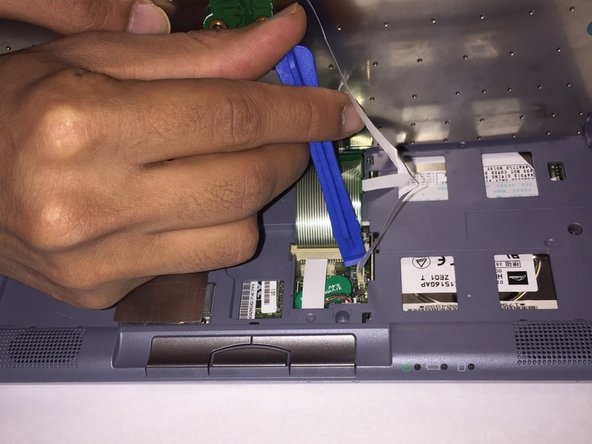
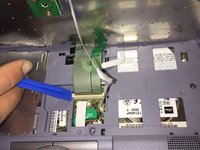
    • The two ribbon cables connecting the keyboard to the motherboard are held in using zero insertion force (ZIF) connectors.

    • Use a plastic opening tool or your fingernail to flip up the small retaining flaps, then pull the ribbon cables out of their connectors.

  4. Sony Vaio PCG-161L Speakers Replacement, Speakers: crwdns2935265:04crwdnd2935265:01crwdnd2935265:01crwdne2935265:0
    • Remove the three 10 mm screws holding the casing to the top of the motherboard using a Phillips screwdriver.

  5. Sony Vaio PCG-161L Speakers Replacement: crwdns2935265:05crwdnd2935265:01crwdnd2935265:01crwdne2935265:0
    • Remove the 6 mm Phillips #0 screw on the left side of the battery that holds the casing to the device.

  6. Sony Vaio PCG-161L Speakers Replacement: crwdns2935265:06crwdnd2935265:01crwdnd2935265:01crwdne2935265:0
    • Turn the device upside down and remove the 6 mm Phillips #0 screw holding the casing to the device.

  7. Sony Vaio PCG-161L Speakers Replacement: crwdns2935265:07crwdnd2935265:01crwdnd2935265:01crwdne2935265:0
    • Remove the top casing by lifting up on the plastic exposing the two speakers.

  8. Sony Vaio PCG-161L Speakers Replacement: crwdns2935265:08crwdnd2935265:01crwdnd2935265:01crwdne2935265:0
    • Remove the two 4 mm screws attaching the broken speaker to the casing.

    • Each speaker has two 4mm screws holding it to the casing. If you are removing both speakers, remove all four screws.

  9. Sony Vaio PCG-161L Speakers Replacement: crwdns2935265:09crwdnd2935265:01crwdnd2935265:01crwdne2935265:0
    • Disconnect the wire from the board by pulling the wire out of the harness.

    • These harnesses do not have any clips or tabs. Simply pull on the wire and it will come out of the harness.

crwdns2915888:0crwdne2915888:0

To reassemble your device, follow these instructions in reverse order.

crwdns2935227:0crwdne2935227:0
Roman Alshehri

crwdns2935283:003/08/17crwdne2935283:0

407 crwdns2915208:0crwdne2915208:0

crwdns2935297:04crwdne2935297:0

crwdns2915084:0crwdne2915084:0

UMass Dartmouth, Team S3-G2, Botvin Spring 2017 crwdns2935289:0UMass Dartmouth, Team S3-G2, Botvin Spring 2017crwdne2935289:0

UMASSD-BOTVIN-S17S3G2

crwdns2931471:03crwdne2931471:0

crwdns2935297:08crwdne2935297:0

crwdns2944067:00crwdne2944067:0

crwdns2917038:0crwdne2917038:0

crwdns2936625:0crwdne2936625:0:

crwdns2936751:024crwdne2936751:0 1

crwdns2936753:07crwdne2936753:0 1

crwdns2936753:030crwdne2936753:0 13

crwdns2942667:0crwdne2942667:0 296