crwdns2915892:0crwdne2915892:0
This is an easy to follow, step by step guide to help aid in the replacement of the hard drive for the Sony Vaio Fit SVF14A190X. The hard drive is a component that store and retrieves information in the device.
crwdns2942213:0crwdne2942213:0
-
-
Use the Phillips head screw driver to remove the eleven 6 mm screws.
-
Use the Phillips head screw driver to remove the one 4 mm screw securing the CD drive.
-
-
-
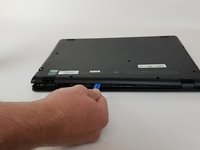
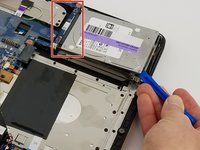
Insert the plastic opening tool into the slit of the CD drive.
-
Then pull it outwards.
-
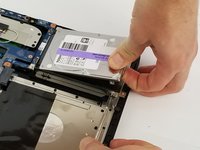
Grab the CD drive with your hand.
-
Take the CD drive all the way out.
-
-
-
-
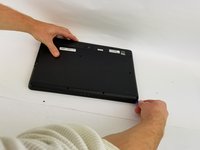
Insert the plastic opening tool into the slit between the back cover and the rest of the computer.
-
Move the plastic opening tool around all sides of the device.
-
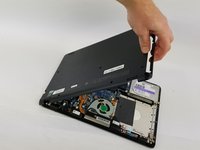
Peel off the back cover.
-
-
-
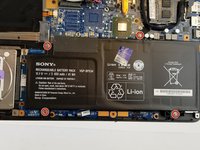
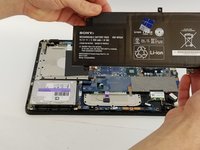
Use the Phillips head screw driver to remove the four 7 mm screws.
-
Lift the battery out with your hand.
-
-
-
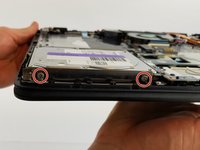
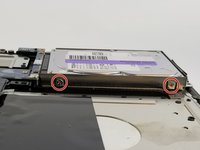
Use the Phillips head screw driver to remove four 4mm screws located on both sides of the hard drive.
-
-
-
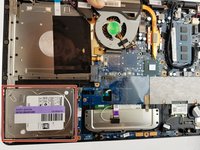
Use a plastic opening tool to lift the hard drive up to the point where it can be grabbed.
-
Pull the hard drive horizontally to separate it from it's connection.
-


To reassemble your device, follow these instructions in reverse order.
crwdns2935287:0crwdne2935287:0

USF Tampa, Team S11-G3, Cheng Spring 2018 crwdns2935289:0USF Tampa, Team S11-G3, Cheng Spring 2018crwdne2935289:0
USFT-CHENG-S18S11G3
crwdns2931471:04crwdne2931471:0
crwdns2935297:011crwdne2935297:0