crwdns2933423:0crwdne2933423:0

Sony VAIO PCG-F580 IDE Hard Drive Replacement

crwdns2942213:0crwdne2942213:0

  1. Sony VAIO PCG-F580 IDE Hard Drive Replacement, How to Open Sony VAIO PCG-F580: crwdns2935265:01crwdnd2935265:01crwdnd2935265:03crwdne2935265:0 Sony VAIO PCG-F580 IDE Hard Drive Replacement, How to Open Sony VAIO PCG-F580: crwdns2935265:01crwdnd2935265:02crwdnd2935265:03crwdne2935265:0 Sony VAIO PCG-F580 IDE Hard Drive Replacement, How to Open Sony VAIO PCG-F580: crwdns2935265:01crwdnd2935265:03crwdnd2935265:03crwdne2935265:0
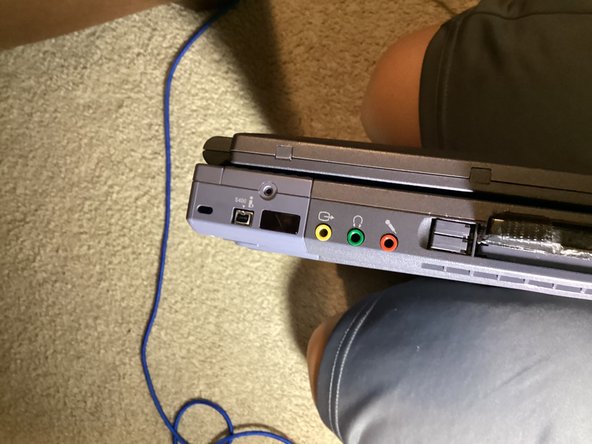
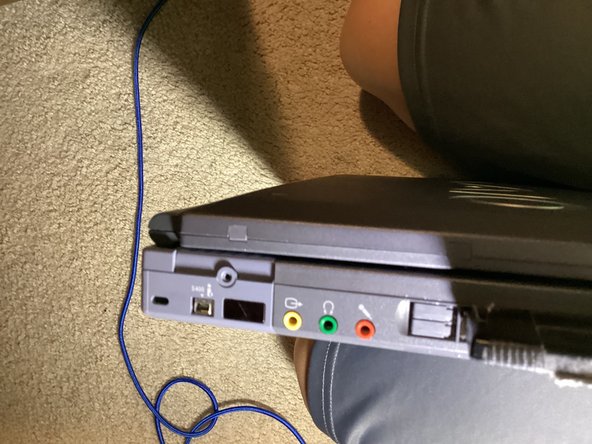
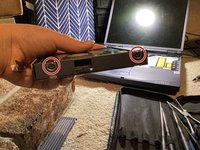
    • On the side with the audio ports, there is a Philips screw. Unscrew it.

    • Push the loose plastic piece, this will loosen the daughterboard from the main case.

  2. Sony VAIO PCG-F580 IDE Hard Drive Replacement, Taking Off the Daughterboard: crwdns2935265:02crwdnd2935265:01crwdnd2935265:03crwdne2935265:0 Sony VAIO PCG-F580 IDE Hard Drive Replacement, Taking Off the Daughterboard: crwdns2935265:02crwdnd2935265:02crwdnd2935265:03crwdne2935265:0 Sony VAIO PCG-F580 IDE Hard Drive Replacement, Taking Off the Daughterboard: crwdns2935265:02crwdnd2935265:03crwdnd2935265:03crwdne2935265:0
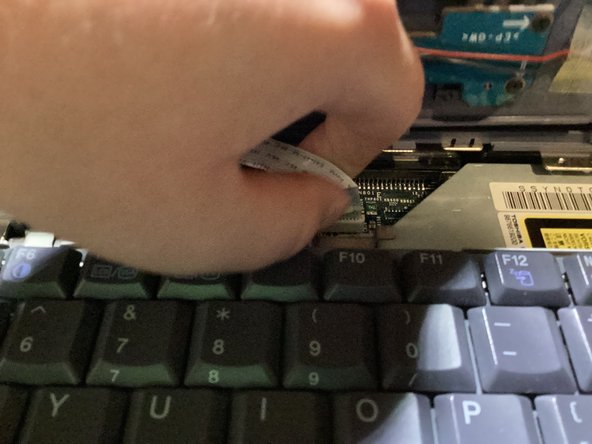
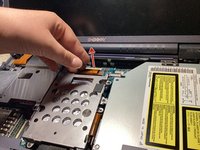
    • Open the lid, and pull up on the daughterboard enough to see the ribbon cable.

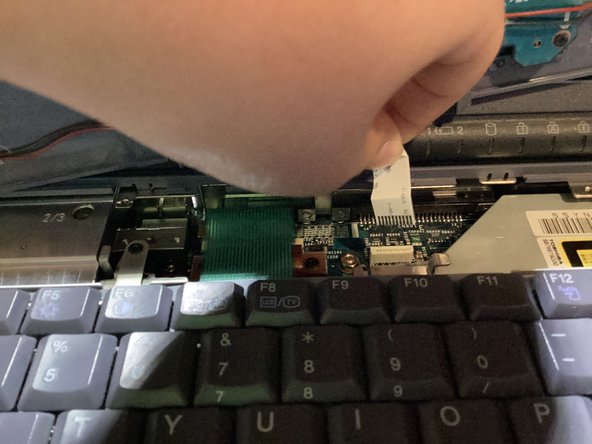
    • Pull up on the ribbon cable to release it. Don't worry, if you pull it straight up, there will be no damage.

    • Set the daughterboard to the side for now.

  3. Sony VAIO PCG-F580 IDE Hard Drive Replacement, The Keyboard: crwdns2935265:03crwdnd2935265:01crwdnd2935265:03crwdne2935265:0 Sony VAIO PCG-F580 IDE Hard Drive Replacement, The Keyboard: crwdns2935265:03crwdnd2935265:02crwdnd2935265:03crwdne2935265:0 Sony VAIO PCG-F580 IDE Hard Drive Replacement, The Keyboard: crwdns2935265:03crwdnd2935265:03crwdnd2935265:03crwdne2935265:0
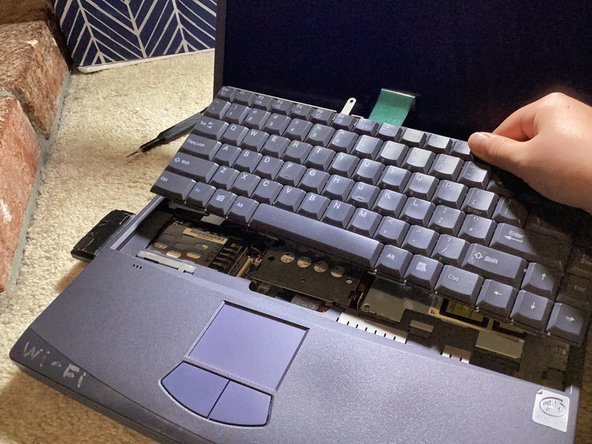
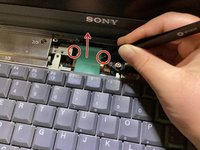
    • Unscrew the Philips screw at the top of the keyboard.

    • Remove the ribbon cable by pulling up on the plastic tabs on either sides of the socket with tweezers, then lifting it straight out.

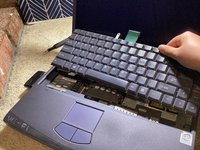
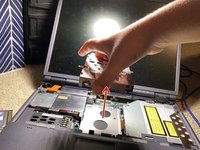
    • Lift the keyboard up at an angle, towards the screen.

    • Note: If you hear what sounds like peeling, that's normal.

  4. Sony VAIO PCG-F580 IDE Hard Drive Replacement, The Ribbon Cable: crwdns2935265:04crwdnd2935265:01crwdnd2935265:02crwdne2935265:0 Sony VAIO PCG-F580 IDE Hard Drive Replacement, The Ribbon Cable: crwdns2935265:04crwdnd2935265:02crwdnd2935265:02crwdne2935265:0
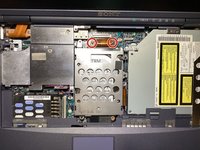
    • Unscrew the Philips screws holding the cable into the socket.

    • Pull up on the end of the cable with two fingers.

  5. Sony VAIO PCG-F580 IDE Hard Drive Replacement, The Outer Casing: crwdns2935265:05crwdnd2935265:01crwdnd2935265:02crwdne2935265:0 Sony VAIO PCG-F580 IDE Hard Drive Replacement, The Outer Casing: crwdns2935265:05crwdnd2935265:02crwdnd2935265:02crwdne2935265:0
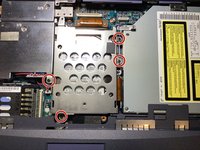
    • Unscrew the Philips screws holding the drive in place.

    • Lift the drive straight up and out of the laptop.

  6. Sony VAIO PCG-F580 IDE Hard Drive Replacement, The Drive Itself: crwdns2935265:06crwdnd2935265:01crwdnd2935265:02crwdne2935265:0 Sony VAIO PCG-F580 IDE Hard Drive Replacement, The Drive Itself: crwdns2935265:06crwdnd2935265:02crwdnd2935265:02crwdne2935265:0
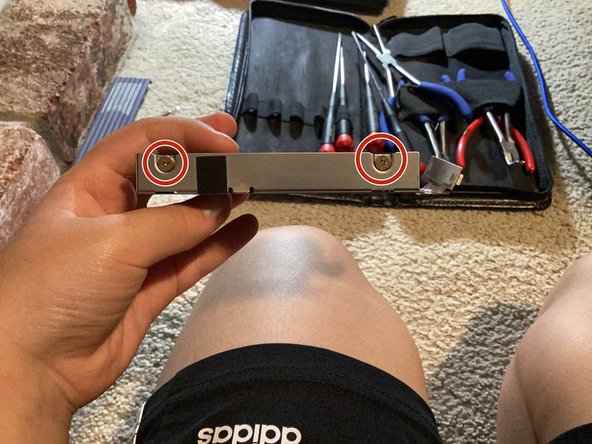
    • Unscrew the Phillips screws holding the hard drive itself into place.

crwdns2915888:0crwdne2915888:0

To reassemble your device, follow these instructions in reverse order.

CI S

crwdns2935283:001/11/25crwdne2935283:0

498 crwdns2915208:0crwdne2915208:0

crwdns2935297:04crwdne2935297:0

crwdns2947412:00crwdne2947412:0

crwdns2917038:0crwdne2917038:0

crwdns2936625:0crwdne2936625:0:

crwdns2936751:024crwdne2936751:0 1

crwdns2936753:07crwdne2936753:0 1

crwdns2936753:030crwdne2936753:0 8

crwdns2942667:0crwdne2942667:0 40