crwdns2933423:0crwdne2933423:0

Sony RMT-D197A Battery Contactor Repair

crwdns2942213:0crwdne2942213:0

  1. Sony RMT-D197A Battery Contactor Repair, Sony RMT-D197A Battery Contactor Repair: crwdns2935265:01crwdnd2935265:01crwdnd2935265:02crwdne2935265:0 Sony RMT-D197A Battery Contactor Repair, Sony RMT-D197A Battery Contactor Repair: crwdns2935265:01crwdnd2935265:02crwdnd2935265:02crwdne2935265:0
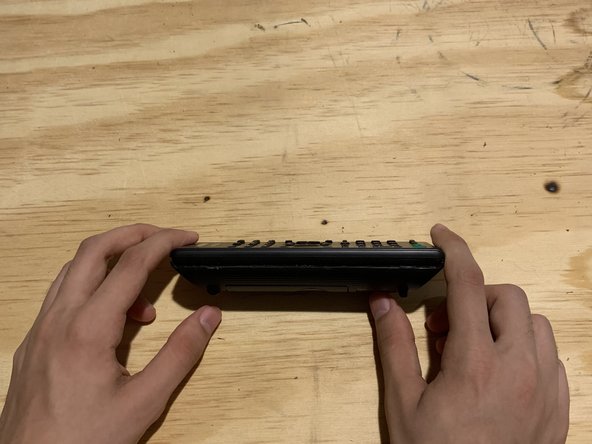
    • Place the remote on a solid, sturdy surface.

    • Use a putty knife to gently pry open the remote.

  2. Sony RMT-D197A Battery Contactor Repair: crwdns2935265:02crwdnd2935265:01crwdnd2935265:02crwdne2935265:0 Sony RMT-D197A Battery Contactor Repair: crwdns2935265:02crwdnd2935265:02crwdnd2935265:02crwdne2935265:0
    • Remove the front panel from the remote.

  3. Sony RMT-D197A Battery Contactor Repair: crwdns2935265:03crwdnd2935265:01crwdnd2935265:01crwdne2935265:0
    • Wear safety glasses and use caution when handling a hot soldering iron.

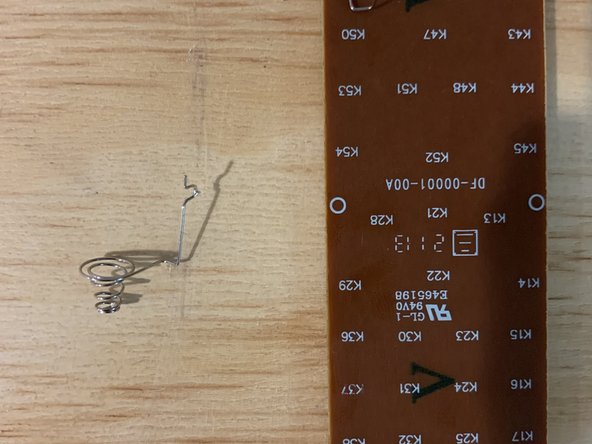
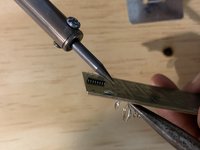
    • Use the soldering iron to gently desolder the damaged battery contactor.

    • Keep in mind the battery contactor can easily break so make sure to be gentle with the soldering iron.

  4. Sony RMT-D197A Battery Contactor Repair: crwdns2935265:04crwdnd2935265:01crwdnd2935265:02crwdne2935265:0 Sony RMT-D197A Battery Contactor Repair: crwdns2935265:04crwdnd2935265:02crwdnd2935265:02crwdne2935265:0
    • Use a pair of tweezers to remove the spring from the contactor.

  5. Sony RMT-D197A Battery Contactor Repair: crwdns2935265:05crwdnd2935265:01crwdnd2935265:01crwdne2935265:0
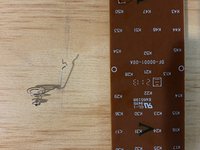
    • Use the soldering iron to melt solder onto the empty hole.

    • Make sure to accurately place the spring into the correct position.

  6. Sony RMT-D197A Battery Contactor Repair: crwdns2935265:06crwdnd2935265:01crwdnd2935265:02crwdne2935265:0 Sony RMT-D197A Battery Contactor Repair: crwdns2935265:06crwdnd2935265:02crwdnd2935265:02crwdne2935265:0
    • Reattach the two halves of the remote.

  7. Sony RMT-D197A Battery Contactor Repair: crwdns2935265:07crwdnd2935265:01crwdnd2935265:01crwdne2935265:0
    • Insert batteries and try out your remote.

crwdns2935217:0crwdne2935217:0

crwdns2935229:03crwdne2935229:0

Ahmed Sultan

crwdns2935283:009/10/21crwdne2935283:0

193 crwdns2915208:0crwdne2915208:0

crwdns2935295:0crwdne2935295:0

crwdns2915084:0crwdne2915084:0

York University, Team 2-10, O'Regan Fall 2021 crwdns2935289:0York University, Team 2-10, O'Regan Fall 2021crwdne2935289:0

YORK-O'REGAN-F21S2G10

crwdns2934841:01crwdne2934841:0

crwdns2935297:02crwdne2935297:0

crwdns2917034:0crwdne2917034:0

As the remote is already disassembled, I took the opportunity to clean the contacts for all the buttons using alcohol.

Jason Lee - crwdns2934203:0crwdne2934203:0

crwdns2917038:0crwdne2917038:0

crwdns2936625:0crwdne2936625:0:

crwdns2936751:024crwdne2936751:0 3

crwdns2936753:07crwdne2936753:0 10

crwdns2936753:030crwdne2936753:0 16

crwdns2942667:0crwdne2942667:0 408