crwdns2933423:0crwdne2933423:0

Sony PS-LX300USB Gears Replacement

crwdns2942213:0crwdne2942213:0

  1. Sony PS-LX300USB Gears Replacement, Drive Belt: crwdns2935265:01crwdnd2935265:01crwdnd2935265:02crwdne2935265:0 Sony PS-LX300USB Gears Replacement, Drive Belt: crwdns2935265:01crwdnd2935265:02crwdnd2935265:02crwdne2935265:0
    • Lift the rubber mat, and put it to the side. It should be easy to remove, because it simply rests on a metal platter without anything securing it down.

  2. Sony PS-LX300USB Gears Replacement: crwdns2935265:02crwdnd2935265:01crwdnd2935265:01crwdne2935265:0
    • Turn the platter so that the motor pulley can be seen through one of the two outer holes in the platter.

    • If the drive belt is hooked around the motor pulley, unhook it.

    • When reassembling to device, don't forget to hook the new drive belt to the motor pulley.

  3. Sony PS-LX300USB Gears Replacement: crwdns2935265:03crwdnd2935265:01crwdnd2935265:01crwdne2935265:0
    • Grasping the platter by its two inner holes, lift it upwards.

    • Removing the platter may take a small amount of force. If the pulley is unhooked and the tone arm is safely to the side, don’t fear using a small amount of force in lifting the platter.

    • If you haven’t yet unhooked the drive belt, the motor pulley and the belt could sustain damage.

  4. Sony PS-LX300USB Gears Replacement: crwdns2935265:04crwdnd2935265:01crwdnd2935265:02crwdne2935265:0 Sony PS-LX300USB Gears Replacement: crwdns2935265:04crwdnd2935265:02crwdnd2935265:02crwdne2935265:0
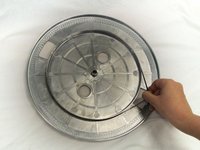
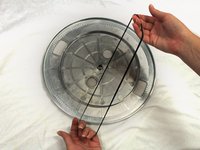
    • Peel the drive belt from the inner ridge of the metal platter and put it to the side.

    • Sometimes, the drive belt can fall off the platter during deconstruction. If this is the case, simply take it out of the device wherever it is.

  5. Sony PS-LX300USB Gears Replacement, Gears: crwdns2935265:05crwdnd2935265:01crwdnd2935265:01crwdne2935265:0
    • Use screwdriver to remove the four Phillips #2 screws holding in the gears.

    • Remove the large gear.

  6. Sony PS-LX300USB Gears Replacement: crwdns2935265:06crwdnd2935265:01crwdnd2935265:01crwdne2935265:0
    • Desolder the ground wire from its base.

    • Remove the small gear and its base.

  7. Sony PS-LX300USB Gears Replacement: crwdns2935265:07crwdnd2935265:01crwdnd2935265:01crwdne2935265:0
    • Place the replacement small gear in its position.

    • Push and hold the metal knob close to the spring.

  8. Sony PS-LX300USB Gears Replacement: crwdns2935265:08crwdnd2935265:01crwdnd2935265:01crwdne2935265:0
    • While holding the knob back, place the large gear inside with the open part of the gear facing away from the small gear.

    • Release the knob and spin the large gear counterclockwise.

crwdns2915888:0crwdne2915888:0

To reassemble your device, follow solder the wire back, screw the gears back in, and step one in reverse order.

crwdns2935227:0crwdne2935227:0

Christopher Slaughter

crwdns2935283:009/27/17crwdne2935283:0

401 crwdns2915208:0crwdne2915208:0

crwdns2935297:02crwdne2935297:0

crwdns2915084:0crwdne2915084:0

Cal Poly, Team S8-G3, Banghart Fall 2017 crwdns2935289:0Cal Poly, Team S8-G3, Banghart Fall 2017crwdne2935289:0

CPSU-BANGHART-F17S8G3

crwdns2931471:05crwdne2931471:0

crwdns2935297:05crwdne2935297:0

crwdns2917034:0crwdne2917034:0

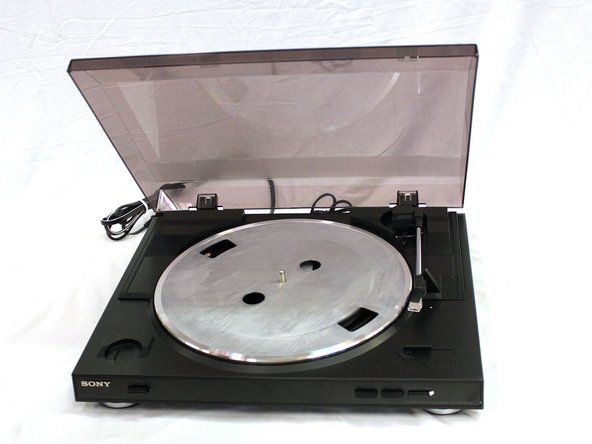
The directions in this guide work for the PS-LX310BT and the spindle assembly replacement part works with it as well. I can confirm this, I ordered a replacement spindle assembly because mine was bent and it worked perfectly.

Cr4shMyCar - crwdns2934203:0crwdne2934203:0

crwdns2917038:0crwdne2917038:0

crwdns2936625:0crwdne2936625:0:

crwdns2936751:024crwdne2936751:0 5

crwdns2936753:07crwdne2936753:0 13

crwdns2936753:030crwdne2936753:0 35

crwdns2942667:0crwdne2942667:0 3,001