crwdns2942213:0crwdne2942213:0
-
-
Find the arrow on the battery cover on the back of the device.
-
While pressing down on the arrow, slide the cover towards the bottom of the recorder until it clicks.
-
-
-
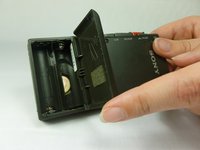
Lift the cover and remove the batteries.
-
-
-
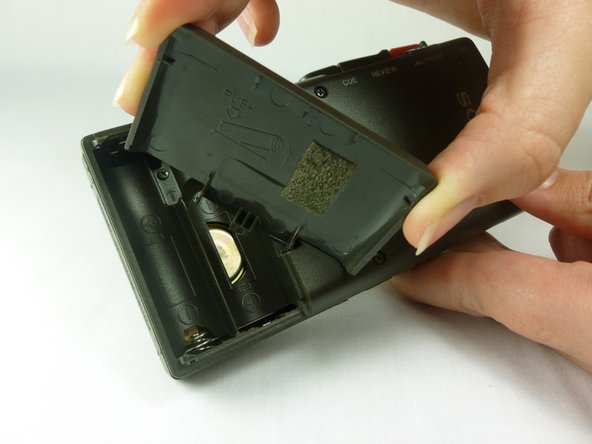
Remove the battery cover by first tilting it so it is at a right angle with the rest of the device.
-
Next, twist it to the side as shown in the second picture. The lid should simply snap off.
-
-
-
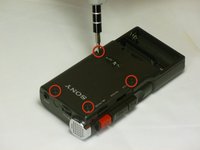
Use a #00 Phillips head screwdriver to remove the four (1.7x16 mm) screws from the back case.
-
Next, use the same screwdriver to unscrew the (1.7X5 mm) screw, which is located inside the battery compartment.
-
-
-
-
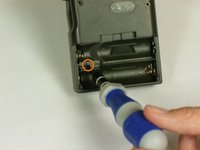
Use a spudger to push in the two tabs located on the bottom of the device.
-
-
-
With a firm grip on the larger half, remove the back cover by lifting first on the battery area.
-
-
-
A black and a red wire connect the microphone to the motherboard as shown in the bottom left of the picture.
-
-
crwdns2935267:0crwdne2935267:0Tweezers$4.99
-
The wires are held down with a piece of black tape.
-
Remove the tape with a pair of tweezers.
-
-
-
Desolder the two connections between the wires and the motherboard. Make sure that the two solder points do not melt together.
-
-
-
Now that the wires are disconnected from the motherboard, you can simply pull the mic out, away from the top of the device.
-


To reassemble your device, follow these instructions in reverse order.
To reassemble your device, follow these instructions in reverse order.

crwdns2915084:0crwdne2915084:0

Cal Poly, Team 10-34, Amido Winter 2012 crwdns2935289:0Cal Poly, Team 10-34, Amido Winter 2012crwdne2935289:0
CPSU-AMIDO-W12S10G34
crwdns2931471:04crwdne2931471:0
crwdns2935297:07crwdne2935297:0