crwdns2933423:0crwdne2933423:0

Sony ICF-C1iPMK2 Control Buttons Replacement

crwdns2942213:0crwdne2942213:0

  1. Sony ICF-C1iPMK2 Control Buttons Replacement, Control Buttons: crwdns2935265:01crwdnd2935265:01crwdnd2935265:03crwdne2935265:0 Sony ICF-C1iPMK2 Control Buttons Replacement, Control Buttons: crwdns2935265:01crwdnd2935265:02crwdnd2935265:03crwdne2935265:0 Sony ICF-C1iPMK2 Control Buttons Replacement, Control Buttons: crwdns2935265:01crwdnd2935265:03crwdnd2935265:03crwdne2935265:0
    • Remove the 1 cm Phillips #00 head screws.

    • Use a plastic spudger to pry the back chassis away from the front.

  2. Sony ICF-C1iPMK2 Control Buttons Replacement: crwdns2935265:02crwdnd2935265:01crwdnd2935265:03crwdne2935265:0 Sony ICF-C1iPMK2 Control Buttons Replacement: crwdns2935265:02crwdnd2935265:02crwdnd2935265:03crwdne2935265:0 Sony ICF-C1iPMK2 Control Buttons Replacement: crwdns2935265:02crwdnd2935265:03crwdnd2935265:03crwdne2935265:0
    • This step contains ribbon cables. Be careful to not bend or rip these fragile cables, to protect your device.

    • Open the back chassis.

    • Remove the top ribbon cable by pulling it straight out of the port.

  3. Sony ICF-C1iPMK2 Control Buttons Replacement: crwdns2935265:03crwdnd2935265:01crwdnd2935265:03crwdne2935265:0 Sony ICF-C1iPMK2 Control Buttons Replacement: crwdns2935265:03crwdnd2935265:02crwdnd2935265:03crwdne2935265:0 Sony ICF-C1iPMK2 Control Buttons Replacement: crwdns2935265:03crwdnd2935265:03crwdnd2935265:03crwdne2935265:0
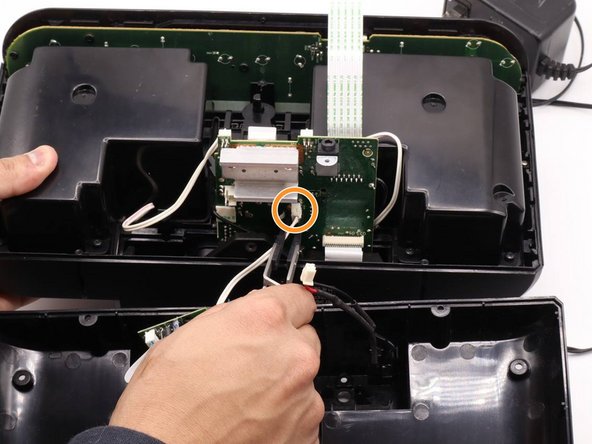
    • Disconnect the power connector.

    • Disconnect the AUX port connector.

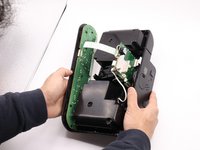
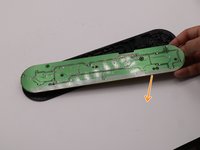
    • Slide the buttons out of the front chassis.

  4. Sony ICF-C1iPMK2 Control Buttons Replacement: crwdns2935265:04crwdnd2935265:01crwdnd2935265:02crwdne2935265:0 Sony ICF-C1iPMK2 Control Buttons Replacement: crwdns2935265:04crwdnd2935265:02crwdnd2935265:02crwdne2935265:0
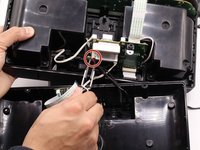
    • Remove the 1 cm Phillips #00 screws on the board.

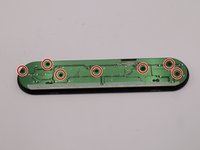
    • Pull the plastic buttons off of the housing.

  5. Sony ICF-C1iPMK2 Control Buttons Replacement: crwdns2935265:05crwdnd2935265:01crwdnd2935265:02crwdne2935265:0 Sony ICF-C1iPMK2 Control Buttons Replacement: crwdns2935265:05crwdnd2935265:02crwdnd2935265:02crwdne2935265:0
    • This next step requires soldering. Be careful when handling a soldering iron as you can easily burn yourself on it and the hot liquid solder. Make sure to desolder and solder in a well ventilated area to not inhale heavy metals, possibly lead. (If you buy iFixit solder there will not be any lead in the solder, but it is still best practice)

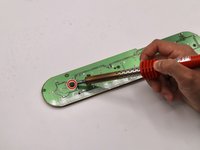
    • Place the soldering iron onto the solder joint of the broken button.

    • Once melted, remove the button, being careful to not touch the melted metal.

    • Replace the button and touch the soldering iron to the solder wire over the button contacts. Refer to the prerequisite guide if you need more help.

crwdns2915888:0crwdne2915888:0

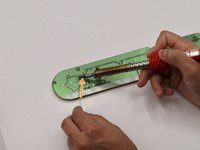
Give the new solder 30 to 45 seconds to cool before reassembling.

To reassemble your device, follow these instructions in reverse order.

crwdns2935227:0crwdne2935227:0

KyndleGabel

crwdns2935283:009/15/23crwdne2935283:0

530 crwdns2915208:0crwdne2915208:0

crwdns2935297:03crwdne2935297:0

crwdns2915084:0crwdne2915084:0

University of North Texas, Team 6-5, Kilpatrick Fall 2023 crwdns2935289:0University of North Texas, Team 6-5, Kilpatrick Fall 2023crwdne2935289:0

UNT-KILPATRICK-F23S6G5

crwdns2931471:05crwdne2931471:0

crwdns2935297:05crwdne2935297:0

crwdns2944067:00crwdne2944067:0

crwdns2917038:0crwdne2917038:0

crwdns2936625:0crwdne2936625:0:

crwdns2936751:024crwdne2936751:0 0

crwdns2936753:07crwdne2936753:0 0

crwdns2936753:030crwdne2936753:0 5

crwdns2942667:0crwdne2942667:0 91