crwdns2915892:0crwdne2915892:0
How to open the Sony ICD-UX570 to swap out the lithium battery.
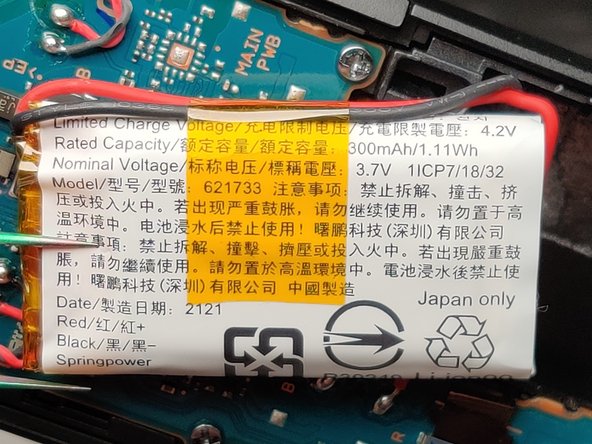
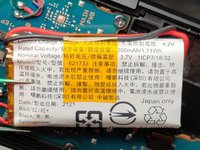
I ended up keeping the original battery. The battery label says 621733, which would be a battery 6.2mm thick, 17mm wide and 33mm long, which I couldn't find.
I suspect it's really a 602030, which would be 6mm thick, 20mm wide and 30mm long, but I can't confirm it. Anyway, you can find plenty of single cell batteries on the web with a similar capacity, for pretty cheap.
If in doubt choose one that will definitely fit and the double sided tape should keep it from wiggling around in the case. If in doubt you can add a small foam spacer to fill the extra space.
crwdns2942213:0crwdne2942213:0
-
-
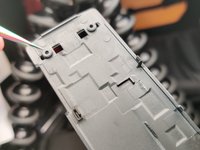
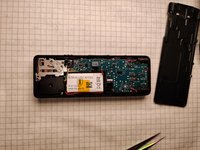
Wedge a thin and pointy tool (I used a knife) under the screw cover and pry it open.
-
-
-
-
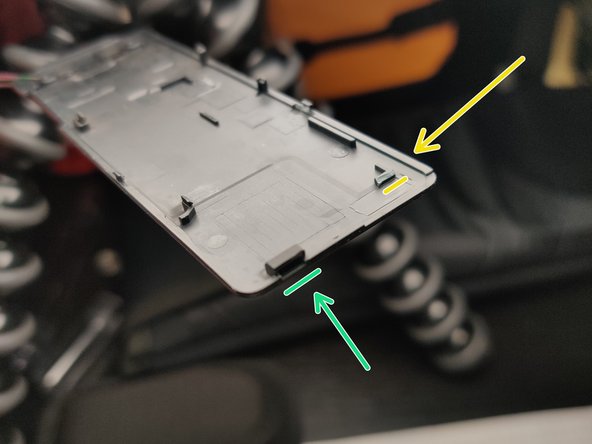
I broke the yellow clip, I don't know if it's possible to keep it intact.
-
The green bit holds a metal tooth from the main case: at that point pull the back cover towards the top of the recorder.
-
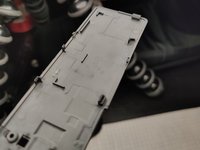
Using a thin pry tool undo the back cover clips.
-
Start at the top and work your way around.
-
On the side with the USB connector slider there's a strong clip, I suspect at that point you have to pull up towards the top of the recorder. I broke off mine trying but it doesn't show once closed.
-
-
-
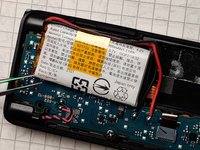
Pull up the battery with a pry tool, making sure not to pierce it. It's held down with a bit of double sided tape.
-
Desolder the wires and install the new battery.
-


To reassemble your device, follow these instructions in reverse order.
To reassemble your device, follow these instructions in reverse order.
crwdns2935221:0crwdne2935221:0
crwdns2935227:0crwdne2935227:0
crwdns2947412:06crwdne2947412:0
Thank you for the great instructions! I just replaced my battery and the new one is charging. The instructions were clear and simple to follow. I am not electrically inclined at all, but this was easy. Instead of soldering, I cut the wires from the old battery near the battery terminal so I had wire to work with. I then tied the new wires to the old ones and used electrical tape. I've never soldered before, so this was an easy alternative. Thank you again!
Good thinking. Glad to hear it was useful!
Ugo -
Sir please play a video for bty replacement
does anyone have advice for a ux 560?
The back of UX560 looks like it has the same piece to be removed, hiding screws.
Ugo -
apa code ic charger untuk type ini???