crwdns2915892:0crwdne2915892:0
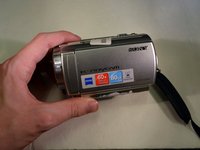
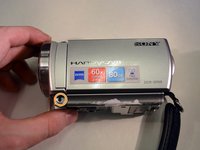
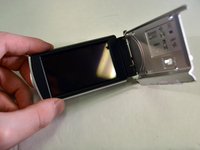
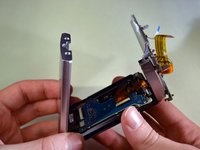
Can't view your pictures anymore after dropping your camera, and breaking the screen ? This guide will help you replace your LCD screen, so you can enjoy your camera once again.
crwdns2942213:0crwdne2942213:0
-
crwdns2935267:0crwdne2935267:0Anti-Static Wrist Strap$7.95
-
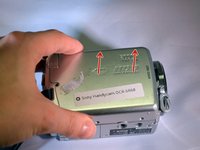
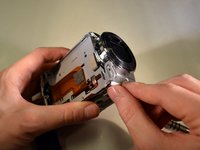
Unfasten the hand strap.
-
-
-
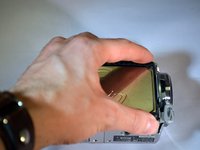
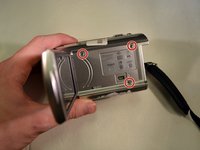
Place device on left side with front lens facing right.
-
Using a JIS size #00 precision Phillips screwdriver, unscrew the left middle 3mm Phillips screw.
-
Open the "DC IN" plastic tab (Second 3mm Phillips screw is revealed).
-
Unscrew the second 3mm Phillips screw.
-
-
-
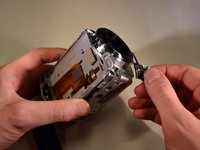
Turn device over onto its top with the front lens facing right.
-
Unscrew the top left and top right 3mm Philips screws.
-
-
-
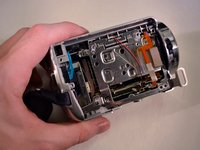
Remove the right side case panel by pulling up.
-
-
-
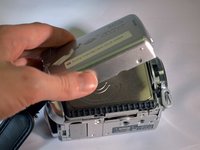
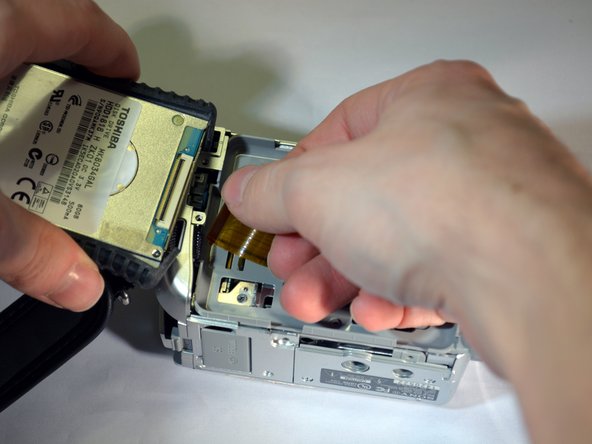
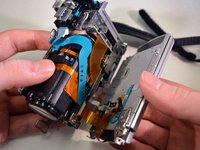
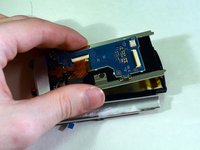
Using your fingers, lift the HDD from its right end, pivoting on its left end.
-
-
-
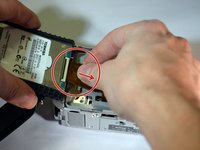
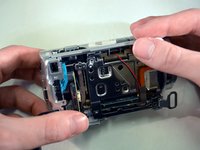
While securely holding the HDD in your left hand, use the soft pad of your right hand fingers to gently pull the ribbon wire out of its socket, toward your right.
-
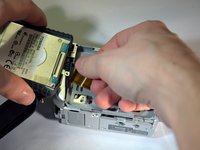
Replace HDD.
-
-
-
Once completed set aside HDD.
-
-
-
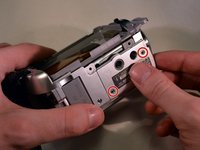
Remove the right and middle bottom 3mm Philips screws from the bottom of the device.
-
Then remove panel.
-
-
-
-
On the left side of the device, remove all visible 3mm Philips screws.
-
-
-
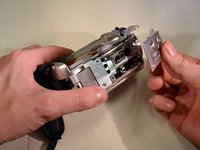
On the right side of the device, remove the two black 3mm Philips screws.
-
Remove the grey tray by lifting out and away.
-
-
-
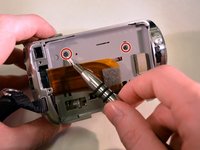
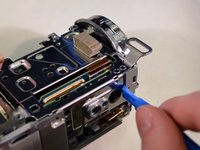
Using the black spudger, carefully open the little black clasp on the large ribbon wire port.
-
-
crwdns2935267:0crwdne2935267:0Tweezers$4.99
-
Using the blunt tweezers, unplug the red and black wire by gently pulling out and away.
-
Unplug the small ribbon wire.
-
-
-
On the right side of the device, remove the top three right 3mm Philips screws.
-
-
-
On the back of the device, remove the top 3mm Philips screw.
-
-
-
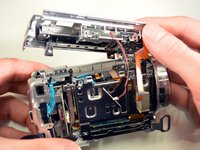
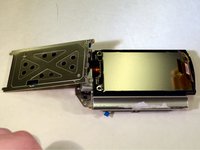
Remove top of device by lifting up and away.
-
-
-
On the top of the device, remove the top right 3mm Philips screw.
-
On the left side of the device, remove the bottom left 3mm Philips screw.
-
-
-
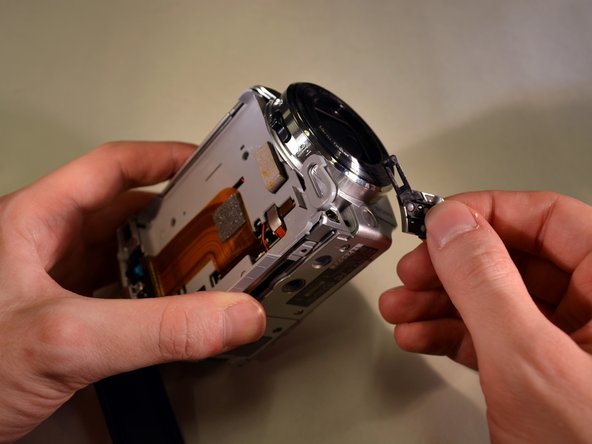
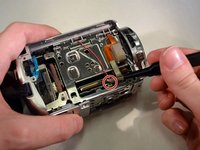
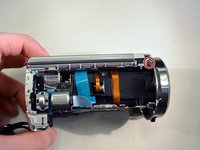
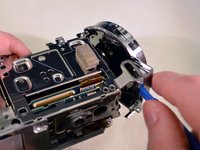
Use the blue plastic opening tool to pop the shutter assembly off the device.
-
-
-
On the left side of the device, remove the middle left 3mm Philips screw.
-
-
-
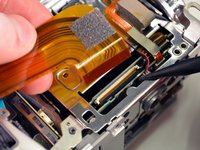
Carefully pivot the loose left side of the device until the ribbon wires are fully exposed.
-
-
-
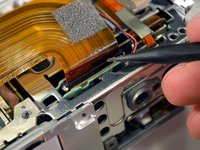
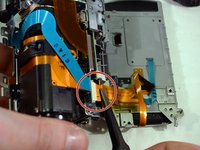
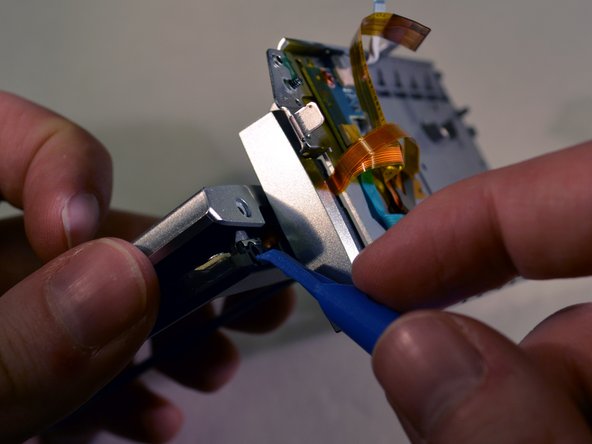
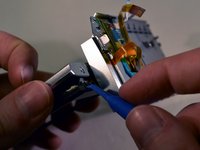
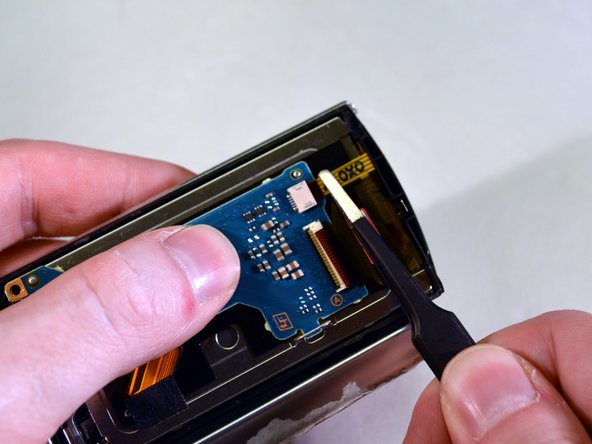
Using the blunt tweezers, unplug the small orange ribbon wire.
-
Unplug the small white ribbon wire.
-
-
-
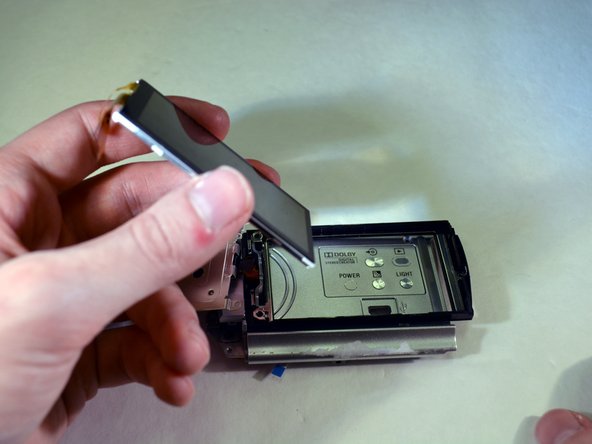
Open the screen and rotate it 90 degrees until the two black screws are exposed.
-
Remove the two black 3mm Philips screws.
-
-
-
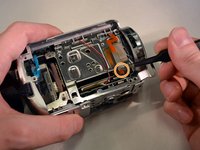
Use a plastic opening tool to pop open the casing around the screen.
-
-
-
Remove two silver 3mm Philips screws on left side.
-
-
-
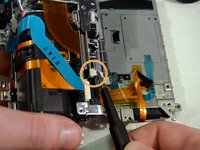
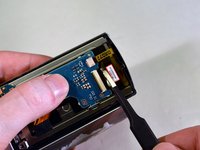
Use the blunt tweezers to unplug both right side ribbon wires.
-
-
-
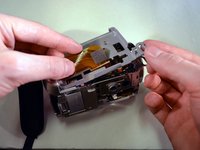
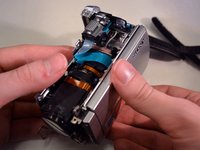
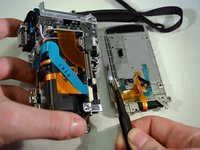
Lift the framework up and pivot to the left.
-
-
-
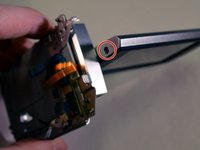
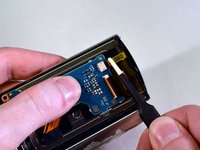
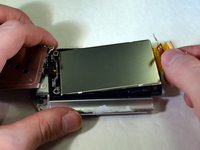
Lift out the screen by grabbing the ribbon wire and lifting up and out.
-


To reassemble your device, follow these instructions in reverse order in addition to the HDD Replacement guide.
To reassemble your device, follow these instructions in reverse order in addition to the HDD Replacement guide.
crwdns2935221:0crwdne2935221:0
crwdns2935229:02crwdne2935229:0

crwdns2915084:0crwdne2915084:0

Eastern Washington University, Team 2-5, Andersen Winter 2016 crwdns2935289:0Eastern Washington University, Team 2-5, Andersen Winter 2016crwdne2935289:0
EWU-ANDERSEN-W16S2G5
crwdns2931471:05crwdne2931471:0
crwdns2935297:013crwdne2935297:0
crwdns2947412:02crwdne2947412:0
Hello, so i have my friends handycam, sony dcr sr68 and i don't know what happened to it but the screen doesn't close at all, it stays open which makes it stay turned on. When i try to close it it just opens right back up. I do not know how to fix it at all since I don't know much about camera's, but i want to return the camera back to them as it was originally.
Hello did you find a solution for this? I have the same problem