crwdns2933423:0crwdne2933423:0

Sony Handycam CX260V Battery Port Replacement

crwdns2942213:0crwdne2942213:0

  1. Sony Handycam CX260V Battery Port Replacement, Housing: crwdns2935265:01crwdnd2935265:01crwdnd2935265:01crwdne2935265:0
    • Remove the 3 mm screw and two 5 mm screws using a Phillips #00 screwdriver from the battery assembly area.

  2. Sony Handycam CX260V Battery Port Replacement: crwdns2935265:02crwdnd2935265:01crwdnd2935265:01crwdne2935265:0
    • Remove the top and bottom 5 mm screws from the joint connecting the LCD screen to the camera.

    • Remove the middle 3 mm screw.

  3. Sony Handycam CX260V Battery Port Replacement: crwdns2935265:03crwdnd2935265:01crwdnd2935265:01crwdne2935265:0
    • Remove the two 5 mm screws from above the power button and Dolby logo.

  4. Sony Handycam CX260V Battery Port Replacement: crwdns2935265:04crwdnd2935265:01crwdnd2935265:01crwdne2935265:0
    • Use a plastic opening tool or other piece of thin angled plastic to remove the button’s cover.

  5. Sony Handycam CX260V Battery Port Replacement: crwdns2935265:05crwdnd2935265:01crwdnd2935265:01crwdne2935265:0
    • Remove the five 5mm screws located on the bottom panel.

    • Remove the panel to expose the internal motherboard.

  6. Sony Handycam CX260V Battery Port Replacement: crwdns2935265:06crwdnd2935265:01crwdnd2935265:01crwdne2935265:0
    • Remove the two 5mm screws adjacent to the lens on the opposite side from the LCD screen attachment joint.

    • Remove the nearby leather strap.

  7. Sony Handycam CX260V Battery Port Replacement: crwdns2935265:07crwdnd2935265:01crwdnd2935265:01crwdne2935265:0
    • Remove the panel from the side where the leather strap was located.

    • Rotate the camera back to the other side and remove the 5mm screw to the left of the record button.

  8. Sony Handycam CX260V Battery Port Replacement: crwdns2935265:08crwdnd2935265:01crwdnd2935265:01crwdne2935265:0
    • Locate the LCD joint cover on the right side of the lens and remove with a spudger or other wide flat-headed object.

  9. Sony Handycam CX260V Battery Port Replacement: crwdns2935265:09crwdnd2935265:01crwdnd2935265:02crwdne2935265:0 Sony Handycam CX260V Battery Port Replacement: crwdns2935265:09crwdnd2935265:02crwdnd2935265:02crwdne2935265:0
    • Orient the camera to the side opposite of the recording buttons where the leather strap was. Locate the orange motherboard and remove the three nearby 5mm black screws and 4mm silver screw.

    • The silver screw is located on the front right-side of the camera and is attached to the main panel.

  10. Sony Handycam CX260V Battery Port Replacement: crwdns2935265:010crwdnd2935265:01crwdnd2935265:01crwdne2935265:0
    • Locate the 5mm screw that is next to both the LCD attachment joint and the camera lens before removing it.

  11. Sony Handycam CX260V Battery Port Replacement: crwdns2935265:011crwdnd2935265:01crwdnd2935265:01crwdne2935265:0
    crwdns2935267:0crwdne2935267:0
    Tweezers
    $4.99
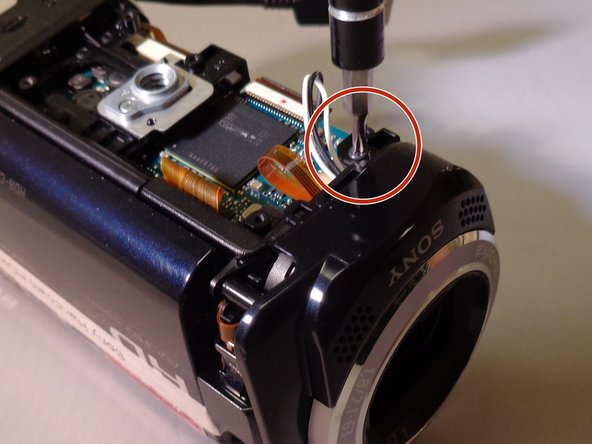
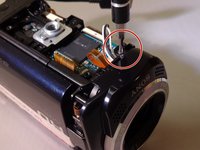
    • Using tweezers, carefully detach the black and white wire connected to the bottom of the motherboard near the lens panel.

    • One white wire, one black wire, and one flat yellow wire are connected to the lens panel.

    • Remove the lens panel.

  12. Sony Handycam CX260V Battery Port Replacement: crwdns2935265:012crwdnd2935265:01crwdnd2935265:01crwdne2935265:0
    • Locate the three 5mm screws holding the lens in place and remove them.

    • One is at the bottom and two are at the top of the lens area.

    • Carefully remove the lens by hand or with a spudger.

    • Do not lose the three springs located underneath the lens.

  13. Sony Handycam CX260V Battery Port Replacement: crwdns2935265:013crwdnd2935265:01crwdnd2935265:01crwdne2935265:0
    • Remove a 5mm screw at the back of the camera next to the zoom and picture capturing control buttons.

    • Unplug or carefully set aside the two flat blue wires keeping the buttons connected to the camera.

    • This will partially remove the zoom and picture capturing control.

  14. Sony Handycam CX260V Battery Port Replacement: crwdns2935265:014crwdnd2935265:01crwdnd2935265:01crwdne2935265:0
    • Remove the silver 5mm screw connected to the tripod mount to expose the mount assembly.

  15. Sony Handycam CX260V Battery Port Replacement: crwdns2935265:015crwdnd2935265:01crwdnd2935265:01crwdne2935265:0
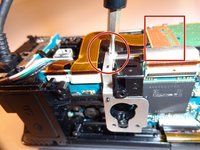
    • Unplug the wire attached to the orange motherboard.

    • Remove the 5mm silver screw underneath the wire.

  16. Sony Handycam CX260V Battery Port Replacement: crwdns2935265:016crwdnd2935265:01crwdnd2935265:01crwdne2935265:0
    • Locate the clip that the other end of the wire that attaches the main internal system from the main frame.

    • Release the clip with tweezers and unplug the cords running through the side panel’s frame, which will allow the rest of the camera to be freely taken apart.

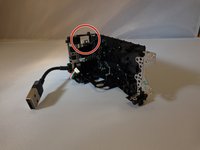
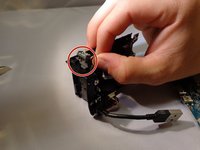
  17. Sony Handycam CX260V Battery Port Replacement, Battery Port: crwdns2935265:017crwdnd2935265:01crwdnd2935265:02crwdne2935265:0 Sony Handycam CX260V Battery Port Replacement, Battery Port: crwdns2935265:017crwdnd2935265:02crwdnd2935265:02crwdne2935265:0
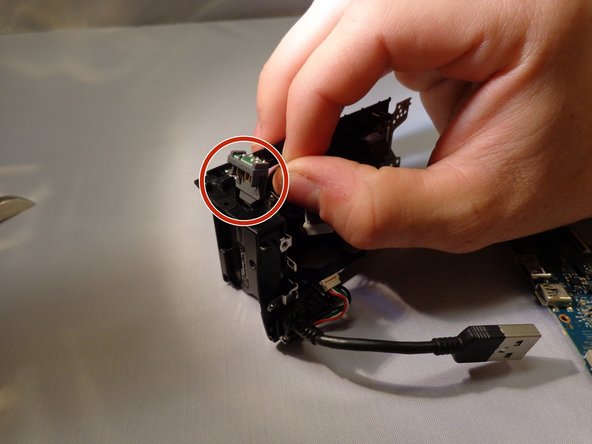
    • Unplug the battery port connected to the frame/motherboard. Remove the battery port.

crwdns2915888:0crwdne2915888:0

To reassemble your device, follow these instructions in reverse order.

crwdns2935229:04crwdne2935229:0

Alejandro Barajas

crwdns2935283:004/07/15crwdne2935283:0

514 crwdns2915208:0crwdne2915208:0

crwdns2935297:03crwdne2935297:0

crwdns2915084:0crwdne2915084:0

Eastern Washington University, Team 1-5, Plummer Spring 2015 crwdns2935289:0Eastern Washington University, Team 1-5, Plummer Spring 2015crwdne2935289:0

EWU-PLUMMER-S15S1G5

crwdns2931471:04crwdne2931471:0

crwdns2935297:012crwdne2935297:0

crwdns2947412:00crwdne2947412:0

crwdns2917038:0crwdne2917038:0

crwdns2936625:0crwdne2936625:0:

crwdns2936751:024crwdne2936751:0 1

crwdns2936753:07crwdne2936753:0 1

crwdns2936753:030crwdne2936753:0 6

crwdns2942667:0crwdne2942667:0 362