crwdns2933423:0crwdne2933423:0

Sony Ericsson s710a Main Interface Buttons Replacement

crwdns2942213:0crwdne2942213:0

  1. Sony Ericsson s710a Main Interface Buttons Replacement, Battery: crwdns2935265:01crwdnd2935265:01crwdnd2935265:01crwdne2935265:0
    • Remove the back cover by sliding it off.

  2. Sony Ericsson s710a Main Interface Buttons Replacement: crwdns2935265:02crwdnd2935265:01crwdnd2935265:01crwdne2935265:0
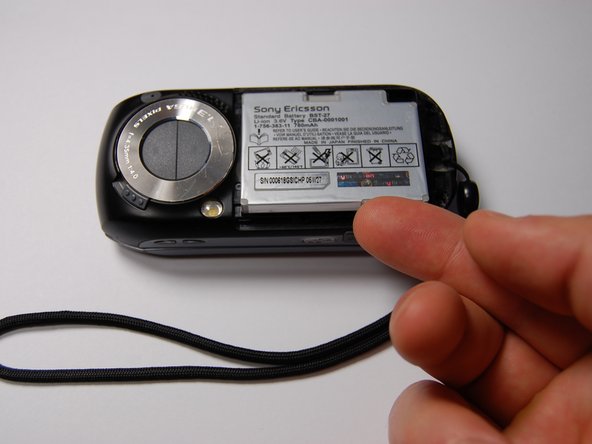
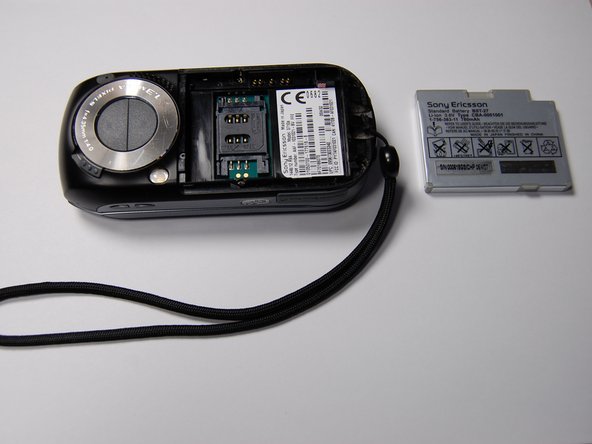
    • Pull the battery out using your finger.

  3. Sony Ericsson s710a Main Interface Buttons Replacement: crwdns2935265:03crwdnd2935265:01crwdnd2935265:01crwdne2935265:0
    • The battery can now be replaced.

    • The battery is a 780 mAh rechargeable Lithium Ion battery.

  4. Sony Ericsson s710a Main Interface Buttons Replacement, LCD Screen: crwdns2935265:04crwdnd2935265:01crwdnd2935265:01crwdne2935265:0
    • Remove the four 6 mm screws from beneath the battery using a Phillips #00 screwdriver.

  5. Sony Ericsson s710a Main Interface Buttons Replacement: crwdns2935265:05crwdnd2935265:01crwdnd2935265:01crwdne2935265:0
    • Remove the microphone cover using the iFixit opening tool.

  6. Sony Ericsson s710a Main Interface Buttons Replacement: crwdns2935265:06crwdnd2935265:01crwdnd2935265:01crwdne2935265:0
    • Remove the two 6 mm screws from the front of the phone beneath the microphone cover using a Phillips #00 screwdriver.

  7. Sony Ericsson s710a Main Interface Buttons Replacement: crwdns2935265:07crwdnd2935265:01crwdnd2935265:01crwdne2935265:0
    • Remove the black plastic piece on the side.

    • This will allow for easier access while prying the motherboard.

  8. Sony Ericsson s710a Main Interface Buttons Replacement: crwdns2935265:08crwdnd2935265:01crwdnd2935265:01crwdne2935265:0
    • Use the iFixit opening tool to loosen the motherboard from the phone.

  9. Sony Ericsson s710a Main Interface Buttons Replacement: crwdns2935265:09crwdnd2935265:01crwdnd2935265:01crwdne2935265:0
    • Lift the motherboard out with your fingers.

    • Pull slowly. This will require some force.

  10. Sony Ericsson s710a Main Interface Buttons Replacement: crwdns2935265:010crwdnd2935265:01crwdnd2935265:01crwdne2935265:0
    • Remove the two cable connectors using the iFixit opening tool.

    • Mark the orientation and port of each cable before detaching them. The connectors are symmetrical, so this is essential for reassembly.

  11. Sony Ericsson s710a Main Interface Buttons Replacement: crwdns2935265:011crwdnd2935265:01crwdnd2935265:01crwdne2935265:0
    • On the rotational assembly remove the following screws:

    • Four 3 mm screws

    • Two 2.3 mm screws

    • Lift the rotational assembly off of the phone to allow access to the other half of the device.

  12. Sony Ericsson s710a Main Interface Buttons Replacement: crwdns2935265:012crwdnd2935265:01crwdnd2935265:01crwdne2935265:0
    • Detach the cable connectors on the other end of the cables using a plastic opening tool.

    • Record the orientation and location of each connector for reassembly.

  13. Sony Ericsson s710a Main Interface Buttons Replacement: crwdns2935265:013crwdnd2935265:01crwdnd2935265:01crwdne2935265:0
    • Remove the plastic cover on the back of the phone using an iFixit opening tool.

    • Remove the four 6 mm screws using a Phillips #00 screwdriver.

  14. Sony Ericsson s710a Main Interface Buttons Replacement: crwdns2935265:014crwdnd2935265:01crwdnd2935265:01crwdne2935265:0
    • Pry the screen assembly from the main case using the iFixit opening tool.

  15. Sony Ericsson s710a Main Interface Buttons Replacement: crwdns2935265:015crwdnd2935265:01crwdnd2935265:01crwdne2935265:0
    • With the face plate and LCD screen exposed, replace the existing LCD screen with a new LCD screen.

    • Be sure to test and make sure the detachable connections are arranged correctly.

  16. Sony Ericsson s710a Main Interface Buttons Replacement, Main Interface Buttons: crwdns2935265:016crwdnd2935265:01crwdnd2935265:01crwdne2935265:0
    • Remove the button and pad assembly as shown.

    • If desired, these items can now be cleaned or replaced.

crwdns2915888:0crwdne2915888:0

To reassemble your device, follow these instructions in reverse order.

Alexander

crwdns2935283:010/29/11crwdne2935283:0

75 crwdns2915208:0crwdne2915208:0

crwdns2935297:04crwdne2935297:0

crwdns2915084:0crwdne2915084:0

University of Maryland, Team 1-1, Calloway Fall 2011 crwdns2935289:0University of Maryland, Team 1-1, Calloway Fall 2011crwdne2935289:0

UMD-CALLOWAY-F11S1G1

crwdns2931471:03crwdne2931471:0

crwdns2935297:014crwdne2935297:0

crwdns2944067:00crwdne2944067:0

crwdns2917038:0crwdne2917038:0

crwdns2936625:0crwdne2936625:0:

crwdns2936751:024crwdne2936751:0 1

crwdns2936753:07crwdne2936753:0 1

crwdns2936753:030crwdne2936753:0 2

crwdns2942667:0crwdne2942667:0 955