crwdns2933423:0crwdne2933423:0

Sony Ericsson W300i Main Screen Replacement

crwdns2942213:0crwdne2942213:0

  1. Sony Ericsson W300i Main Screen Replacement, Main Screen: crwdns2935265:01crwdnd2935265:01crwdnd2935265:02crwdne2935265:0 Sony Ericsson W300i Main Screen Replacement, Main Screen: crwdns2935265:01crwdnd2935265:02crwdnd2935265:02crwdne2935265:0
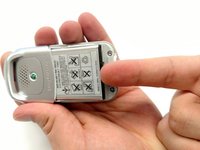
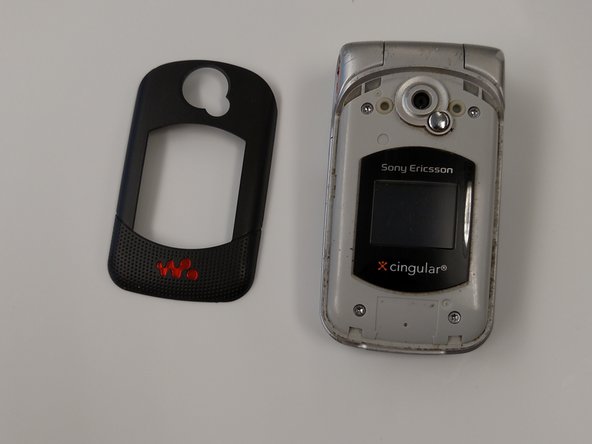
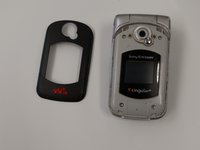
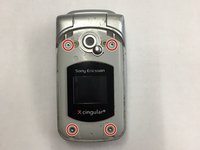
    • Here is the phone in question: The Sony Ericsson W300i.

    • To access the interior of the phone, you need the a plastic opening tool, and a T6 Torx screwdriver.

  2. Sony Ericsson W300i Main Screen Replacement: crwdns2935265:02crwdnd2935265:01crwdnd2935265:03crwdne2935265:0 Sony Ericsson W300i Main Screen Replacement: crwdns2935265:02crwdnd2935265:02crwdnd2935265:03crwdne2935265:0 Sony Ericsson W300i Main Screen Replacement: crwdns2935265:02crwdnd2935265:03crwdnd2935265:03crwdne2935265:0
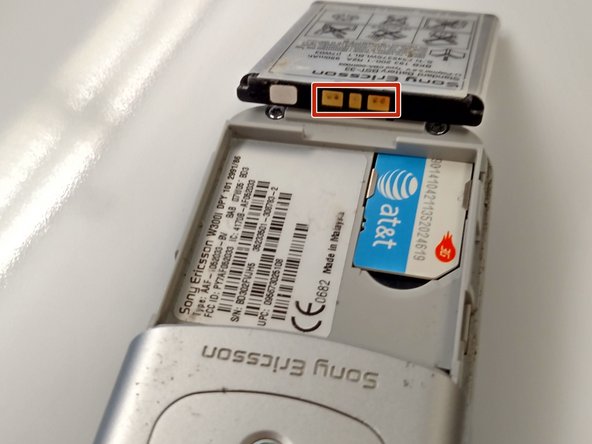
    • Before removing the screen, you must first remove the battery.

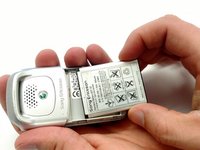
    • Remove the battery cover by applying pressure while sliding the base cover away from the phone and then lifting the cover up.

  3. Sony Ericsson W300i Main Screen Replacement: crwdns2935265:03crwdnd2935265:01crwdnd2935265:03crwdne2935265:0 Sony Ericsson W300i Main Screen Replacement: crwdns2935265:03crwdnd2935265:02crwdnd2935265:03crwdne2935265:0 Sony Ericsson W300i Main Screen Replacement: crwdns2935265:03crwdnd2935265:03crwdnd2935265:03crwdne2935265:0
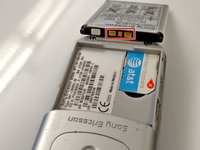
    • Using your fingers, lift the end of the battery up and then pry the battery from the phone base.

    • During reassembly you must reinsert the battery so the gold markings are at the top of the battery.

  4. Sony Ericsson W300i Main Screen Replacement: crwdns2935265:04crwdnd2935265:01crwdnd2935265:03crwdne2935265:0 Sony Ericsson W300i Main Screen Replacement: crwdns2935265:04crwdnd2935265:02crwdnd2935265:03crwdne2935265:0 Sony Ericsson W300i Main Screen Replacement: crwdns2935265:04crwdnd2935265:03crwdnd2935265:03crwdne2935265:0
    • This step may take a few minutes.

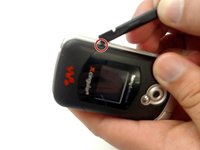
    • Remove the front plate off the phone with a plastic opening tool to gain access to the screws beneath.

    • Use the point indicated on the photo as a good prying point.

    • Use a moderate amount of force.

    • Be aware of the sharp edges of the prying tool.

  5. Sony Ericsson W300i Main Screen Replacement: crwdns2935265:05crwdnd2935265:01crwdnd2935265:02crwdne2935265:0 Sony Ericsson W300i Main Screen Replacement: crwdns2935265:05crwdnd2935265:02crwdnd2935265:02crwdne2935265:0
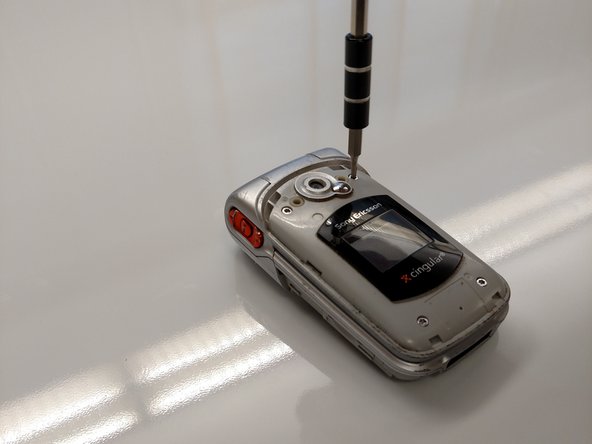
    • Use the T6 Torx screwdriver to remove the four screws.

    • Place screws in a safe location to avoid losing them.

  6. Sony Ericsson W300i Main Screen Replacement: crwdns2935265:06crwdnd2935265:01crwdnd2935265:03crwdne2935265:0 Sony Ericsson W300i Main Screen Replacement: crwdns2935265:06crwdnd2935265:02crwdnd2935265:03crwdne2935265:0 Sony Ericsson W300i Main Screen Replacement: crwdns2935265:06crwdnd2935265:03crwdnd2935265:03crwdne2935265:0
    • This step may take a few minutes.

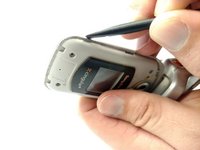
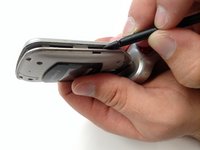
    • Use a plastic opening tool to separate the screen cover from the top half of the phone.

    • Slide the corner of the opening tool along the side of the phone toward the bottom corner.

    • With the phone screen facing away from you, press into the screen crevice at an angle so that the tool pushes away towards the main screen.

    • Use a moderate amount of force.

    • Be aware of the sharp edges of the prying tool.

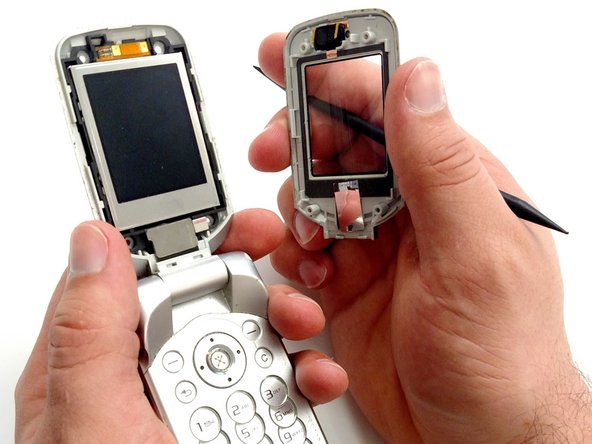
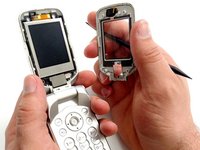
    • Once the seal has been broken, tug the cover away.

  7. Sony Ericsson W300i Main Screen Replacement: crwdns2935265:07crwdnd2935265:01crwdnd2935265:03crwdne2935265:0 Sony Ericsson W300i Main Screen Replacement: crwdns2935265:07crwdnd2935265:02crwdnd2935265:03crwdne2935265:0 Sony Ericsson W300i Main Screen Replacement: crwdns2935265:07crwdnd2935265:03crwdnd2935265:03crwdne2935265:0
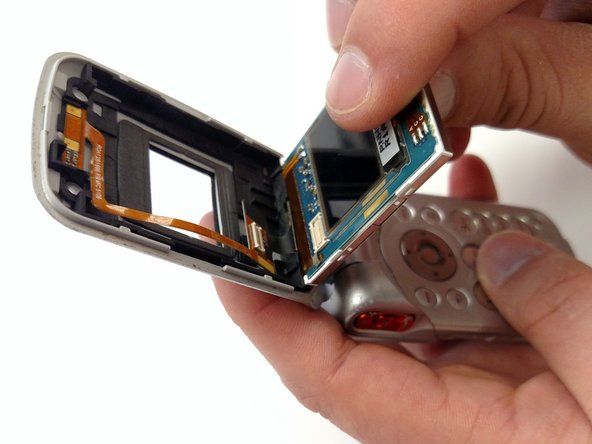
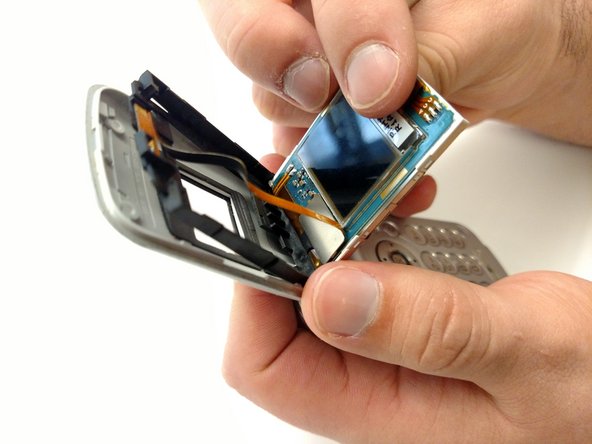
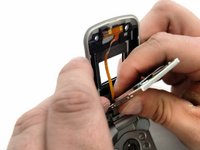
    • Use your fingers to pry the plug end of the orange ribbon cable away from the screen.

    • Remove screen.

  8. Sony Ericsson W300i Main Screen Replacement: crwdns2935265:08crwdnd2935265:01crwdnd2935265:02crwdne2935265:0 Sony Ericsson W300i Main Screen Replacement: crwdns2935265:08crwdnd2935265:02crwdnd2935265:02crwdne2935265:0
    • Using the new screen, reattach the plug end of the orange ribbon cable.

    • Push new screen into the phone.

crwdns2915888:0crwdne2915888:0

Reassemble the phone following the steps in reverse.

crwdns2935229:03crwdne2935229:0

Michael Faist

crwdns2935283:002/17/16crwdne2935283:0

178 crwdns2915208:0crwdne2915208:0

crwdns2935295:0crwdne2935295:0

crwdns2915084:0crwdne2915084:0

Ohio State, Team 1-2, Garvin Spring 2016 crwdns2935289:0Ohio State, Team 1-2, Garvin Spring 2016crwdne2935289:0

OSU-GARVIN-S16S1G2

crwdns2931471:03crwdne2931471:0

crwdns2935297:04crwdne2935297:0

crwdns2917034:0crwdne2917034:0

nicely done, no fuss, no jargon, nice and clear and simple ...and it worked :D

Jim O - crwdns2934203:0crwdne2934203:0

crwdns2917038:0crwdne2917038:0

crwdns2936625:0crwdne2936625:0:

crwdns2936751:024crwdne2936751:0 0

crwdns2936753:07crwdne2936753:0 2

crwdns2936753:030crwdne2936753:0 10

crwdns2942667:0crwdne2942667:0 798