crwdns2933423:0crwdne2933423:0
crwdns2947577:0crwdnd2947577:0crwdne2947577:0

Sony DSC-RX100MA Image Sensor Replacement

crwdns2942213:0crwdne2942213:0

    1. Sony DSC-RX100MA Image Sensor Replacement, Back Cover: crwdns2935265:01crwdnd2935265:01crwdnd2935265:03crwdne2935265:0 Sony DSC-RX100MA Image Sensor Replacement, Back Cover: crwdns2935265:01crwdnd2935265:02crwdnd2935265:03crwdne2935265:0 Sony DSC-RX100MA Image Sensor Replacement, Back Cover: crwdns2935265:01crwdnd2935265:03crwdnd2935265:03crwdne2935265:0
      • Remove battery by sliding the tab to open the cover

      crwdns2952109:0crwdne2952109:0

      crwdns2917038:0crwdne2917038:0

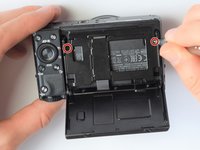
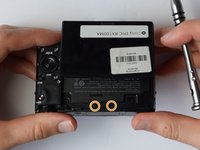
    2. Sony DSC-RX100MA Image Sensor Replacement: crwdns2935265:02crwdnd2935265:01crwdnd2935265:03crwdne2935265:0 Sony DSC-RX100MA Image Sensor Replacement: crwdns2935265:02crwdnd2935265:02crwdnd2935265:03crwdne2935265:0 Sony DSC-RX100MA Image Sensor Replacement: crwdns2935265:02crwdnd2935265:03crwdnd2935265:03crwdne2935265:0
      • Using the screwdriver, remove all screws (black 2.5mm) from outermost layer of the assembly.

      • All screws in the camera can be removed with the PH 0 driver head.

      crwdns2952109:0crwdne2952109:0

      crwdns2917038:0crwdne2917038:0

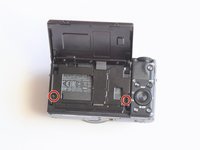
    3. Sony DSC-RX100MA Image Sensor Replacement: crwdns2935265:03crwdnd2935265:01crwdnd2935265:03crwdne2935265:0 Sony DSC-RX100MA Image Sensor Replacement: crwdns2935265:03crwdnd2935265:02crwdnd2935265:03crwdne2935265:0 Sony DSC-RX100MA Image Sensor Replacement: crwdns2935265:03crwdnd2935265:03crwdnd2935265:03crwdne2935265:0
      • Also using the screwdriver, remove screws (black 1mm) underneath articulated LCD screen.

      • Remove the marked 2.5 mm screws with the screwdriver

      crwdns2952109:0crwdne2952109:0

      crwdns2917038:0crwdne2917038:0

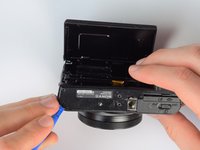
    4. Sony DSC-RX100MA Image Sensor Replacement: crwdns2935265:04crwdnd2935265:01crwdnd2935265:02crwdne2935265:0 Sony DSC-RX100MA Image Sensor Replacement: crwdns2935265:04crwdnd2935265:02crwdnd2935265:02crwdne2935265:0
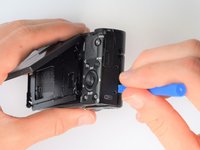
      • Using the plastic opening tools, carefully pry off the bottom plate.

      • Do not pull too hard as you may break the plastic casing.

      crwdns2952109:0crwdne2952109:0

      crwdns2917038:0crwdne2917038:0

    5. Sony DSC-RX100MA Image Sensor Replacement: crwdns2935265:05crwdnd2935265:01crwdnd2935265:03crwdne2935265:0 Sony DSC-RX100MA Image Sensor Replacement: crwdns2935265:05crwdnd2935265:02crwdnd2935265:03crwdne2935265:0 Sony DSC-RX100MA Image Sensor Replacement: crwdns2935265:05crwdnd2935265:03crwdnd2935265:03crwdne2935265:0
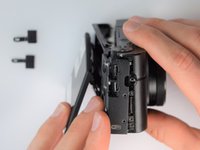
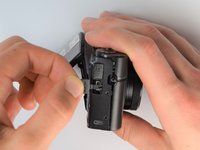
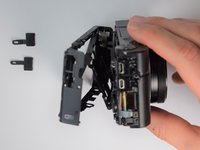
      • Using the same plastic opening tools, separate the screen and back assembly from the front portion of the camera

      • Once the back assembly is slightly detached, pull the media covers for the HDMI and Multimedia ports

      crwdns2952109:0crwdne2952109:0

      crwdns2917038:0crwdne2917038:0

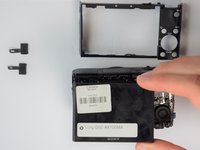
    6. Sony DSC-RX100MA Image Sensor Replacement: crwdns2935265:06crwdnd2935265:01crwdnd2935265:02crwdne2935265:0 Sony DSC-RX100MA Image Sensor Replacement: crwdns2935265:06crwdnd2935265:02crwdnd2935265:02crwdne2935265:0
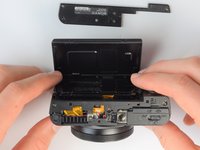
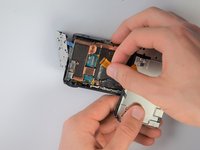
      • Remove the back cover

      crwdns2952109:0crwdne2952109:0

      crwdns2917038:0crwdne2917038:0

    1. Sony DSC-RX100MA Image Sensor Replacement, Screen: crwdns2935265:07crwdnd2935265:01crwdnd2935265:03crwdne2935265:0 Sony DSC-RX100MA Image Sensor Replacement, Screen: crwdns2935265:07crwdnd2935265:02crwdnd2935265:03crwdne2935265:0 Sony DSC-RX100MA Image Sensor Replacement, Screen: crwdns2935265:07crwdnd2935265:03crwdnd2935265:03crwdne2935265:0
      • Move side panel to get access to screws

      • Remove two screws (black 2.5mm) with PH #0 screwdriver

      crwdns2952109:0crwdne2952109:0

      crwdns2917038:0crwdne2917038:0

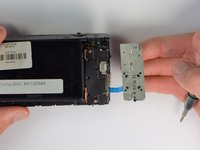
    2. Sony DSC-RX100MA Image Sensor Replacement: crwdns2935265:08crwdnd2935265:01crwdnd2935265:02crwdne2935265:0 Sony DSC-RX100MA Image Sensor Replacement: crwdns2935265:08crwdnd2935265:02crwdnd2935265:02crwdne2935265:0
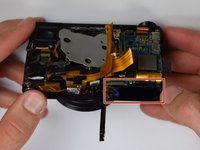
      • Remove back panel assembly while still keeping ribbon cable attached

      • Be very gentle and care not to tear the gold ribbon cable. This will be a common theme throughout these replacement guides.

      crwdns2952109:0crwdne2952109:0

      crwdns2917038:0crwdne2917038:0

    3. Sony DSC-RX100MA Image Sensor Replacement: crwdns2935265:09crwdnd2935265:01crwdnd2935265:02crwdne2935265:0 Sony DSC-RX100MA Image Sensor Replacement: crwdns2935265:09crwdnd2935265:02crwdnd2935265:02crwdne2935265:0
      • Carefully unplug ribbon connector to fully detach LCD screen assembly from camera

      crwdns2952109:0crwdne2952109:0

      crwdns2917038:0crwdne2917038:0

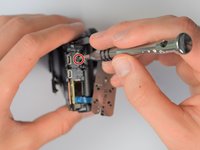
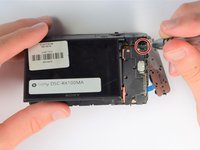
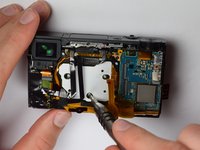
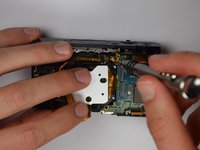
    1. Sony DSC-RX100MA Image Sensor Replacement, Image Sensor: crwdns2935265:010crwdnd2935265:01crwdnd2935265:02crwdne2935265:0 Sony DSC-RX100MA Image Sensor Replacement, Image Sensor: crwdns2935265:010crwdnd2935265:02crwdnd2935265:02crwdne2935265:0
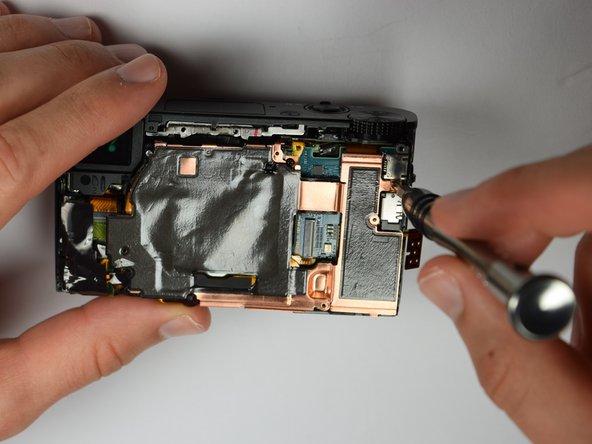
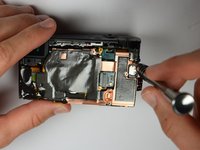
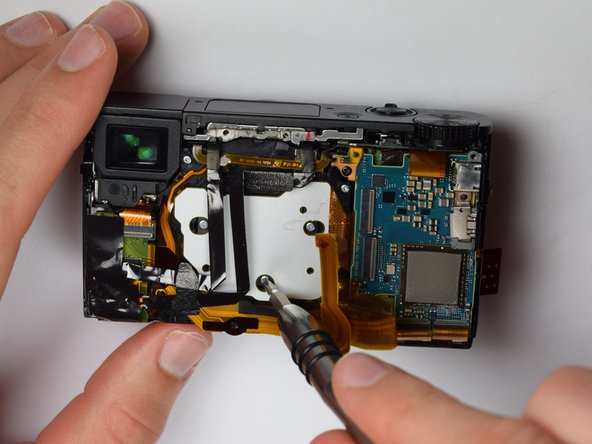
      • Using the Philips Screwdriver, remove the screw (black 3mm) located on the copper casing.

      crwdns2952109:0crwdne2952109:0

      crwdns2917038:0crwdne2917038:0

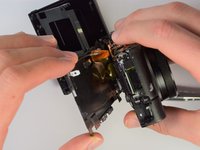
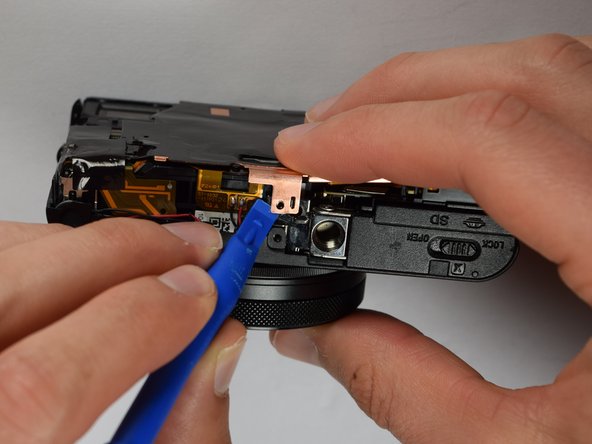
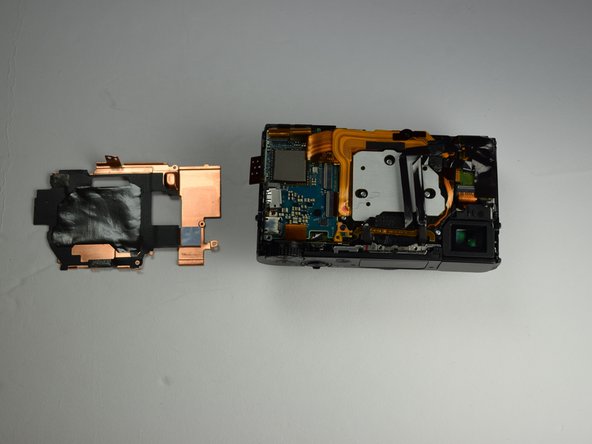
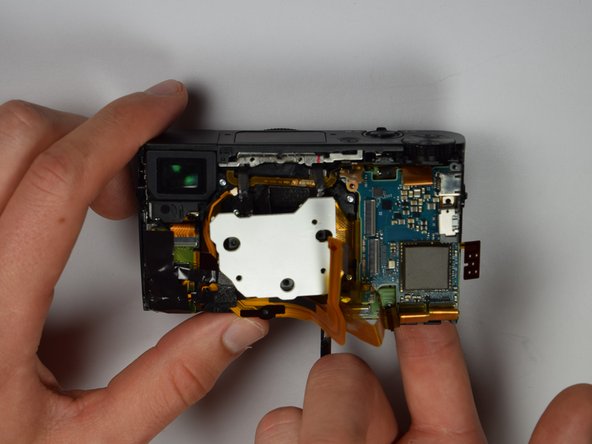
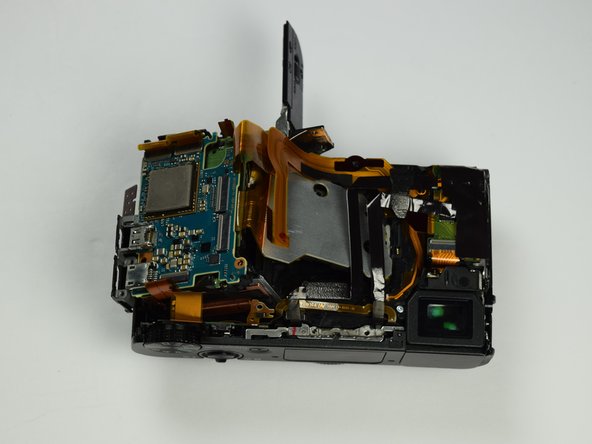
    2. Sony DSC-RX100MA Image Sensor Replacement: crwdns2935265:011crwdnd2935265:01crwdnd2935265:03crwdne2935265:0 Sony DSC-RX100MA Image Sensor Replacement: crwdns2935265:011crwdnd2935265:02crwdnd2935265:03crwdne2935265:0 Sony DSC-RX100MA Image Sensor Replacement: crwdns2935265:011crwdnd2935265:03crwdnd2935265:03crwdne2935265:0
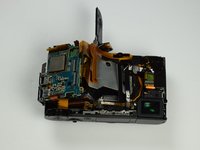
      • Using the plastic opening tools, carefully pry off the copper casing at the two pictured points.

      • Remove casing.

      crwdns2952109:0crwdne2952109:0

      crwdns2917038:0crwdne2917038:0

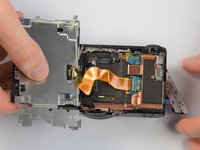
    3. Sony DSC-RX100MA Image Sensor Replacement: crwdns2935265:012crwdnd2935265:01crwdnd2935265:03crwdne2935265:0 Sony DSC-RX100MA Image Sensor Replacement: crwdns2935265:012crwdnd2935265:02crwdnd2935265:03crwdne2935265:0 Sony DSC-RX100MA Image Sensor Replacement: crwdns2935265:012crwdnd2935265:03crwdnd2935265:03crwdne2935265:0
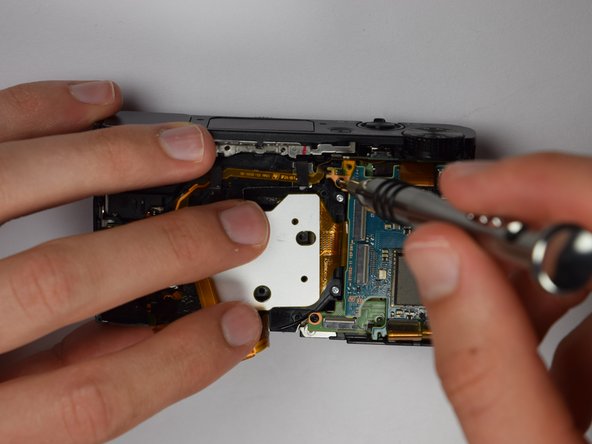
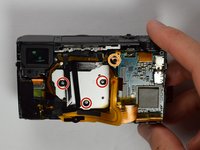
      • Using the Philips screwdriver, remove the three (silver 3mm) screws

      • Remove the screw (silver 2mm) from the upper right hand corner

      crwdns2952109:0crwdne2952109:0

      crwdns2917038:0crwdne2917038:0

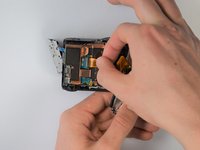
    4. Sony DSC-RX100MA Image Sensor Replacement: crwdns2935265:013crwdnd2935265:01crwdnd2935265:03crwdne2935265:0 Sony DSC-RX100MA Image Sensor Replacement: crwdns2935265:013crwdnd2935265:02crwdnd2935265:03crwdne2935265:0 Sony DSC-RX100MA Image Sensor Replacement: crwdns2935265:013crwdnd2935265:03crwdnd2935265:03crwdne2935265:0
      • Place your finger into the battery port and push up on the SD card holder to push it out of its socket.

      • Give it a little wiggle and you should feel the SD card holder come out.

      crwdns2952109:0crwdne2952109:0

      crwdns2917038:0crwdne2917038:0

    5. Sony DSC-RX100MA Image Sensor Replacement: crwdns2935265:014crwdnd2935265:01crwdnd2935265:01crwdne2935265:0
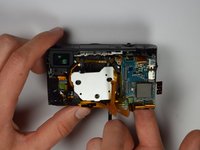
      • Now you can remove the marked gold ribbon cable from the SD card holder.

      • Utilize extreme caution while removing because the ribbon cables are extremely fragile and important to the camera.

      crwdns2952109:0crwdne2952109:0

      crwdns2917038:0crwdne2917038:0

crwdns2915888:0crwdne2915888:0

To reassemble your device, follow these instructions in reverse order.

crwdns2935221:0crwdne2935221:0

crwdns2935227:0crwdne2935227:0

Isaiah De Leon

crwdns2935283:001/29/17crwdne2935283:0

442 crwdns2915208:0crwdne2915208:0

crwdns2935297:03crwdne2935297:0

crwdns2935287:0crwdne2935287:0

Cal Poly, Team 21-1, Maness Winter 2017 crwdns2935289:0Cal Poly, Team 21-1, Maness Winter 2017crwdne2935289:0

CPSU-MANESS-W17S21G1

crwdns2931471:05crwdne2931471:0

crwdns2935297:060crwdne2935297:0

crwdns2947412:00crwdne2947412:0

crwdns2917038:0crwdne2917038:0

crwdns2936625:0crwdne2936625:0:

crwdns2936751:024crwdne2936751:0 7

crwdns2936753:07crwdne2936753:0 24

crwdns2936753:030crwdne2936753:0 99

crwdns2942667:0crwdne2942667:0 4,262