crwdns2915892:0crwdne2915892:0
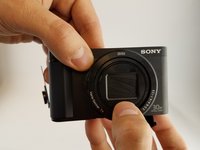
This guide will show you the steps to remove and replace the lens of the camera
crwdns2942213:0crwdne2942213:0
-
-
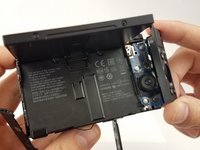
Place the device so bottom of the camera is facing up .
-
Remove the five marked screws with a Phillips #000 screwdriver.
-
Insert the spudger where arrow marks to gently remove the lower panel.
-
-
-
Remove the marked screw on the side of the camera with a Phillips #000 screwdriver.
-
-
-
Remove the marked screw with a Phillips #000 screwdriver.
-
-
-
Orient the device so the lens is facing down.
-
Remove the two black M1.4 X 3.5 Phillips head screws using Phillips #000 screwdriver.
-
-
-
-
Orient the device so the lens is facing down.
-
Remove the black M1.4 X 3.5 Phillips head screw.
-
-
-
Use the plastic opening tool with a prying motion to remove the side cover of the camera.
-
-
-
Remove the small screw under the multi/USB cover.
-
Use the plastic opening tool to remove the button board.
Remove screw under multi/usb cover
There are 3 more screws to remove!
There are 3 more screws to remove!
do you mean 3 more or 3 screws to remove if so where are they? thanks
ColBunn -
-
-
-
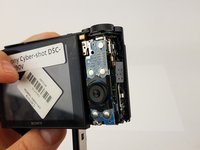
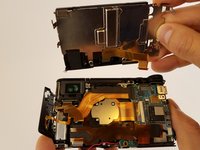
Disconnect the control board data cable by wiggling carefully with your fingertips. Set the control board to the side once it is disconnected.
-
-
-
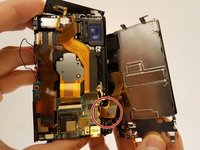
Lift the metal plate and LCD screen simultaneously until it is perpendicular to the camera.
Es muss vor dem lösen des Flachbandkabels vom Display die Verriegelung der Anschlussbuchse über den kleinen Hebel (schwarz oder grau) entriegelt werden. Diesen vorsichtig von hinten in Richtung Flachbandkabel hochklappen aber Vorsichtig!
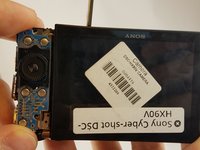
Before remove two screws :one under multi/usb socket ; onecontrol board socket
there is a black screw behind the control board to remove. (shown under the front of the thumb in the photo.)
-
-
-
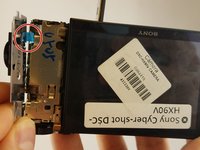
Remove the ribbon cable connecting LCD display to camera sensor and battery housing.
Je n'arrive pas à rebrancher ce câble et la photo ne m'aide pas. Est-ce qu'il va sous la petite barrette de la carte mère, comme je pense mais je n'arrive pas à le glisser, ou dans le pli de l'autre câble plat qui arrive à cette barrette?
Si vous suivez encore ce fil....énorme merci d'avance.
-
-
-
Make sure all ribbon cables are unplugged and remove the motherboard.
-
-
-
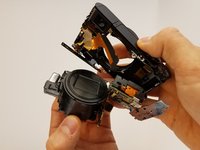
Press on the lens with your finger.
-
Gently pull the lens container out of the camera.
-


To reassemble your device, follow these instructions in reverse order.
To reassemble your device, follow these instructions in reverse order.
crwdns2935221:0crwdne2935221:0
crwdns2935229:08crwdne2935229:0
crwdns2947412:05crwdne2947412:0
Aside from a few missed screws, very nicely done. And I suspect that if one didn’t realize the need to remove those screws, sh/e probably shouldn’t be attempting the job in the first place. :) (I noted the comments after completing lens removal.)
Can you comment where/specifically the missing screws that were not listed can be found? Any other guides out there that are more comprehensive?
Eric C -
Under multi cover
First at step 7
Dufour -
At step 8 remove two 2mm screws both lower sides of LCD