crwdns2915892:0crwdne2915892:0
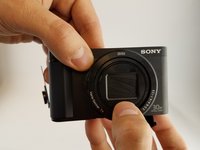
This guide will show you the steps to remove and replace the lens of the camera
crwdns2942213:0crwdne2942213:0
-
-
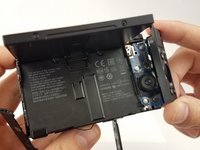
Place the device so bottom of the camera is facing up .
-
Remove the five marked screws with a Phillips #000 screwdriver.
-
Insert the spudger where arrow marks to gently remove the lower panel.
-
-
-
Remove the marked screw on the side of the camera with a Phillips #000 screwdriver.
-
-
-
Remove the marked screw with a Phillips #000 screwdriver.
-
-
-
Orient the device so the lens is facing down.
-
Remove the two black M1.4 X 3.5 Phillips head screws using Phillips #000 screwdriver.
-
-
-
-
Orient the device so the lens is facing down.
-
Remove the black M1.4 X 3.5 Phillips head screw.
-
-
-
Use the plastic opening tool with a prying motion to remove the side cover of the camera.
-
-
-
Remove the small screw under the multi/USB cover.
-
Use the plastic opening tool to remove the button board.
-
-
-
Disconnect the control board data cable by wiggling carefully with your fingertips. Set the control board to the side once it is disconnected.
-
-
-
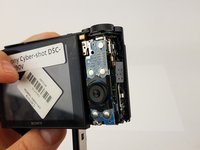
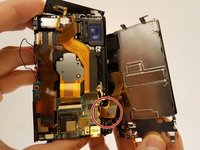
Lift the metal plate and LCD screen simultaneously until it is perpendicular to the camera.
-
-
-
Remove the ribbon cable connecting LCD display to camera sensor and battery housing.
-
-
-
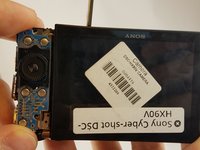
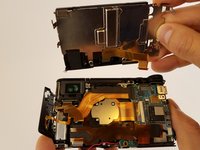
Make sure all ribbon cables are unplugged and remove the motherboard.
-
-
-
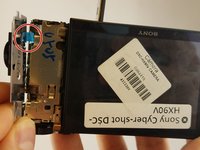
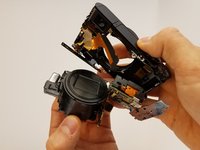
Press on the lens with your finger.
-
Gently pull the lens container out of the camera.
-


To reassemble your device, follow these instructions in reverse order.
To reassemble your device, follow these instructions in reverse order.
crwdns2935221:0crwdne2935221:0
crwdns2935229:08crwdne2935229:0
crwdns2947412:05crwdne2947412:0
Aside from a few missed screws, very nicely done. And I suspect that if one didn’t realize the need to remove those screws, sh/e probably shouldn’t be attempting the job in the first place. :) (I noted the comments after completing lens removal.)
Can you comment where/specifically the missing screws that were not listed can be found? Any other guides out there that are more comprehensive?
Eric C -
Under multi cover
First at step 7
Dufour -
At step 8 remove two 2mm screws both lower sides of LCD