crwdns2915892:0crwdne2915892:0
Your SD door could be stuck, loose or broken. This guide will show you how to remove and replace an SD door. In order to reach the SD door screw, you need to access the motherboard. Please refer to the LCD Screen prerequisite guide and the motherboard prerequisite guide for proper LCD Screen and Motherboard removal.
crwdns2942213:0crwdne2942213:0
-
-
Using a screwdriver, remove four 6mm screws located on the back panel.
-
-
-
Using a screwdriver, remove the two 6mm screws on the bottom.
-
Using a screwdriver, remove the four 3mm screws on the bottom.
-
-
-
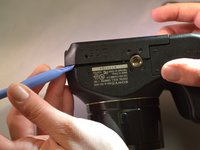
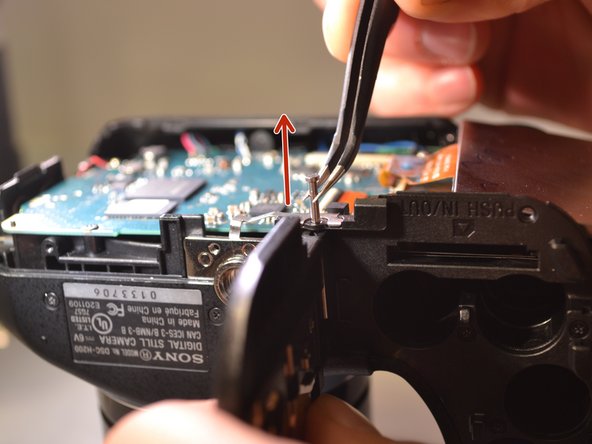
Open the SD Door, unscrew and remove the single 6mm screw closest to "PUSH IN/OUT" under the SD card slot.
-
-
-
-
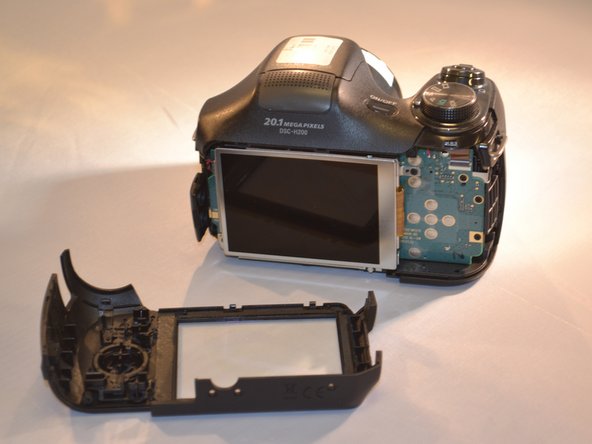
Using the blue plastic opening tools, remove the back panel (the LCD and motherboard are exposed).
-
-
-
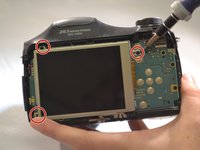
Using a screwdriver, remove the three 4mm screws that attach the LCD to the camera motherboard (The LCD is contained in a holding plate, attached to the motherboard with a ribbon cable).
-
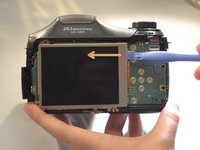
Using the blue plastic opening tool remove the LCD Screen from the motherboard.
-
-
-
Using a screwdriver, remove the single 4mm screw at the bottom of the holding plate.
-
-
-
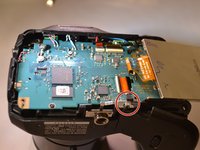
Lift the holding plate away from the motherboard and set aside (the pin attaching the door to the body is now accessible).
-
-
crwdns2935267:0crwdne2935267:0Tweezers$4.99
-
Using tweezers remove the pin that attaches the door to the body.
-


To reassemble your device, follow these instructions in reverse order.
To reassemble your device, follow these instructions in reverse order.
crwdns2935221:0crwdne2935221:0
crwdns2935227:0crwdne2935227:0

crwdns2915084:0crwdne2915084:0

Eastern Washington University, Team 2-3, Matresse Spring 2015 crwdns2935289:0Eastern Washington University, Team 2-3, Matresse Spring 2015crwdne2935289:0
EWU-MATRESSE-S15S2G3
crwdns2931471:04crwdne2931471:0
crwdns2935297:010crwdne2935297:0