crwdns2933423:0crwdne2933423:0
crwdns2947577:0crwdnd2947577:0crwdne2947577:0

Sony CDX-GT540UI Front Panel Replacement

crwdns2869540:0crwdne2869540:0: 3.5K

crwdns2959988:0crwdne2959988:0

crwdns2959990:0crwdne2959990:0
3
crwdns2959992:0crwdne2959992:0
20
crwdns2959994:0crwdne2959994:0
108
crwdns2959996:0crwdne2959996:0
3,508
crwdns2955950:0crwdne2955950:0: 4

crwdns2960004:04crwdne2960004:0.

crwdns2959984:0crwdne2959984:0: 2

crwdns2959974:02crwdne2959974:0

crwdns2959986:0crwdne2959986:0: 2

crwdns2959982:02crwdne2959982:0

crwdns2955944:0crwdne2955944:0: 10 - 15 crwdns2931279:0crwdne2931279:0
crwdns2955970:0crwdne2955970:0: crwdns2937801:0crwdne2937801:0
Sony CDX-GT540UI Front Panel Replacement

crwdns2915892:0crwdne2915892:0

crwdns2959928:0crwdne2959928:0 ↓

This will be the initial step for getting into your device for repair.

Before any repair work can be done, one must remove the device from the vehicle. To do so follow this link to see a vehicle general removal of a stereo system.

crwdns2959930:0crwdne2959930:0

crwdns2943215:0crwdne2943215:0

    1. Sony CDX-GT540UI Front Panel Replacement, Front Panel: crwdns2935265:01crwdnd2935265:01crwdnd2935265:01crwdne2935265:0
      • Locate face-plate eject button.

      crwdns2952109:0crwdne2952109:0

      crwdns2917038:0crwdne2917038:0

    2. Sony CDX-GT540UI Front Panel Replacement: crwdns2935265:02crwdnd2935265:01crwdnd2935265:02crwdne2935265:0 Sony CDX-GT540UI Front Panel Replacement: crwdns2935265:02crwdnd2935265:02crwdnd2935265:02crwdne2935265:0
      • Press the eject button.

      • Remove the face-plate.

      crwdns2952109:0crwdne2952109:0

      crwdns2917038:0crwdne2917038:0

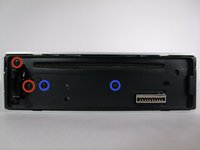
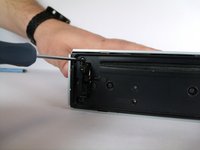
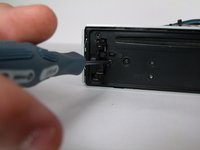
    3. Sony CDX-GT540UI Front Panel Replacement: crwdns2935265:03crwdnd2935265:01crwdnd2935265:03crwdne2935265:0 Sony CDX-GT540UI Front Panel Replacement: crwdns2935265:03crwdnd2935265:02crwdnd2935265:03crwdne2935265:0 Sony CDX-GT540UI Front Panel Replacement: crwdns2935265:03crwdnd2935265:03crwdnd2935265:03crwdne2935265:0
      • Remove two 4.9mm Phillips #00screws on the front of the device.

      • Remove two 7.5mm Phillips #00screws on the front of the device.

      • When the screws are removed, the eject lever may fall into the device. Make sure the device is held horizontal and level.

      crwdns2952109:0crwdne2952109:0

      crwdns2917038:0crwdne2917038:0

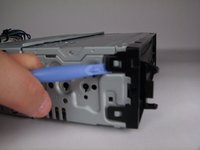
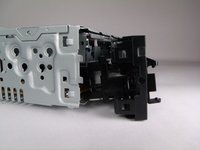
    4. Sony CDX-GT540UI Front Panel Replacement: crwdns2935265:04crwdnd2935265:01crwdnd2935265:02crwdne2935265:0 Sony CDX-GT540UI Front Panel Replacement: crwdns2935265:04crwdnd2935265:02crwdnd2935265:02crwdne2935265:0
      • Rotate device 90 degrees to either side.

      • Use the plastic opening tool to pry open the top and bottom tab respectively.

      • Repeat on opposite side.

      crwdns2952109:0crwdne2952109:0

      crwdns2917038:0crwdne2917038:0

    5. Sony CDX-GT540UI Front Panel Replacement: crwdns2935265:05crwdnd2935265:01crwdnd2935265:01crwdne2935265:0
      • Remove front panel.

      crwdns2952109:0crwdne2952109:0

      crwdns2917038:0crwdne2917038:0

crwdns2915888:0crwdne2915888:0

To reassemble your device, follow these instructions in reverse order.

crwdns2935221:0crwdne2935221:0

crwdns2935229:02crwdne2935229:0

Odelkys Marquez

crwdns2935283:009/22/14crwdne2935283:0

1,139 crwdns2915208:0crwdne2915208:0

crwdns2935297:07crwdne2935297:0

crwdns2935287:0crwdne2935287:0

USF Tampa, Team 10-2, Brown Fall 2014 crwdns2935289:0USF Tampa, Team 10-2, Brown Fall 2014crwdne2935289:0

USFT-BROWN-F14S10G2

crwdns2931471:03crwdne2931471:0

crwdns2935297:084crwdne2935297:0

crwdns2947412:00crwdne2947412:0

crwdns2917038:0crwdne2917038:0

crwdns2936625:0crwdne2936625:0:

crwdns2936751:024crwdne2936751:0 3

crwdns2936753:07crwdne2936753:0 20

crwdns2936753:030crwdne2936753:0 108

crwdns2959996:0crwdne2959996:0 3,508