crwdns2915892:0crwdne2915892:0
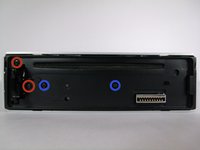
This will show one how to remove and replace the CD drive.
Before any repair work can be done one must remove the device for the vehicle. To do so follow this link to see a general vehicle removal of a stereo system.
crwdns2942213:0crwdne2942213:0
-
-
Locate face-plate eject button.
-
-
-
Press the eject button.
-
Remove the face-plate.
-
-
-
Remove two 4.9mm Phillips #00screws on the front of the device.
-
Remove two 7.5mm Phillips #00screws on the front of the device.
-
-
-
Rotate device 90 degrees to either side.
-
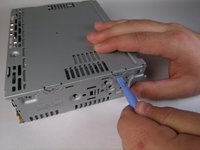
Use the plastic opening tool to pry open the top and bottom tab respectively.
-
Repeat on opposite side.
-
-
-
-
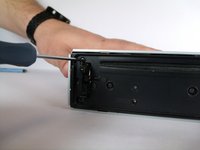
Remove four 11.5mm Phillips #00 (silver) screws from back panel.
-
-
-
Remove four 9.5mm Phillips #00 (black) screws from back panel.
-
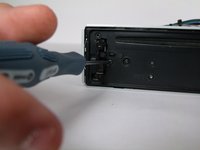
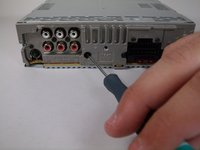
Remove two 7.5mm Phillips #00 (black) screws from back panel.
-
-
-
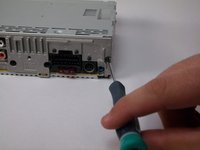
Remove one 9.5mm Phillips #00 screw.
-
Rotate device 180 degrees and repeat step.
-
-
-
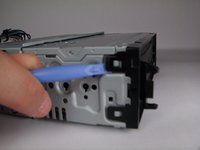
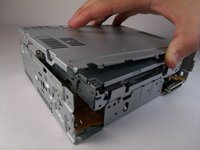
Using plastic opening tool, detach the tabs. There are two on either side.
-


To reassemble your device, follow these instructions in reverse order.
To reassemble your device, follow these instructions in reverse order.
crwdns2935221:0crwdne2935221:0
crwdns2935229:02crwdne2935229:0
crwdns2915084:0crwdne2915084:0

USF Tampa, Team 10-2, Brown Fall 2014 crwdns2935289:0USF Tampa, Team 10-2, Brown Fall 2014crwdne2935289:0
USFT-BROWN-F14S10G2
crwdns2931471:03crwdne2931471:0
crwdns2935297:07crwdne2935297:0
crwdns2947410:01crwdne2947410:0
This guide is listed as "difficult" yet only requires the use of a screwdriver and some prying tools. It would seem more appropriate to list it as "moderate" at most. I believe the motherboard guide has the same issue.
Also, you say PH#00 in the description of steps, but in the "tools" listing at the beginning of the guide, you said that a PH#0 was needed. These are not the same.