crwdns2915892:0crwdne2915892:0
This guide provided instruction on removing the motherboard and should only be followed if a compatible replacement is available or subsequent repair procedures require its removal.
crwdns2942213:0crwdne2942213:0
-
-
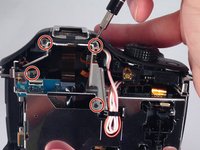
Remove the seven highlighted screws shown here.
-
-
-
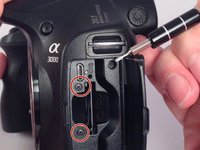
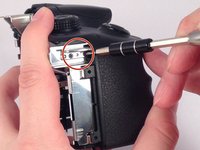
Remove this final screw from the memory card compartment.
-
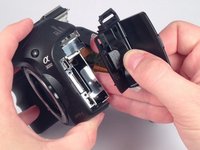
Remove the chassis by pulling the back cover away from the camera.
-
-
-
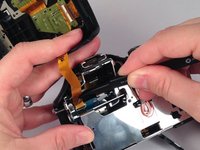
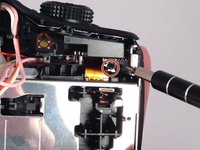
Gently but forcefully lift up on the parallel cable connecting the two halves of the camera.
-
-
-
After removing the backing from the camera. Remove the two final screws in the memory compartment area.
-
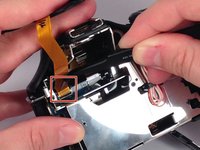
Detach the facing for the memory dock.
-
-
-
-
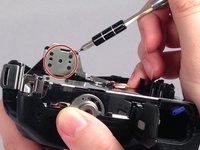
Remove the eight screws securing the mount for the flash device.
-
-
-
Remove the three remaining screws holding in the protective metal casing.
-
-
-
Remove three screws holding down the motherboard .
-
-
-
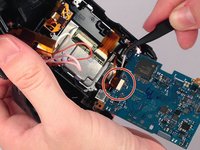
Detach the nine serial cables connecting it to the camera body.
-
-
-
Finally remove the motherboard from the casing.
-


To reassemble your device, follow these instructions in reverse order.
To reassemble your device, follow these instructions in reverse order.
crwdns2935221:0crwdne2935221:0
crwdns2935229:07crwdne2935229:0

crwdns2915084:0crwdne2915084:0

USF Tampa, Team 4-4, Meier Fall 2015 crwdns2935289:0USF Tampa, Team 4-4, Meier Fall 2015crwdne2935289:0
USFT-MEIER-F15S4G4
crwdns2931471:04crwdne2931471:0
crwdns2935297:010crwdne2935297:0
crwdns2947410:01crwdne2947410:0
Then loose the plug all the motherboard?