crwdns2942213:0crwdne2942213:0
-
-
Disconnect any power to the speaker and wait a few minutes for the capacitors to fully discharge.
-
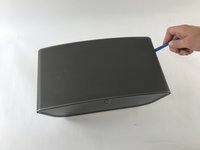
Flip the speaker upside down.
-
-
-
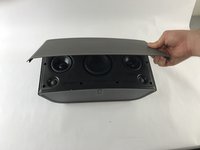
Remove eight 10mm Phillips #2 screws
-
Remove the bottom panel by pulling upwards.
-
-
-
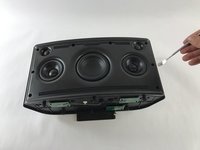
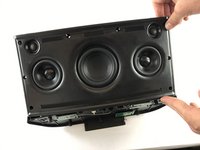
Flip the device so that the grille is facing up.
-
Locate the line on the right side of the speaker where the grill and the plastic meet, and place your plastic opening tool in the gap.
-
Run the spudger along the gap, loosening the grille from the plastic. Repeat this process on the left side as well.
-
Gently pull up on the grille, removing it from the front panel.
-
-
-
Remove the six 8mm Phillips #2 screws.
-
Remove the two 10mm Phillips #2 screws.
-
-
-
Locate the line on the right side where the front panel and back panel meet. Place a plastic opening tool in the gap, and run it along the gap. Repeat this on the left side.
-
Use the opening tool to lift the front plate. If a plastic tool is not providing enough leverage, use a metal opening tool.
-
Gently pull up on the face plate to ensure it has been detached from the enclosure.
-
-
-
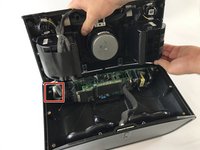
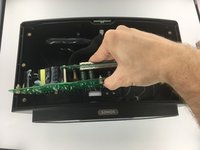
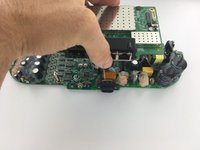
Lift up the front panel, forming a 90 degree angle with the back panel. Locate the locate ten pin connector shown. This is the wire that connects the front panel to back panel.
-
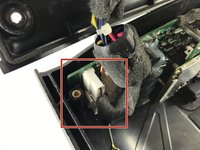
Press down on the small tab located on the connector. With the tab firmly pressed down, pull the connector out from its socket.
-
The faceplate assembly is now fully detached from the rest of the speaker.
-
-
-
-
Remove the ten pin connector.
-
-
-
Flip the device over on its front side.
-
-
-
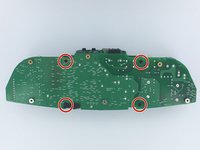
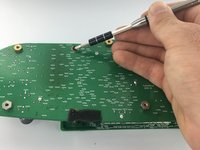
Remove six 5mm Phillips #0 screws.
-
Remove two 7mm Phillips #2 screws.
-
-
-
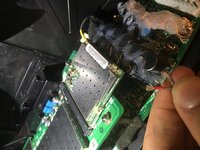
Remove the grey and red antenna connectors by lifting them away from the board.
-
Pull cords away from the board.
-
-
-
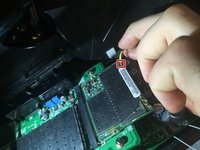
Remove the yellow antenna connector by lifting it away from the board.
-
Pull cord away from the board.
-
-
-
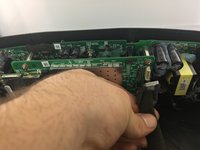
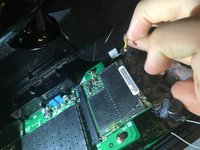
Remove circuit board by lifting it straight away from the rear plate.
-
-
-
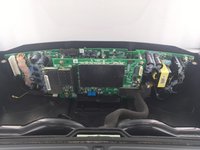
Lay the two connected boards so that the power board is facing upwards.
-
-
-
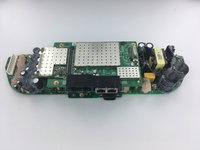
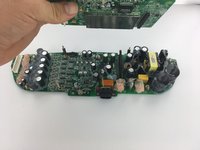
Flip boards so audio board is facing upwards, as is shown in picture.
-
-
-
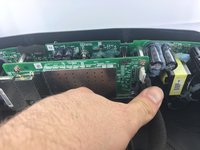
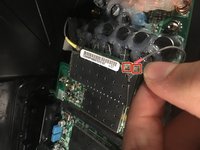
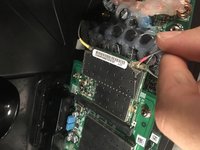
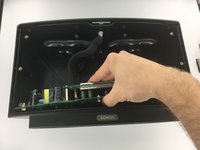
Lift control board up and away from power supply board.
-
-
-
The larger of the two boards is the power supply board.
-


To reassemble your device, follow these instructions in reverse order.
To reassemble your device, follow these instructions in reverse order.
crwdns2935221:0crwdne2935221:0
crwdns2935229:017crwdne2935229:0
crwdns2915084:0crwdne2915084:0

USF Tampa, Team S3-G6, Sullivan Spring 2017 crwdns2935289:0USF Tampa, Team S3-G6, Sullivan Spring 2017crwdne2935289:0
USFT-SULLIVAN-S17S3G6
crwdns2931471:04crwdne2931471:0
crwdns2935297:021crwdne2935297:0
crwdns2947412:09crwdne2947412:0
Great guide but where can you get replacement boards from, if at all?
Yes good question, where to get a replacement board SONOS P/N: 170-00236?
Model: JB Power Board
Does anyone know the specs on the five electrolytic capacitors that are arranged vertically (on the left side of the last image above)? I have a couple failing on one board, and I think that’s what is causing the amp to ‘click’ once it warms up.
We replaced the parts listed in the description of this clip, and the unit came back to life: https://www.youtube.com/watch?v=2R8hKdGT...
The procedure is a bit unclear in the clip, suggest following the ifixit-procedure, or both.
Thank you for your work here. Youtube video also useful.
I needed to purchase quality solder iron plus tips, solder wick, and review how to desolder capacitors. Taking out the bad fuse and the rectifier were relatively easy, but the capacitors were covered in silicone, then the old solder on its terminals proved very difficult to melt. In the end, even with temperature of tip at 340, little progress was made, so I disassembled capacitor in situ, and finally with more heat the remnant of it and the two terminals popped out. Again ,I saw this technique on YouTube.
So, having had a live chat with sonos who told me I had no warranty and it was unfixable, and that the new sonos5 is not compatible with my current Generation 1 system, I got the thing working, with next to no initial knowledge.
Cost
£90 in tools- solder iron, tips, quality electronic pliers
£10 in components from Farnell
And about 6 hours disassemble, doing the biz ( the learning curve of desoldering, removing caps, fuse, rectifier) then reassembling