crwdns2933423:0crwdne2933423:0

Solio Rocsta Internal Components Replacement

crwdns2862587:0crwdne2862587:0
crwdns2862588:0crwdne2862588:0

crwdns2942213:0crwdne2942213:0

  1. Solio Rocsta Internal Components Replacement, Internal Components: crwdns2935265:01crwdnd2935265:01crwdnd2935265:01crwdne2935265:0
    • Remove the three 7mm Torx T7 screws.

  2. Solio Rocsta Internal Components Replacement: crwdns2935265:02crwdnd2935265:01crwdnd2935265:03crwdne2935265:0 Solio Rocsta Internal Components Replacement: crwdns2935265:02crwdnd2935265:02crwdnd2935265:03crwdne2935265:0 Solio Rocsta Internal Components Replacement: crwdns2935265:02crwdnd2935265:03crwdnd2935265:03crwdne2935265:0
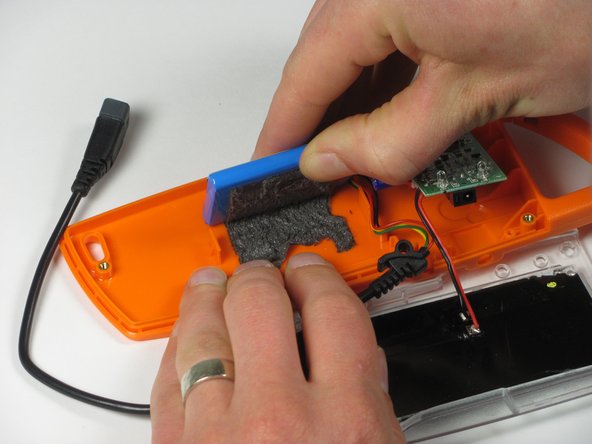
    • Insert the flat end of the spudger between the top panel and the body.

    • Use the spudger as a lever to carefully pry apart the two panels.

    • As you pry, take care not to break the small orange clip holding the top to the body.

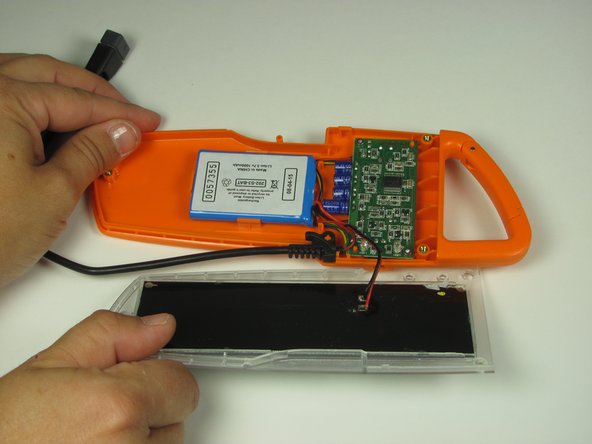
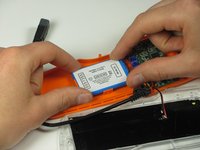
    • Lift the panel above and away to disconnect the panel from the body.

    • Be careful when lifting because you could break the wiring connecting the motherboard to the panel.

  3. Solio Rocsta Internal Components Replacement: crwdns2935265:03crwdnd2935265:01crwdnd2935265:02crwdne2935265:0 Solio Rocsta Internal Components Replacement: crwdns2935265:03crwdnd2935265:02crwdnd2935265:02crwdne2935265:0
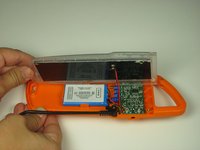
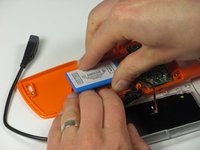
    • Lift the panel off the body and set it next to the device.

    • Remember to use caution when lifting because you could break the wiring connecting the motherboard to the panel.

  4. Solio Rocsta Internal Components Replacement: crwdns2935265:04crwdnd2935265:01crwdnd2935265:01crwdne2935265:0
    • Remove the two 6mm Torx T6 screws from the motherboard.

  5. Solio Rocsta Internal Components Replacement: crwdns2935265:05crwdnd2935265:01crwdnd2935265:02crwdne2935265:0 Solio Rocsta Internal Components Replacement: crwdns2935265:05crwdnd2935265:02crwdnd2935265:02crwdne2935265:0
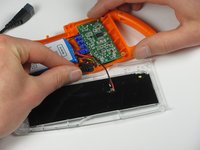
    • Lift the end of the USB cord out of the body.

    • The cord fits over an orange peg.

  6. Solio Rocsta Internal Components Replacement: crwdns2935265:06crwdnd2935265:01crwdnd2935265:03crwdne2935265:0 Solio Rocsta Internal Components Replacement: crwdns2935265:06crwdnd2935265:02crwdnd2935265:03crwdne2935265:0 Solio Rocsta Internal Components Replacement: crwdns2935265:06crwdnd2935265:03crwdnd2935265:03crwdne2935265:0
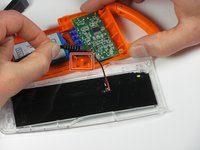
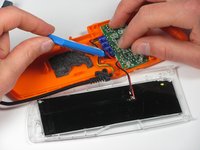
    • Lift up the battery with your fingers or with the flat end of the spudger.

    • Be prepared to use force because the battery is adhered to the body.

    • Do not try to remove the battery completely because the wiring connects to the motherboard.

  7. Solio Rocsta Internal Components Replacement: crwdns2935265:07crwdnd2935265:01crwdnd2935265:02crwdne2935265:0 Solio Rocsta Internal Components Replacement: crwdns2935265:07crwdnd2935265:02crwdnd2935265:02crwdne2935265:0
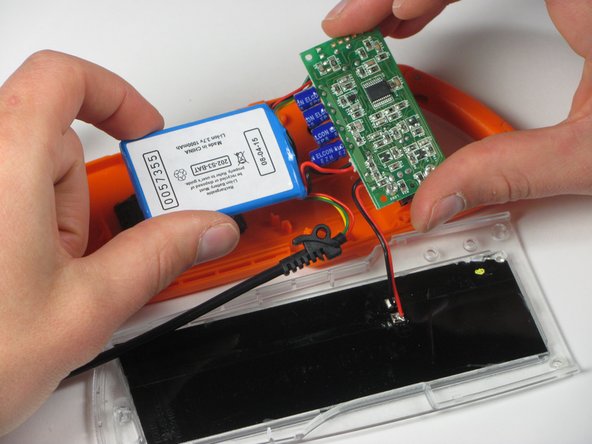
    • Remove the battery and the motherboard from the body.

crwdns2915888:0crwdne2915888:0

To reassemble your device, follow these instructions in reverse order.

crwdns2935227:0crwdne2935227:0

Aimee Whiteside

crwdns2935283:005/21/15crwdne2935283:0

1 crwdns2915208:0crwdne2915208:0

crwdns2935295:0crwdne2935295:0

crwdns2915084:0crwdne2915084:0

iFixit, Team 1-1, Goldberg SU 2015 crwdns2935289:0iFixit, Team 1-1, Goldberg SU 2015crwdne2935289:0

FIX-GOLDBERG-SU15S1G1

crwdns2931471:03crwdne2931471:0

crwdns2935303:01crwdne2935303:0

crwdns2944067:00crwdne2944067:0

crwdns2917038:0crwdne2917038:0

crwdns2936625:0crwdne2936625:0:

crwdns2936751:024crwdne2936751:0 0

crwdns2936753:07crwdne2936753:0 0

crwdns2936753:030crwdne2936753:0 0

crwdns2942667:0crwdne2942667:0 58