crwdns2933423:0crwdne2933423:0

Sirius XM Onyx Plus Screen Replacement

crwdns2942213:0crwdne2942213:0

  1. Sirius XM Onyx Plus Screen Replacement, Case: crwdns2935265:01crwdnd2935265:01crwdnd2935265:01crwdne2935265:0
    • Wedge a plastic opening tool in between the case.

  2. Sirius XM Onyx Plus Screen Replacement: crwdns2935265:02crwdnd2935265:01crwdnd2935265:03crwdne2935265:0 Sirius XM Onyx Plus Screen Replacement: crwdns2935265:02crwdnd2935265:02crwdnd2935265:03crwdne2935265:0 Sirius XM Onyx Plus Screen Replacement: crwdns2935265:02crwdnd2935265:03crwdnd2935265:03crwdne2935265:0
    • Starting with the bottom left corner, press down on the plastic opening tool to unhook the latches on the inside of the device.

    • You have to start with the bottom left and right corners, and then flip the device to over and do the top of the device.

  3. Sirius XM Onyx Plus Screen Replacement: crwdns2935265:03crwdnd2935265:01crwdnd2935265:01crwdne2935265:0
    • Once unclipped, separate the back casing from the device.

  4. Sirius XM Onyx Plus Screen Replacement, Motherboard: crwdns2935265:04crwdnd2935265:01crwdnd2935265:02crwdne2935265:0 Sirius XM Onyx Plus Screen Replacement, Motherboard: crwdns2935265:04crwdnd2935265:02crwdnd2935265:02crwdne2935265:0
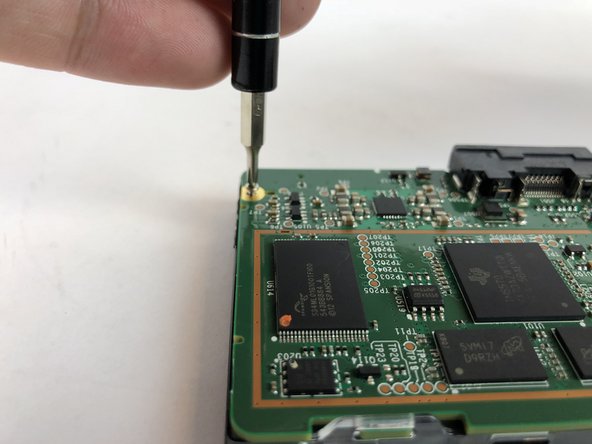
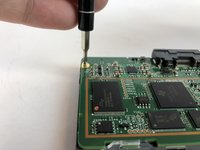
    • Remove the three 5.4mm JIS #00 screws from the motherboard.

  5. Sirius XM Onyx Plus Screen Replacement: crwdns2935265:05crwdnd2935265:01crwdnd2935265:01crwdne2935265:0
    • Unlatch the two clips located at the top of the device that hold the motherboard in place.

  6. Sirius XM Onyx Plus Screen Replacement: crwdns2935265:06crwdnd2935265:01crwdnd2935265:01crwdne2935265:0
    • Lift the motherboard up from the bottom.

  7. Sirius XM Onyx Plus Screen Replacement: crwdns2935265:07crwdnd2935265:01crwdnd2935265:01crwdne2935265:0
    • Lift the screen up, so you can see where it is attached to the motherboard.

  8. Sirius XM Onyx Plus Screen Replacement: crwdns2935265:08crwdnd2935265:01crwdnd2935265:01crwdne2935265:0
    • Use a spudger to flip up the retaining flap on the display ribbon cable ZIF socket.

  9. Sirius XM Onyx Plus Screen Replacement: crwdns2935265:09crwdnd2935265:01crwdnd2935265:01crwdne2935265:0
    • Carefully pull the ribbon out from the ZIF connector.

  10. Sirius XM Onyx Plus Screen Replacement, Screen: crwdns2935265:010crwdnd2935265:01crwdnd2935265:01crwdne2935265:0
    • Take the black casing off the screen.

crwdns2915888:0crwdne2915888:0

To reassemble your device, follow these instructions in reverse order.

crwdns2935227:0crwdne2935227:0

Angel Rivera

crwdns2935283:001/25/18crwdne2935283:0

532 crwdns2915208:0crwdne2915208:0

crwdns2935297:05crwdne2935297:0

crwdns2915084:0crwdne2915084:0

USF Tampa, Team S7-G2, Passmore Spring 2018 crwdns2935289:0USF Tampa, Team S7-G2, Passmore Spring 2018crwdne2935289:0

USFT-PASSMORE-S18S7G2

crwdns2931471:04crwdne2931471:0

crwdns2935297:05crwdne2935297:0

crwdns2944067:00crwdne2944067:0

crwdns2917038:0crwdne2917038:0

crwdns2936625:0crwdne2936625:0:

crwdns2936751:024crwdne2936751:0 0

crwdns2936753:07crwdne2936753:0 6

crwdns2936753:030crwdne2936753:0 15

crwdns2942667:0crwdne2942667:0 575