crwdns2915892:0crwdne2915892:0
The XLR connector is the place where the XLR cable connects to the microphone. If the connector is pulled out, the internal wiring of the microphone can be damaged.
crwdns2942213:0crwdne2942213:0
-
-
-
While holding the microphone connector in one hand, and the XLR cable in the other hand, slowly pull them apart.
-
Check to make sure all of the internal wires are connected. If you see a disconnected wire, take a look at the connector soldering guide.
 crwdns2952109:0crwdne2952109:0
-
-
-
Hold the microphone connector in one hand and the microphone base in the other.
-
Line up the screw in the connector with the hole in the middle of the microphone.
-
Also, align the ridge on the microphone connector (located near the top of the connector) with the slot in the base of the microphone.
-
-
-
-
With those parts aligned, push the connector back into the microphone until the screw lines up with hole in the side of the microphone.
-
-
-
Using a small flat head screw driver, turn the screw in the side of the microphone clockwise until it is tight.
-
-


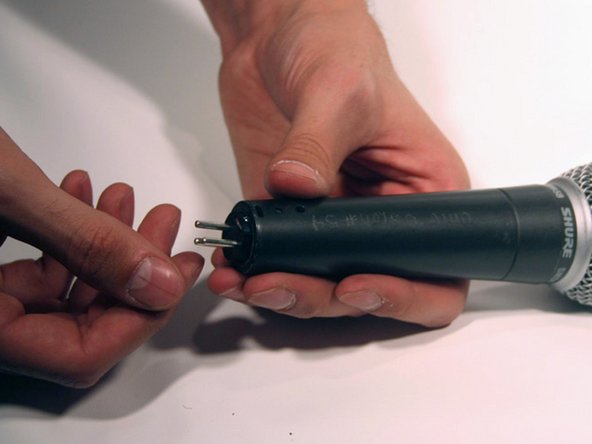

Following these steps should reinstall the XLR connector back into the microphone.
crwdns2935221:0crwdne2935221:0
crwdns2935229:02crwdne2935229:0

crwdns2935287:0crwdne2935287:0

Cal Poly, Team 7-53, Forte Fall 2012 crwdns2935289:0Cal Poly, Team 7-53, Forte Fall 2012crwdne2935289:0
CPSU-FORTE-F12S7G53
crwdns2931471:05crwdne2931471:0
crwdns2935297:061crwdne2935297:0
crwdns2947412:02crwdne2947412:0
you can buy the part here
kmusic - crwdns2934203:0crwdne2934203:0 crwdns2950251:0crwdne2950251:0
simple clear and precise. Small problem fixed in no time, thank you very much!
Kimmo Pekari - crwdns2934203:0crwdne2934203:0 crwdns2950251:0crwdne2950251:0
