crwdns2933423:0crwdne2933423:0
crwdns2947577:0crwdnd2947577:0crwdne2947577:0

Shop-Vac MC150A Motor Replacement

crwdns2942213:0crwdne2942213:0

    1. Shop-Vac MC150A Motor Replacement, Unlatch the power unit assembly: crwdns2935265:01crwdnd2935265:01crwdnd2935265:01crwdne2935265:0
      • Before you begin, make sure to switch off the device and unplug it from the outlet.

      • Unlatch the two side clips securing the power unit assembly to the tank.

      • Remove the power unit assembly from the tank assembly.

      crwdns2952109:0crwdne2952109:0

      crwdns2917038:0crwdne2917038:0

    2. Shop-Vac MC150A Motor Replacement, Remove the top cover: crwdns2935265:02crwdnd2935265:01crwdnd2935265:02crwdne2935265:0 Shop-Vac MC150A Motor Replacement, Remove the top cover: crwdns2935265:02crwdnd2935265:02crwdnd2935265:02crwdne2935265:0
      • Use a 3.5 mm hex key to remove the three screws securing the top cover.

      • Remove the top cover.

      crwdns2952109:0crwdne2952109:0

      crwdns2917038:0crwdne2917038:0

    3. Shop-Vac MC150A Motor Replacement: crwdns2935265:03crwdnd2935265:01crwdnd2935265:01crwdne2935265:0
      • Use a 3.5 mm hex key to remove the four screws securing the power unit assembly.

      crwdns2952109:0crwdne2952109:0

      crwdns2917038:0crwdne2917038:0

    4. Shop-Vac MC150A Motor Replacement: crwdns2935265:04crwdnd2935265:01crwdnd2935265:01crwdne2935265:0
      • Separate the power unit assembly from the cover.

      crwdns2952109:0crwdne2952109:0

      crwdns2917038:0crwdne2917038:0

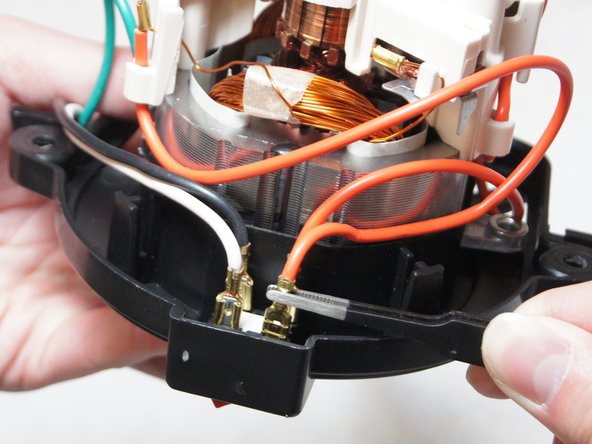
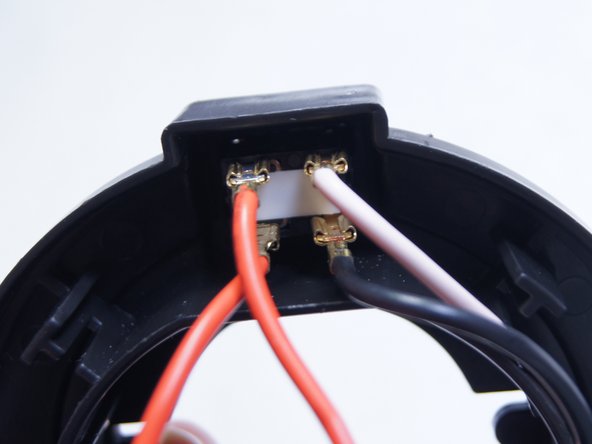
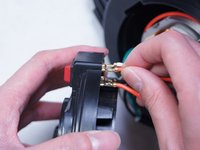
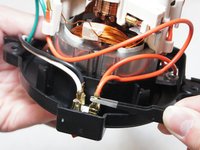
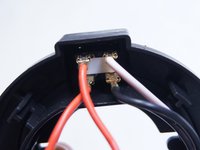
    1. Shop-Vac MC150A Motor Replacement, Disconnect the switch: crwdns2935265:05crwdnd2935265:01crwdnd2935265:03crwdne2935265:0 Shop-Vac MC150A Motor Replacement, Disconnect the switch: crwdns2935265:05crwdnd2935265:02crwdnd2935265:03crwdne2935265:0 Shop-Vac MC150A Motor Replacement, Disconnect the switch: crwdns2935265:05crwdnd2935265:03crwdnd2935265:03crwdne2935265:0
      • Pull out and disconnect the four spade connectors from the switch module.

      • During reassembly, use the last image as a reference for how to connect the wires.

      crwdns2952109:0crwdne2952109:0

      crwdns2917038:0crwdne2917038:0

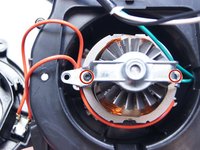
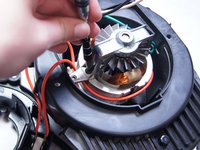
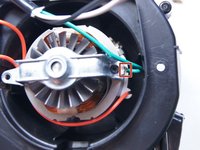
    2. Shop-Vac MC150A Motor Replacement, Unscrew the motor bracket: crwdns2935265:06crwdnd2935265:01crwdnd2935265:02crwdne2935265:0 Shop-Vac MC150A Motor Replacement, Unscrew the motor bracket: crwdns2935265:06crwdnd2935265:02crwdnd2935265:02crwdne2935265:0
      • Use a Torx T15 driver to unscrew the two screws securing the metal motor bracket.

      crwdns2952109:0crwdne2952109:0

      crwdns2917038:0crwdne2917038:0

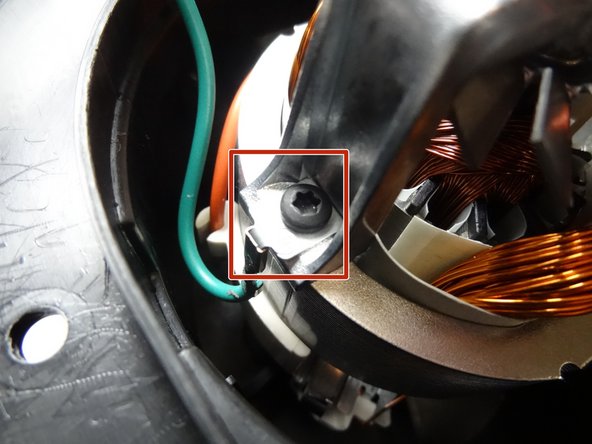
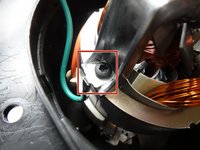
    3. Shop-Vac MC150A Motor Replacement: crwdns2935265:07crwdnd2935265:01crwdnd2935265:02crwdne2935265:0 Shop-Vac MC150A Motor Replacement: crwdns2935265:07crwdnd2935265:02crwdnd2935265:02crwdne2935265:0
      • During reassembly, be sure to reattach the green ground wire clip to the bracket.

      crwdns2952109:0crwdne2952109:0

      crwdns2917038:0crwdne2917038:0

    4. Shop-Vac MC150A Motor Replacement: crwdns2935265:08crwdnd2935265:01crwdnd2935265:01crwdne2935265:0
      • Separate the clip from the green wire and transfer it to the replacement motor.

      crwdns2952109:0crwdne2952109:0

      crwdns2917038:0crwdne2917038:0

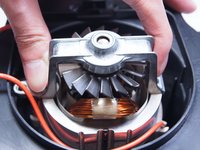
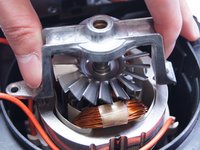
    1. Shop-Vac MC150A Motor Replacement, Motor: crwdns2935265:09crwdnd2935265:01crwdnd2935265:02crwdne2935265:0 Shop-Vac MC150A Motor Replacement, Motor: crwdns2935265:09crwdnd2935265:02crwdnd2935265:02crwdne2935265:0
      • Remove the motor bracket.

      crwdns2952109:0crwdne2952109:0

      crwdns2917038:0crwdne2917038:0

    2. Shop-Vac MC150A Motor Replacement: crwdns2935265:010crwdnd2935265:01crwdnd2935265:01crwdne2935265:0
      • Turn the part over to the other side.

      • Use the socket wrench remove the bolt securing the aluminum plate.

      crwdns2952109:0crwdne2952109:0

      crwdns2917038:0crwdne2917038:0

    3. Shop-Vac MC150A Motor Replacement: crwdns2935265:011crwdnd2935265:01crwdnd2935265:01crwdne2935265:0
      • Unscrew the two Phillips head screws holding the cover to the motor.

      • After removing the cover to the motor, you can replace the motor.

      crwdns2952109:0crwdne2952109:0

      crwdns2917038:0crwdne2917038:0

crwdns2915888:0crwdne2915888:0

To reassemble your device, follow these instructions in reverse order.

crwdns2935221:0crwdne2935221:0

crwdns2935229:08crwdne2935229:0

Ngunlian

crwdns2935283:002/08/16crwdne2935283:0

756 crwdns2915208:0crwdne2915208:0

crwdns2935297:05crwdne2935297:0

crwdns2935287:0crwdne2935287:0

IUPUI, Team 1-2, Baechle Spring 2016 crwdns2935289:0IUPUI, Team 1-2, Baechle Spring 2016crwdne2935289:0

IUPUI-BAECHLE-S16S1G2

crwdns2931471:05crwdne2931471:0

crwdns2935297:018crwdne2935297:0

crwdns2947412:02crwdne2947412:0

Yeah that's what we all would like to know, removing is the easy part

Junkyard_Boxer - crwdns2934203:0crwdne2934203:0 crwdns2950251:0crwdne2950251:0

crwdns2917038:0crwdne2917038:0

crwdns2936625:0crwdne2936625:0:

crwdns2936751:024crwdne2936751:0 2

crwdns2936753:07crwdne2936753:0 48

crwdns2936753:030crwdne2936753:0 243

crwdns2942667:0crwdne2942667:0 32,377