crwdns2933423:0crwdne2933423:0

Shark Navigator Lift-Away Zero-M Power Switch Replacement

crwdns2942213:0crwdne2942213:0

  1. Shark Navigator Lift-Away Zero-M Power Switch Replacement, Power Switch: crwdns2935265:01crwdnd2935265:01crwdnd2935265:02crwdne2935265:0 Shark Navigator Lift-Away Zero-M Power Switch Replacement, Power Switch: crwdns2935265:01crwdnd2935265:02crwdnd2935265:02crwdne2935265:0
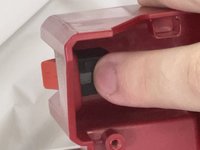
    • Depress the dust cup release button and remove the dust cup.

  2. Shark Navigator Lift-Away Zero-M Power Switch Replacement: crwdns2935265:02crwdnd2935265:01crwdnd2935265:02crwdne2935265:0 Shark Navigator Lift-Away Zero-M Power Switch Replacement: crwdns2935265:02crwdnd2935265:02crwdnd2935265:02crwdne2935265:0
    • Use a Torx TR6 screwdriver to remove the seven 18 mm screws from the frame of the vacuum.

  3. Shark Navigator Lift-Away Zero-M Power Switch Replacement: crwdns2935265:03crwdnd2935265:01crwdnd2935265:02crwdne2935265:0 Shark Navigator Lift-Away Zero-M Power Switch Replacement: crwdns2935265:03crwdnd2935265:02crwdnd2935265:02crwdne2935265:0
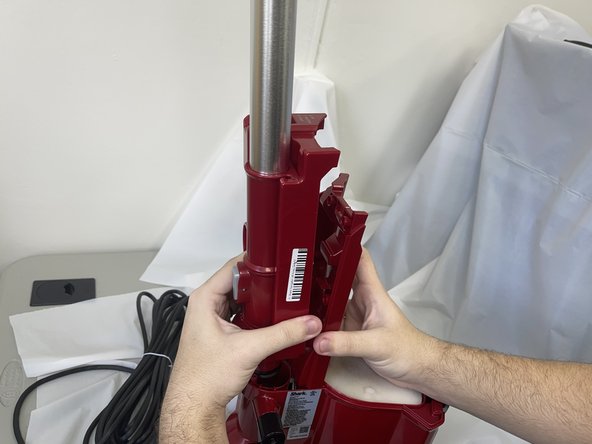
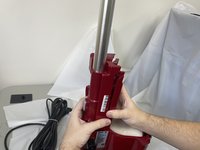
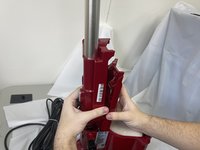
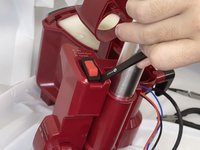
    • Grab the front of the vacuum frame and lift the wand assembly to remove it.

    • This will reveal the underside of the switch.

  4. Shark Navigator Lift-Away Zero-M Power Switch Replacement: crwdns2935265:04crwdnd2935265:01crwdnd2935265:02crwdne2935265:0 Shark Navigator Lift-Away Zero-M Power Switch Replacement: crwdns2935265:04crwdnd2935265:02crwdnd2935265:02crwdne2935265:0
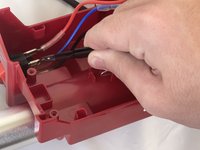
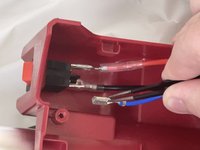
    • Use tweezers or your fingers to disconnect the power switch connectors.

    • Each of the wires has a release tab at the bottom of the metal portion. Be sure to depress it before pulling to avoid damage.

  5. Shark Navigator Lift-Away Zero-M Power Switch Replacement: crwdns2935265:05crwdnd2935265:01crwdnd2935265:03crwdne2935265:0 Shark Navigator Lift-Away Zero-M Power Switch Replacement: crwdns2935265:05crwdnd2935265:02crwdnd2935265:03crwdne2935265:0 Shark Navigator Lift-Away Zero-M Power Switch Replacement: crwdns2935265:05crwdnd2935265:03crwdnd2935265:03crwdne2935265:0
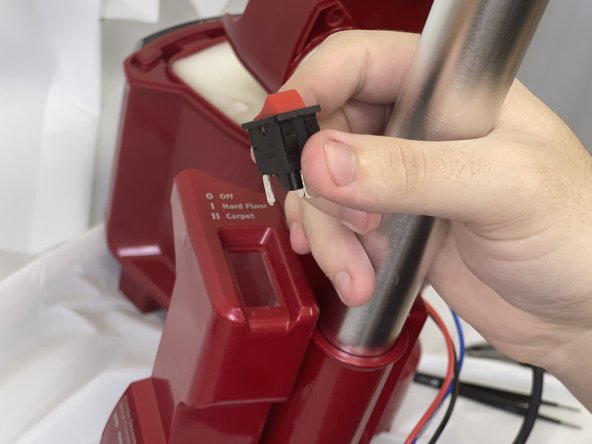
    • Push the switch out of its housing from the underside.

    • Remove the switch.

crwdns2915888:0crwdne2915888:0

To reassemble your device, follow these instructions in reverse order.

Chris Collins

crwdns2935283:002/05/24crwdne2935283:0

127 crwdns2915208:0crwdne2915208:0

crwdns2935295:0crwdne2935295:0

crwdns2915084:0crwdne2915084:0

University of North Texas, Team 3-4, Kilpatrick Spring 2024 crwdns2935289:0University of North Texas, Team 3-4, Kilpatrick Spring 2024crwdne2935289:0

UNT-KILPATRICK-S24S3G4

crwdns2931471:04crwdne2931471:0

crwdns2935297:05crwdne2935297:0

crwdns2947412:00crwdne2947412:0

crwdns2917038:0crwdne2917038:0

crwdns2936625:0crwdne2936625:0:

crwdns2936751:024crwdne2936751:0 0

crwdns2936753:07crwdne2936753:0 2

crwdns2936753:030crwdne2936753:0 6

crwdns2942667:0crwdne2942667:0 153