crwdns2915892:0crwdne2915892:0
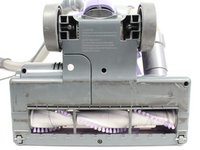
The motherboard controls the power to the vacuum. If your vacuum is not turning on, your motherboard may need to be replaced. Follow these instructions to access the motherboard for replacement.
crwdns2942213:0crwdne2942213:0
-
-
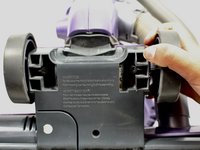
Lift the latches on both sides of the vacuum to release the dust canister.
-
Remove the dust canister from the vacuum by lifting it up.
-
-
-
Lay down the vacuum to access the bottom panel of the roller brush compartment.
Instead of laying down the whole vacuum, remove the cord from the hooks, then, using the red button/lever on the side, detach the vacuum from the base. https://youtu.be/gQmme4xespU?t=69
-
-
-
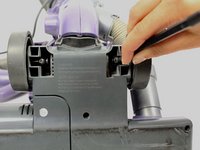
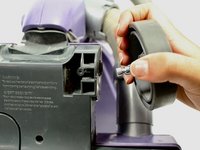
Using the metal spudger, pry the two small wheels located at the two bottom corners of the vacuum to remove them.
It needs to be noted that this step will VOID the warranty!
You can also use a small slot screwdriver to push directly on the metal rods that hold the wheels.
-
-
-
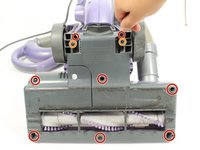
Remove the eight 19mm Phillips #2 screws from the plastic cover.
-
Remove the two 14 mm Phillips #2 screws from the upper section of the plastic cover.
Leave the orange screws in. Removing the wheels is not necessary and does not make the repair easier.
the whole floor unit can be removed which makes the job A LOT EASIER.
Mine has stars instead of phillips head #2 screws! : (
-
-
-
-
Remove the wheels by pulling them out of their axles, away from the vacuum.
Any advice on putting the wheels back on the vacuum? I cannot get the metal axle pins back into the socket all the way, and I’m hesitant to just bang them in.
Im not even sure taking out the wheels is necessary. They dont appear to be attached to the purple plate.
Removing the wheels is not necessary and does not make the repair easier.
-
-
-
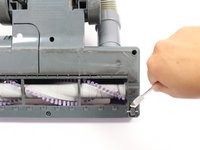
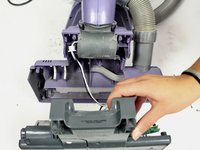
Gently pull the grey lower part of the roller brush compartment away from the purple upper part of the compartment.
-
-
-
Lift up and then pull the roller belt off of the roller brush and the motor to remove it.
-
-
-
Take out the roller brush by lifting it out of its tray.
Me interesa adquirir el cepillo de esta aspiradora y conocer la ubicación del centro de servicio técnico en San Luis Potosí. Slp. Mex
Saber centro de servicio tec. En slp
Be careful not to pinch any wires as you put the cover back on .
-
-
-
Lift the motherboard out of the plastic tray to remove it.
-
-
-
Disconnect the wires connecting the motherboard to the vacuum by unscrewing the twist-on wire connectors.
-
Desolder the wires connecting the motherboard to the motor. Get tips on how to desolder by checking out How to Solder and Desolder.
-


To reassemble your device, follow these instructions in reverse order.
To reassemble your device, follow these instructions in reverse order.
crwdns2935221:0crwdne2935221:0
crwdns2935229:03crwdne2935229:0
crwdns2915084:0crwdne2915084:0

Cal Poly, Team S18-G5, Forte Fall 2017 crwdns2935289:0Cal Poly, Team S18-G5, Forte Fall 2017crwdne2935289:0
CPSU-FORTE-F17S18G5
crwdns2931471:04crwdne2931471:0
crwdns2935297:010crwdne2935297:0
crwdns2947412:05crwdne2947412:0
Great work team!
Thanks Thomas! Your support is greatly appreciated!
Any knowledge on how to fix or replace the handle lick button. Mine won't lock and so the whole vacuum doesn't work
I have a 350 will the 352 powerhead motherboard work as a replacement as I can’t find a 305 one
I have a 350 vacume but need a replacement powerhead circuit board would the 352 work? It looks the same and it’s the same unit?
Removing the dust canister is not necessary.
Taudris - crwdns2934203:0crwdne2934203:0