crwdns2933423:0crwdne2933423:0

Shark ION Robot R75 Top Cover Replacement

crwdns2862623:0crwdne2862623:0
crwdns2942641:0crwdne2942641:0

crwdns2942213:0crwdne2942213:0

  1. Shark ION Robot R75 Top Cover Replacement, Battery: crwdns2935265:01crwdnd2935265:01crwdnd2935265:03crwdne2935265:0 Shark ION Robot R75 Top Cover Replacement, Battery: crwdns2935265:01crwdnd2935265:02crwdnd2935265:03crwdne2935265:0 Shark ION Robot R75 Top Cover Replacement, Battery: crwdns2935265:01crwdnd2935265:03crwdnd2935265:03crwdne2935265:0
    • Make sure the robot is shut off by pressing the power button on top.

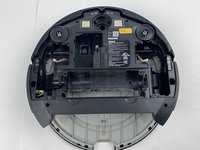
    • Flip the R75 over so that the underside is facing up.

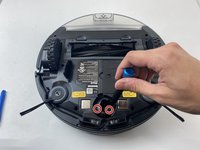
    • Using a Phillips #1 screwdriver, remove the 4mm screw in the battery cover.

    • Remove the battery cover.

  2. Shark ION Robot R75 Top Cover Replacement: crwdns2935265:02crwdnd2935265:01crwdnd2935265:03crwdne2935265:0 Shark ION Robot R75 Top Cover Replacement: crwdns2935265:02crwdnd2935265:02crwdnd2935265:03crwdne2935265:0 Shark ION Robot R75 Top Cover Replacement: crwdns2935265:02crwdnd2935265:03crwdnd2935265:03crwdne2935265:0
    • Be careful when removing the battery, as it will still be connected to a wire.

    • Slowly pull the white tabs outward to remove the battery.

  3. Shark ION Robot R75 Top Cover Replacement: crwdns2935265:03crwdnd2935265:01crwdnd2935265:02crwdne2935265:0 Shark ION Robot R75 Top Cover Replacement: crwdns2935265:03crwdnd2935265:02crwdnd2935265:02crwdne2935265:0
    crwdns2935267:0crwdne2935267:0
    Tweezers
    $4.99
    • Be careful when removing the connector, as the part can break if too much force is used.

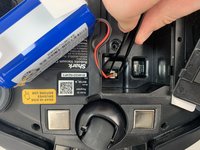
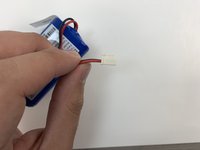
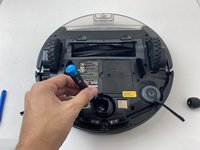
    • Push down on the tab of the battery connector using a set of tweezers and pull the connector away from the robot to free the wire.

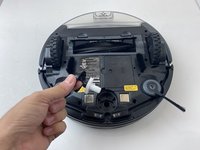
    • Remove the battery from the device.

  4. Shark ION Robot R75 Top Cover Replacement, Main Brush: crwdns2935265:04crwdnd2935265:01crwdnd2935265:01crwdne2935265:0
    • Push on the two tabs on the edge of the main brush cover and pull up to remove the cover.

  5. Shark ION Robot R75 Top Cover Replacement: crwdns2935265:05crwdnd2935265:01crwdnd2935265:01crwdne2935265:0
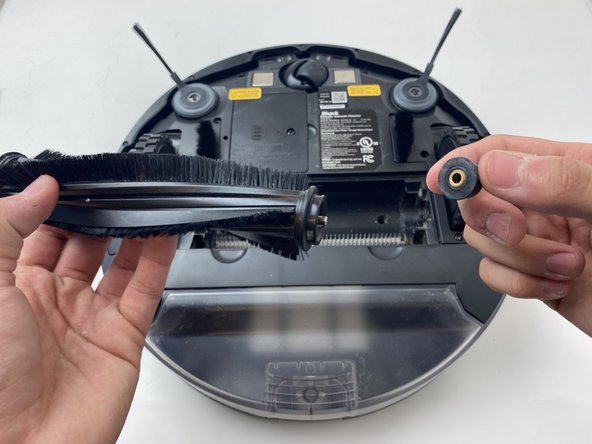
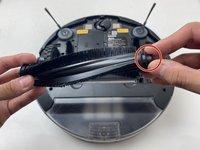
    • Pull the main brush slightly to the right to remove it from the compartment.

  6. Shark ION Robot R75 Top Cover Replacement: crwdns2935265:06crwdnd2935265:01crwdnd2935265:02crwdne2935265:0 Shark ION Robot R75 Top Cover Replacement: crwdns2935265:06crwdnd2935265:02crwdnd2935265:02crwdne2935265:0
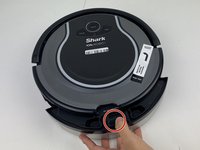
    • Remove the rubber end cap indicated by the red circle.

    • This step is not needed for a replacement. However, it is important for maintenance. Hair will build up in this area over time, and will cause error messages to pop up, as well as stopping the R75 from cleaning and moving.

    • Inspect this component at least every six months. This time may be less if you have animals.

  7. Shark ION Robot R75 Top Cover Replacement, Side Brush: crwdns2935265:07crwdnd2935265:01crwdnd2935265:03crwdne2935265:0 Shark ION Robot R75 Top Cover Replacement, Side Brush: crwdns2935265:07crwdnd2935265:02crwdnd2935265:03crwdne2935265:0 Shark ION Robot R75 Top Cover Replacement, Side Brush: crwdns2935265:07crwdnd2935265:03crwdnd2935265:03crwdne2935265:0
    • Grab the side brushes by the plastic tab at the base of the bristles, and gently lift up.

    • It's recommended to clean the area with a dry microfiber cloth during replacement, as debris can collect beneath the brush during use.

  8. Shark ION Robot R75 Top Cover Replacement, Drive Wheel Assembly: crwdns2935265:08crwdnd2935265:01crwdnd2935265:01crwdne2935265:0
    • Flip the R75 to its underside.

    • Make sure the R75 is shut off.

    • For extra security, disconnect the battery by following the prerequisite guide.

  9. Shark ION Robot R75 Top Cover Replacement: crwdns2935265:09crwdnd2935265:01crwdnd2935265:03crwdne2935265:0 Shark ION Robot R75 Top Cover Replacement: crwdns2935265:09crwdnd2935265:02crwdnd2935265:03crwdne2935265:0 Shark ION Robot R75 Top Cover Replacement: crwdns2935265:09crwdnd2935265:03crwdnd2935265:03crwdne2935265:0
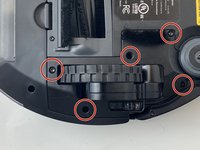
    • Using a Torx T15 screwdriver, remove the five screws from the drive wheel assembly.

    • Carefully lift the drive wheel assembly from the wheel well by gently pulling up on the wheel.

    • The assembly will still be connected to the motherboard via a cable, so be sure not to pull so hard that the cable rips.

  10. Shark ION Robot R75 Top Cover Replacement: crwdns2935265:010crwdnd2935265:01crwdnd2935265:03crwdne2935265:0 Shark ION Robot R75 Top Cover Replacement: crwdns2935265:010crwdnd2935265:02crwdnd2935265:03crwdne2935265:0 Shark ION Robot R75 Top Cover Replacement: crwdns2935265:010crwdnd2935265:03crwdnd2935265:03crwdne2935265:0
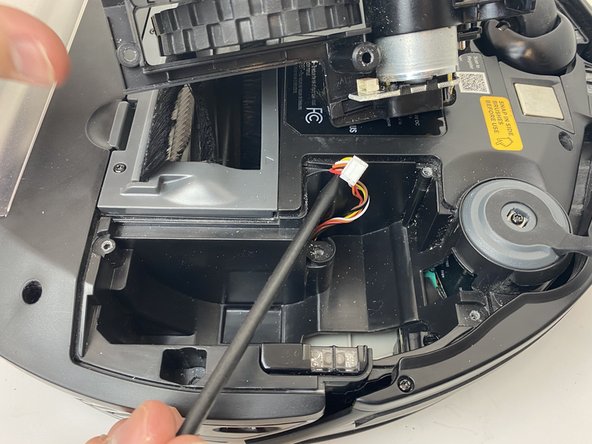
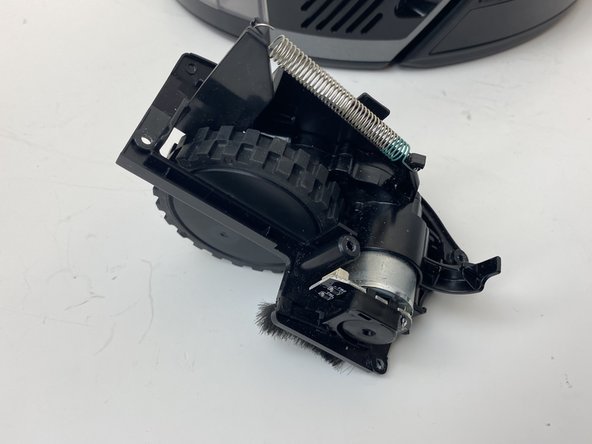
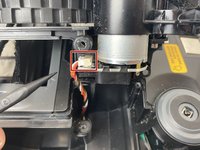
    • Flip the wheel assembly over and disconnect the cable connector on its underside.

    • Remove the drive wheel assembly.

    • Repeat this process for the other side if necessary.

  11. Shark ION Robot R75 Top Cover Replacement, Shark ION Robot R75 Caster Wheel: crwdns2935265:011crwdnd2935265:01crwdnd2935265:01crwdne2935265:0
    • Orient the device with the bottom facing up.

  12. Shark ION Robot R75 Top Cover Replacement: crwdns2935265:012crwdnd2935265:01crwdnd2935265:03crwdne2935265:0 Shark ION Robot R75 Top Cover Replacement: crwdns2935265:012crwdnd2935265:02crwdnd2935265:03crwdne2935265:0 Shark ION Robot R75 Top Cover Replacement: crwdns2935265:012crwdnd2935265:03crwdnd2935265:03crwdne2935265:0
    • Using a plastic opening tool, pry first one side of the wheel, then the other out of the caster.

    • Remove the wheel.

  13. Shark ION Robot R75 Top Cover Replacement: crwdns2935265:013crwdnd2935265:01crwdnd2935265:03crwdne2935265:0 Shark ION Robot R75 Top Cover Replacement: crwdns2935265:013crwdnd2935265:02crwdnd2935265:03crwdne2935265:0 Shark ION Robot R75 Top Cover Replacement: crwdns2935265:013crwdnd2935265:03crwdnd2935265:03crwdne2935265:0
    • Using a Torx TR9 screwdriver, remove both screws from the caster assembly beneath the wheel.

    • Pull the caster assembly up from its slot in the device.

  14. Shark ION Robot R75 Top Cover Replacement, Top Cover: crwdns2935265:014crwdnd2935265:01crwdnd2935265:03crwdne2935265:0 Shark ION Robot R75 Top Cover Replacement, Top Cover: crwdns2935265:014crwdnd2935265:02crwdnd2935265:03crwdne2935265:0 Shark ION Robot R75 Top Cover Replacement, Top Cover: crwdns2935265:014crwdnd2935265:03crwdnd2935265:03crwdne2935265:0
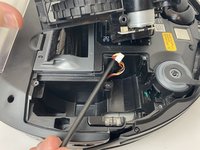
    • Push down on the black tab and remove the dust bin

  15. Shark ION Robot R75 Top Cover Replacement: crwdns2935265:015crwdnd2935265:01crwdnd2935265:02crwdne2935265:0 Shark ION Robot R75 Top Cover Replacement: crwdns2935265:015crwdnd2935265:02crwdnd2935265:02crwdne2935265:0
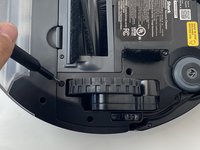
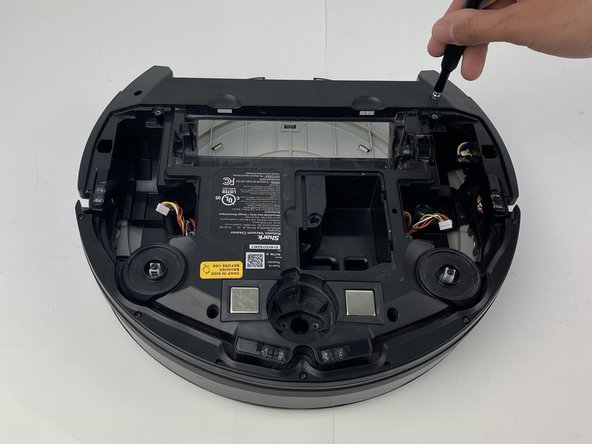
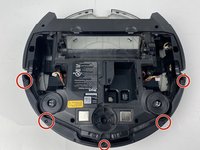
    • Using a Torx TR15 screwdriver, remove the five screws from the bottom cover.

  16. Shark ION Robot R75 Top Cover Replacement: crwdns2935265:016crwdnd2935265:01crwdnd2935265:03crwdne2935265:0 Shark ION Robot R75 Top Cover Replacement: crwdns2935265:016crwdnd2935265:02crwdnd2935265:03crwdne2935265:0 Shark ION Robot R75 Top Cover Replacement: crwdns2935265:016crwdnd2935265:03crwdnd2935265:03crwdne2935265:0
    • Make sure the robot is facing rearward

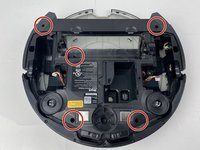
    • Using a Torx TR15 screwdriver, remove the five screws along the front edge of the device.

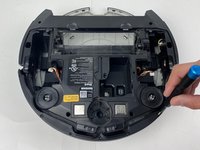
    • Pull the bottom part of the bump guard away from the body of the device.

  17. Shark ION Robot R75 Top Cover Replacement: crwdns2935265:017crwdnd2935265:01crwdnd2935265:03crwdne2935265:0 Shark ION Robot R75 Top Cover Replacement: crwdns2935265:017crwdnd2935265:02crwdnd2935265:03crwdne2935265:0 Shark ION Robot R75 Top Cover Replacement: crwdns2935265:017crwdnd2935265:03crwdnd2935265:03crwdne2935265:0
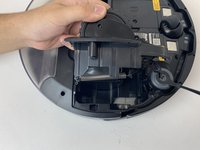
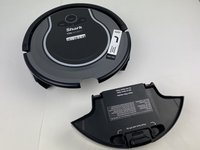
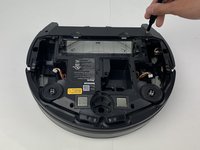
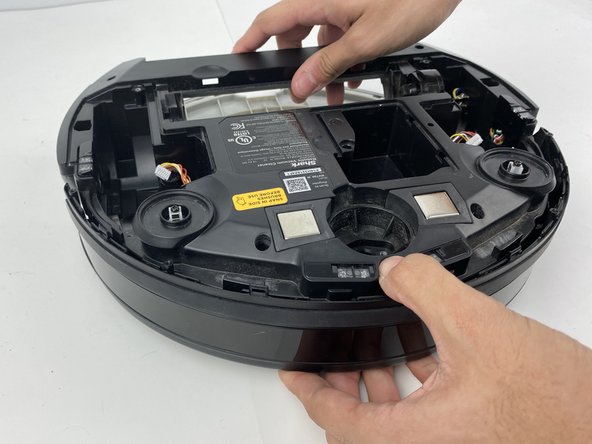
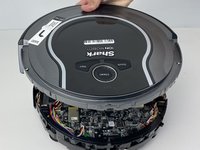
    • Lift the top cover up from the rear of the robot to separate the top cover from the rest of the robot.

    • Be careful when separating the top from the rest of the robot, as the plastic clips can break if excessive force is applied.

    • From here, easy access to all sensors, the main brush motor, and the fan are all granted.

crwdns2935217:0crwdne2935217:0

Kyle Wilbourn

crwdns2935283:001/25/20crwdne2935283:0

513 crwdns2915208:0crwdne2915208:0

crwdns2935297:04crwdne2935297:0

crwdns2915084:0crwdne2915084:0

Embry-Riddle Aeronautical University, Team S3-G6, Watkins Spring 2020 crwdns2935289:0Embry-Riddle Aeronautical University, Team S3-G6, Watkins Spring 2020crwdne2935289:0

ERAU-WATKINS-S20S3G6

crwdns2931471:04crwdne2931471:0

crwdns2935297:014crwdne2935297:0

crwdns2947412:00crwdne2947412:0

crwdns2917038:0crwdne2917038:0

crwdns2936625:0crwdne2936625:0:

crwdns2936751:024crwdne2936751:0 0

crwdns2936753:07crwdne2936753:0 0

crwdns2936753:030crwdne2936753:0 0

crwdns2942667:0crwdne2942667:0 53