crwdns2933423:0crwdne2933423:0

Sega CD CD Tray Replacement

crwdns2942213:0crwdne2942213:0

  1. Sega CD CD Tray Replacement, Sega CD Plastic Housing Removal: crwdns2935265:01crwdnd2935265:01crwdnd2935265:02crwdne2935265:0 Sega CD CD Tray Replacement, Sega CD Plastic Housing Removal: crwdns2935265:01crwdnd2935265:02crwdnd2935265:02crwdne2935265:0
    • Using a Phillips head screwdriver remove six screws from the bottom of the console.

    • The six screws are marked.

  2. Sega CD CD Tray Replacement: crwdns2935265:02crwdnd2935265:01crwdnd2935265:01crwdne2935265:0
    • Remove the two screws that attach the Genesis' connector to the rest of the console.

    • The two screws are marked in the diagram.

  3. Sega CD CD Tray Replacement: crwdns2935265:03crwdnd2935265:01crwdnd2935265:01crwdne2935265:0
    • Slide the lock tab to the left to separate the halves of the console.

  4. Sega CD CD Tray Replacement: crwdns2935265:04crwdnd2935265:01crwdnd2935265:01crwdne2935265:0
    • Lift from the left side to remove the top of the case.

  5. Sega CD CD Tray Replacement: crwdns2935265:05crwdnd2935265:01crwdnd2935265:01crwdne2935265:0
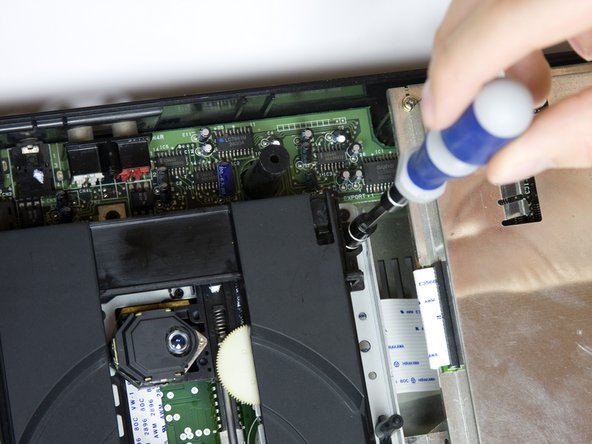
    • Using the spudger, pry the cover off of the Genesis attachment.

  6. Sega CD CD Tray Replacement: crwdns2935265:06crwdnd2935265:01crwdnd2935265:01crwdne2935265:0
    • Lift the top of the case to remove the cover.

  7. Sega CD CD Tray Replacement: crwdns2935265:07crwdnd2935265:01crwdnd2935265:01crwdne2935265:0
    • Remove the faceplate by pulling it up, then out.

  8. Sega CD CD Tray Replacement, CD Tray: crwdns2935265:08crwdnd2935265:01crwdnd2935265:02crwdne2935265:0 Sega CD CD Tray Replacement, CD Tray: crwdns2935265:08crwdnd2935265:02crwdnd2935265:02crwdne2935265:0
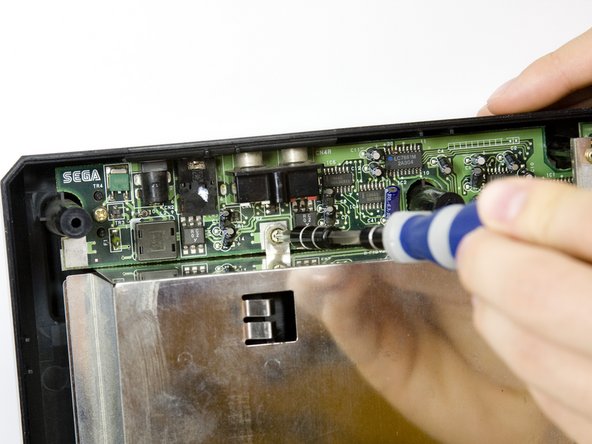
    • Remove metal plate by unscrewing the three screws with the Phillips head screwdriver and then lifting the plate.

    • The three screws are shown on the diagram.

  9. Sega CD CD Tray Replacement: crwdns2935265:09crwdnd2935265:01crwdnd2935265:02crwdne2935265:0 Sega CD CD Tray Replacement: crwdns2935265:09crwdnd2935265:02crwdnd2935265:02crwdne2935265:0
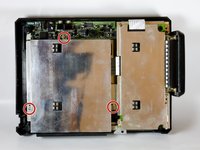
    • Remove the two screws from the plastic bar.

    • The two screws are shown pictured.

  10. Sega CD CD Tray Replacement: crwdns2935265:010crwdnd2935265:01crwdnd2935265:02crwdne2935265:0 Sega CD CD Tray Replacement: crwdns2935265:010crwdnd2935265:02crwdnd2935265:02crwdne2935265:0
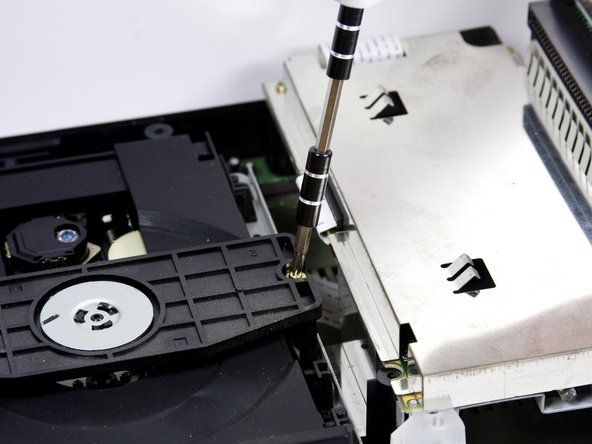
    • To remove the CD tray

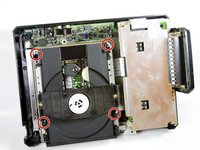
    • Remove the four screws with the Phillips head screwdriver.

  11. Sega CD CD Tray Replacement: crwdns2935265:011crwdnd2935265:01crwdnd2935265:01crwdne2935265:0
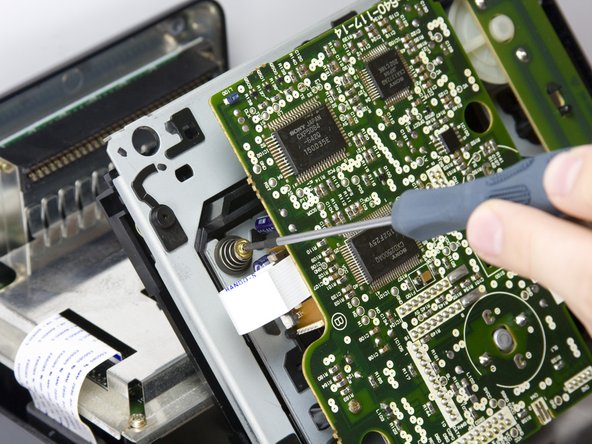
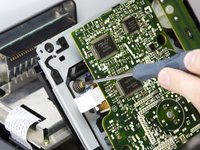
    • Carefully unplug the wire connected to optical reader.

  12. Sega CD CD Tray Replacement: crwdns2935265:012crwdnd2935265:01crwdnd2935265:02crwdne2935265:0 Sega CD CD Tray Replacement: crwdns2935265:012crwdnd2935265:02crwdnd2935265:02crwdne2935265:0
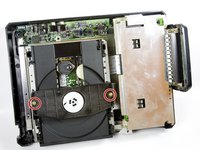
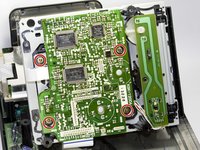
    • Remove the four screws on the underside of the CD tray with a small Phillips head screwdriver.

    • The four screws are highlighted on the diagram.

    • The four springs below the circuit board are attached to the screws, so be careful not to lose them when you remove the screws.

  13. Sega CD CD Tray Replacement: crwdns2935265:013crwdnd2935265:01crwdnd2935265:01crwdne2935265:0
    • Carefully remove the CD tray from circuit board.

crwdns2915888:0crwdne2915888:0

To reassemble your device, follow these instructions in reverse order.

crwdns2935227:0crwdne2935227:0

sskyllin

crwdns2935283:010/18/10crwdne2935283:0

21 crwdns2915208:0crwdne2915208:0

crwdns2935297:02crwdne2935297:0

crwdns2915084:0crwdne2915084:0

Cal Poly, Team 5-14, Maness Fall 2010 crwdns2935289:0Cal Poly, Team 5-14, Maness Fall 2010crwdne2935289:0

CPSU-MANESS-F10S5G14

crwdns2931471:04crwdne2931471:0

crwdns2935297:012crwdne2935297:0

crwdns2944067:00crwdne2944067:0

crwdns2917038:0crwdne2917038:0

crwdns2936625:0crwdne2936625:0:

crwdns2936751:024crwdne2936751:0 0

crwdns2936753:07crwdne2936753:0 11

crwdns2936753:030crwdne2936753:0 39

crwdns2942667:0crwdne2942667:0 9,600