crwdns2933423:0crwdne2933423:0

Screen Replacement

crwdns2942213:0crwdne2942213:0

  1. Screen Replacement, Back Cover: crwdns2935265:01crwdnd2935265:01crwdnd2935265:03crwdne2935265:0 Screen Replacement, Back Cover: crwdns2935265:01crwdnd2935265:02crwdnd2935265:03crwdne2935265:0 Screen Replacement, Back Cover: crwdns2935265:01crwdnd2935265:03crwdnd2935265:03crwdne2935265:0
    • Insert the plastic opening tool into the middle of the bottom edge of the device. The tool should be inserted within the seam between the back and front covers.

    • Slide the opening tool to the right and slowly continue to separate the back cover from the device.

    • Avoid prying on the buttons, as they are easily damaged.

  2. Screen Replacement: crwdns2935265:02crwdnd2935265:01crwdnd2935265:01crwdne2935265:0
    • Pull the cover off of the device once about three quarters of the cover has been pried open using the plastic opening tool.

  3. Screen Replacement, Battery: crwdns2935265:03crwdnd2935265:01crwdnd2935265:01crwdne2935265:0
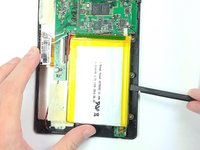
    • Remove masking tape from the battery.

  4. Screen Replacement: crwdns2935265:04crwdnd2935265:01crwdnd2935265:03crwdne2935265:0 Screen Replacement: crwdns2935265:04crwdnd2935265:02crwdnd2935265:03crwdne2935265:0 Screen Replacement: crwdns2935265:04crwdnd2935265:03crwdnd2935265:03crwdne2935265:0
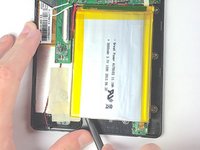
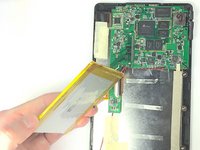
    • Pry the battery from the base using the nylon spudger and move it away from the motherboard.

    • Handle the battery with care to avoid damaging it.

  5. Screen Replacement: crwdns2935265:05crwdnd2935265:01crwdnd2935265:03crwdne2935265:0 Screen Replacement: crwdns2935265:05crwdnd2935265:02crwdnd2935265:03crwdne2935265:0 Screen Replacement: crwdns2935265:05crwdnd2935265:03crwdnd2935265:03crwdne2935265:0
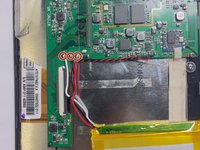
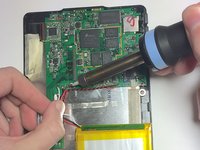
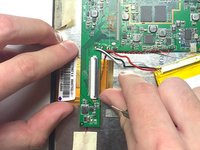
    • De-solder the three contact points and remove the battery.

    • See the following guide for instructions on how to solder. How To Solder and Desolder Connections

    • Use caution when operating the soldering iron.

  6. Screen Replacement, Motherboard: crwdns2935265:06crwdnd2935265:01crwdnd2935265:03crwdne2935265:0 Screen Replacement, Motherboard: crwdns2935265:06crwdnd2935265:02crwdnd2935265:03crwdne2935265:0 Screen Replacement, Motherboard: crwdns2935265:06crwdnd2935265:03crwdnd2935265:03crwdne2935265:0
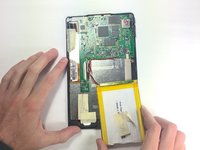
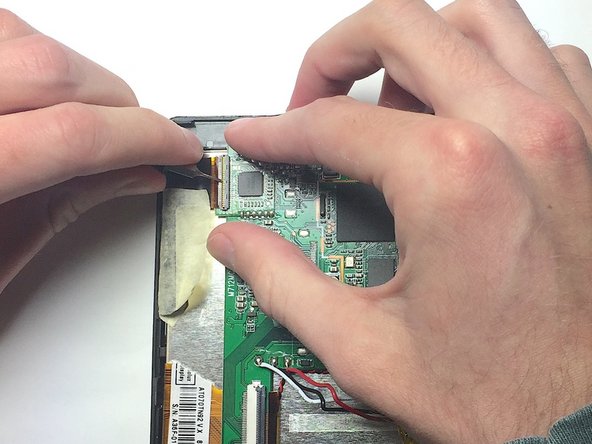
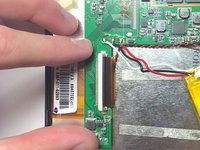
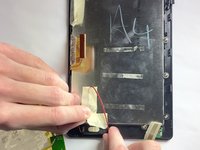
    • Remove the two ZIF connectors attached to the motherboard by flipping up the black tabs before pulling the ribbon cable away.

    • Only use a fingernail or nylon spudger to flip up the retaining flap. Using metal tools may damage delicate components.

  7. Screen Replacement: crwdns2935265:07crwdnd2935265:01crwdnd2935265:01crwdne2935265:0
    • Use the nut driver and J00 bit to remove the three 4 mm screws.

  8. Screen Replacement: crwdns2935265:08crwdnd2935265:01crwdnd2935265:03crwdne2935265:0 Screen Replacement: crwdns2935265:08crwdnd2935265:02crwdnd2935265:03crwdne2935265:0 Screen Replacement: crwdns2935265:08crwdnd2935265:03crwdnd2935265:03crwdne2935265:0
    • Peel back metal tape that is hiding the auxiliary port wires.

    • Remove tape that is holding the speaker wires in place.

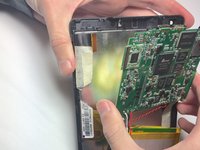
    • Lift up on the motherboard to release it from the tablet.

  9. Screen Replacement, Screen: crwdns2935265:09crwdnd2935265:01crwdnd2935265:01crwdne2935265:0
    • Use the nut driver and the J0 bit to unscrew the four 4 mm screws

  10. Screen Replacement: crwdns2935265:010crwdnd2935265:01crwdnd2935265:02crwdne2935265:0 Screen Replacement: crwdns2935265:010crwdnd2935265:02crwdnd2935265:02crwdne2935265:0
    • If your are replacing a broken screen be careful when handling broken glass.

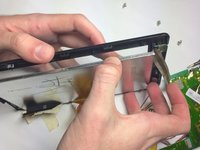
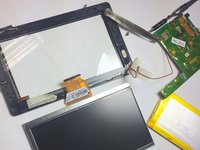
    • Remove the screen from the front cover of the device. At this point there should be no other component holding the screen down.

crwdns2915888:0crwdne2915888:0

To reassemble your device, follow these instructions in reverse order.

crwdns2935227:0crwdne2935227:0

Walker Karstens

crwdns2935283:010/30/16crwdne2935283:0

364 crwdns2915208:0crwdne2915208:0

crwdns2935297:03crwdne2935297:0

crwdns2915084:0crwdne2915084:0

Baylor, Team 4-1, Williams Fall 2016 crwdns2935289:0Baylor, Team 4-1, Williams Fall 2016crwdne2935289:0

BU-WILLIAMS-F16S4G1

crwdns2931471:04crwdne2931471:0

crwdns2935297:014crwdne2935297:0

crwdns2947412:00crwdne2947412:0

crwdns2917038:0crwdne2917038:0

crwdns2936625:0crwdne2936625:0:

crwdns2936751:024crwdne2936751:0 4

crwdns2936753:07crwdne2936753:0 24

crwdns2936753:030crwdne2936753:0 88

crwdns2942667:0crwdne2942667:0 2,283