crwdns2933423:0crwdne2933423:0

Sanyo VPC-T850 Lens Replacement

crwdns2942213:0crwdne2942213:0

  1. Sanyo VPC-T850 Lens Replacement, Battery: crwdns2935265:01crwdnd2935265:01crwdnd2935265:01crwdne2935265:0
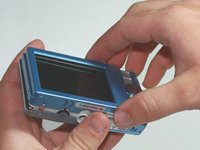
    • Make sure the camera is powered off by pressing and holding the small, square button embedded in the top rim of the camera.

  2. Sanyo VPC-T850 Lens Replacement: crwdns2935265:02crwdnd2935265:01crwdnd2935265:01crwdne2935265:0
    • Locate the hatch found on the bottom of the camera.

    • Open the hatch by gripping the small notch and sliding it outwards.

  3. Sanyo VPC-T850 Lens Replacement: crwdns2935265:03crwdnd2935265:01crwdnd2935265:01crwdne2935265:0
    • Push the small, plastic arm out of the way to free the battery.

    • The battery is spring loaded and will pop out slightly when the arm is moved.

  4. Sanyo VPC-T850 Lens Replacement: crwdns2935265:04crwdnd2935265:01crwdnd2935265:01crwdne2935265:0
    • Pull the battery out of the camera and close the hatch.

    • To reinsert, there is a triangle on the battery indicating which direction to slide it in.

  5. Sanyo VPC-T850 Lens Replacement, Outer Casing: crwdns2935265:05crwdnd2935265:01crwdnd2935265:03crwdne2935265:0 Sanyo VPC-T850 Lens Replacement, Outer Casing: crwdns2935265:05crwdnd2935265:02crwdnd2935265:03crwdne2935265:0 Sanyo VPC-T850 Lens Replacement, Outer Casing: crwdns2935265:05crwdnd2935265:03crwdnd2935265:03crwdne2935265:0
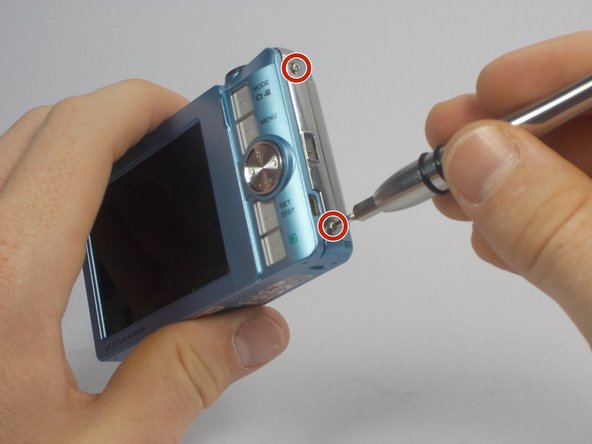
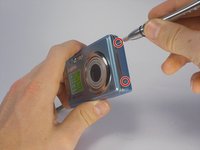
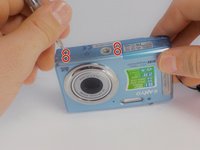
    • Using your Phillips #000 Screwdriver, remove the eight screws located around the sides and bottom of the camera.

    • Be sure to keep track of the side each screw comes from, as they come in different lengths.

  6. Sanyo VPC-T850 Lens Replacement: crwdns2935265:06crwdnd2935265:01crwdnd2935265:02crwdne2935265:0 Sanyo VPC-T850 Lens Replacement: crwdns2935265:06crwdnd2935265:02crwdnd2935265:02crwdne2935265:0
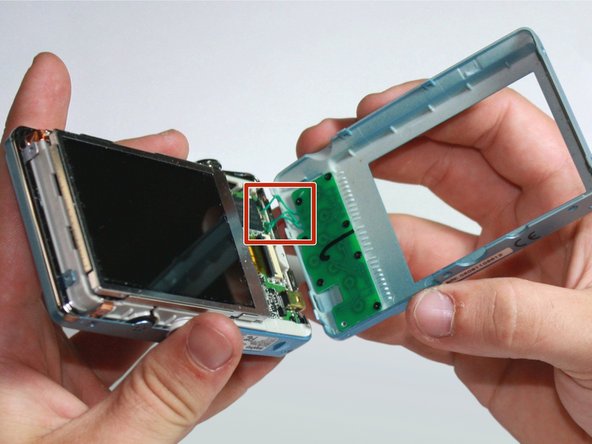
    • Orient the camera so the display is facing up.

    • Gently pull off the rear panel surrounding the display.

    • There are still three green wires connecting the panel to the rest of the camera.

    • Use your prying tool if you have difficulties removing the panel by hand.

  7. Sanyo VPC-T850 Lens Replacement: crwdns2935265:07crwdnd2935265:01crwdnd2935265:01crwdne2935265:0
    • Remove the eight black screws connecting the keypad circuit board to the rear panel.

  8. Sanyo VPC-T850 Lens Replacement: crwdns2935265:08crwdnd2935265:01crwdnd2935265:02crwdne2935265:0 Sanyo VPC-T850 Lens Replacement: crwdns2935265:08crwdnd2935265:02crwdnd2935265:02crwdne2935265:0
    • With a plastic opening tool, gently remove the chrome framing on the left and right sides of the camera.

  9. Sanyo VPC-T850 Lens Replacement: crwdns2935265:09crwdnd2935265:01crwdnd2935265:01crwdne2935265:0
    • Flip the camera over so the lens is facing up.

    • Gently lift up the front panel to remove it from the rest of the camera.

    • Use your plastic opening tool if you have difficulties removing the panel by hand.

  10. Sanyo VPC-T850 Lens Replacement, LCD Display: crwdns2935265:010crwdnd2935265:01crwdnd2935265:01crwdne2935265:0
    • Flip the device over to where the display is located.

    • Using your plastic opening tool, lift the display out of its metal housing.

  11. Sanyo VPC-T850 Lens Replacement: crwdns2935265:011crwdnd2935265:01crwdnd2935265:01crwdne2935265:0
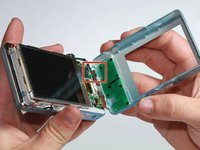
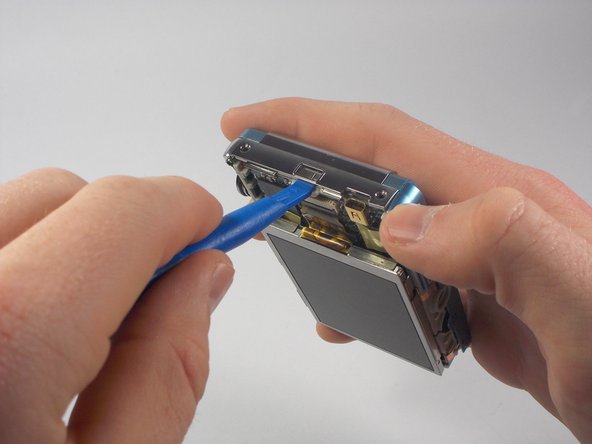
    • Locate the orange ribbon connecting the display to the camera.

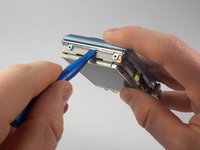
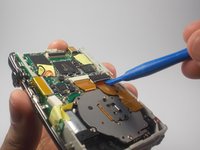
    • Using your plastic opening tool, gently lift the black bar holding the orange ribbon to the camera.

  12. Sanyo VPC-T850 Lens Replacement: crwdns2935265:012crwdnd2935265:01crwdnd2935265:01crwdne2935265:0
    • With two fingers held firmly on the display, gently pull the orange ribbon out of the camera.

    • Pull slowly to avoid severing the orange ribbon from the display.

  13. Sanyo VPC-T850 Lens Replacement, Lens: crwdns2935265:013crwdnd2935265:01crwdnd2935265:01crwdne2935265:0
    • Orient the camera so the lens is facing up.

    • Locate and remove the two screws connecting the lens to the camera.

  14. Sanyo VPC-T850 Lens Replacement: crwdns2935265:014crwdnd2935265:01crwdnd2935265:02crwdne2935265:0 Sanyo VPC-T850 Lens Replacement: crwdns2935265:014crwdnd2935265:02crwdnd2935265:02crwdne2935265:0
    • Flip the camera back around to the other side.

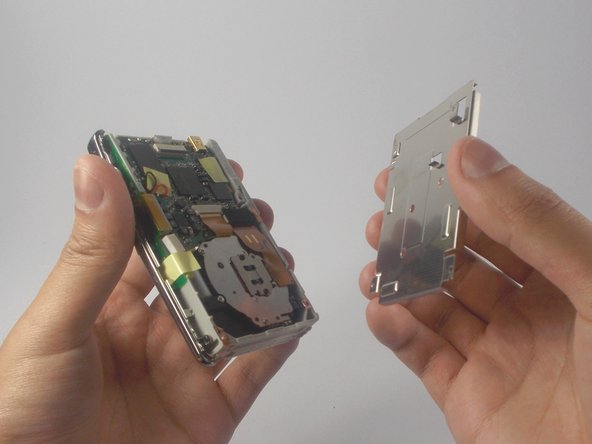
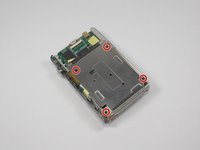
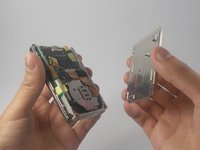
    • Remove the four black screws connecting the metal display holder to the camera.

    • You do not have to remove the three screws located near the center.

    • Gently lift the display holder to reveal the underside of the lens.

  15. Sanyo VPC-T850 Lens Replacement: crwdns2935265:015crwdnd2935265:01crwdnd2935265:03crwdne2935265:0 Sanyo VPC-T850 Lens Replacement: crwdns2935265:015crwdnd2935265:02crwdnd2935265:03crwdne2935265:0 Sanyo VPC-T850 Lens Replacement: crwdns2935265:015crwdnd2935265:03crwdnd2935265:03crwdne2935265:0
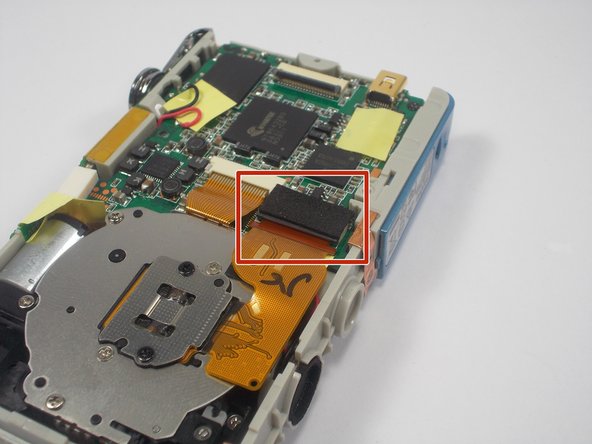
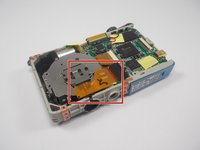
    • Locate where the larger orange ribbon is plugged into the motherboard.

    • There should be a rectangular foam piece covering the part it is plugged into.

    • Using your plastic opening tool, gently lift the edge of the rectangle where the orange ribbon is connected.

  16. Sanyo VPC-T850 Lens Replacement: crwdns2935265:016crwdnd2935265:01crwdnd2935265:01crwdne2935265:0
    • With two fingers, slowly lift the lens out of its compartment.

  17. Sanyo VPC-T850 Lens Replacement: crwdns2935265:017crwdnd2935265:01crwdnd2935265:01crwdne2935265:0
    • With the lens between your thumb and index finger, pull to delicately slide the ribbons out of their connections.

    • The lens should be placed back into the compartment before attempting to reconnect the ribbons.

crwdns2915888:0crwdne2915888:0

To reassemble your device, follow these instructions in reverse order.

crwdns2935227:0crwdne2935227:0

James Robinson

crwdns2935283:010/27/15crwdne2935283:0

459 crwdns2915208:0crwdne2915208:0

crwdns2935297:04crwdne2935297:0

crwdns2915084:0crwdne2915084:0

UMass Dartmouth, Team 5-5, Gulbrandsen Fall 2015 crwdns2935289:0UMass Dartmouth, Team 5-5, Gulbrandsen Fall 2015crwdne2935289:0

UMASSD-GULBRANDSEN-F15S5G5

crwdns2931471:03crwdne2931471:0

crwdns2935297:010crwdne2935297:0

crwdns2944067:00crwdne2944067:0

crwdns2917038:0crwdne2917038:0

crwdns2936625:0crwdne2936625:0:

crwdns2936751:024crwdne2936751:0 3

crwdns2936753:07crwdne2936753:0 5

crwdns2936753:030crwdne2936753:0 6

crwdns2942667:0crwdne2942667:0 267