crwdns2915892:0crwdne2915892:0
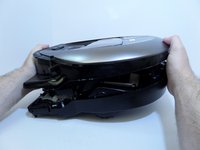
Replace the right driving wheel of your POWERbot to end movement problems . To resolve the C 03 error code, replace the right driving wheel.
crwdns2942213:0crwdne2942213:0
-
-
Turn the emergency switch off.
-
-
-
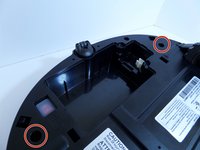
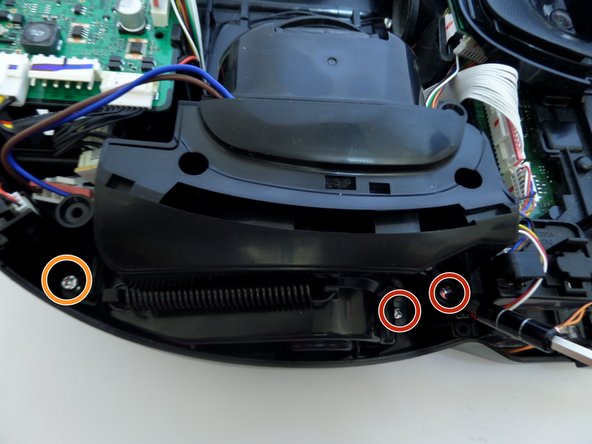
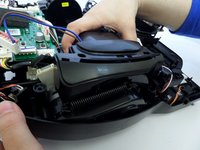
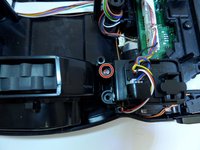
Remove the two exposed screws on the top right of the device.
-
-
-
Lift the cover plate to expose the battery.
-
-
-
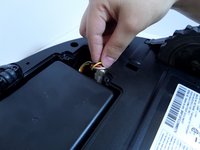
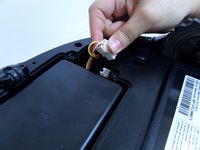
Using one hand, pinch the white plastic connector where the battery's wiring connects the POWERbot. Pull up to disconnect.
-
-
-
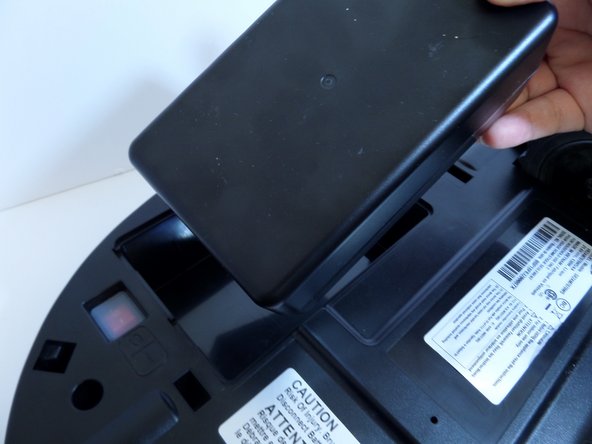
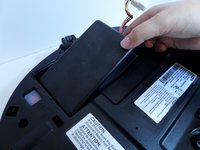
Lift the battery from the right side, up and out of its compartment.
-
-
-
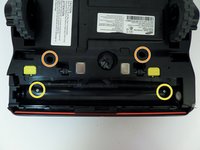
Unscrew the two silver 1.5 cm screws on the left and right side of the battery compartment.
-
Remove the two 1.5 cm screws above the yellow sliding lock tabs.
-
Remove the two 1.2 cm screws in the brush compartment.
-
-
-
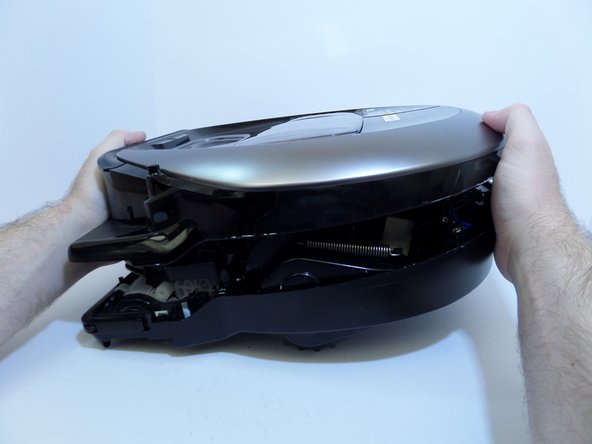
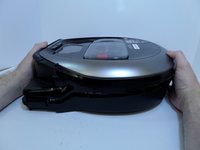
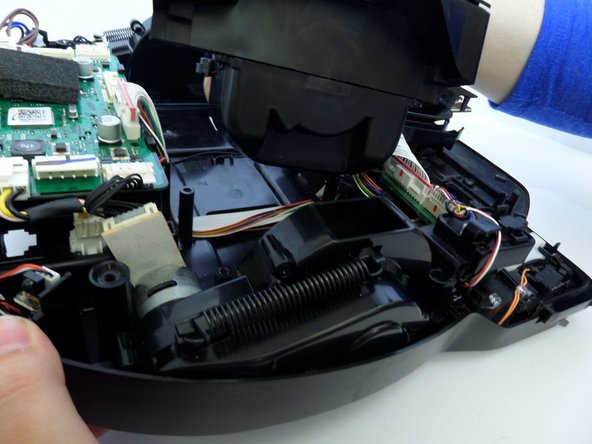
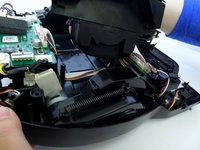
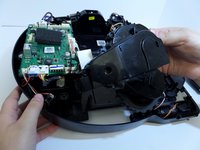
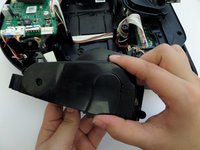
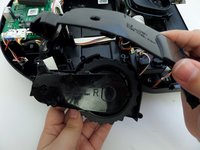
With moderate force, separate the silver top from the black bottom of the vacuum.
-
-
-
-
Disconnect the white and red wired connector attached to the top half of the base of the vacuum by squeezing the connector and pulling up.
-
-
-
Pinching the top and bottom of the black wired connector, pull outward, fully detaching the top from the bottom of the device.
-
-
-
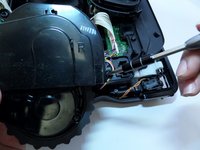
Detach the wide circuit connector on the left side by pinching and pressing down on the right and left side of the clip, pulling the connector out.
-
-
-
Remove the four 1.2 cm screws.
-
Remove the single 0.8 cm screw.
-
-
-
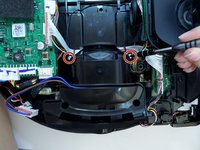
Remove the two 1.5 cm screws on the motor chamber.
-
-
-
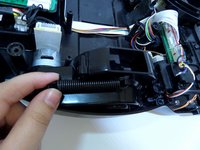
Lift the motor by grabbing the body of the motor, lifting upward.
-
-
-
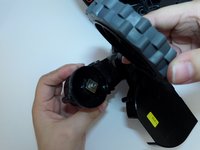
With the spring fully retracted, unhook the spring from the wheel casing.
-
-
-
Remove the screw securing the black plastic piece to the right of the wheel casing.
-
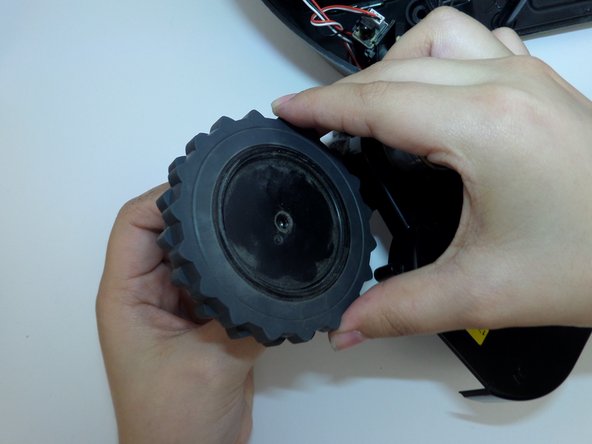
Lift wheel and wheel casing out of vacuum base.
-
-
-
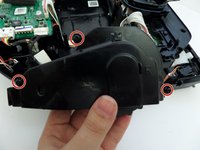
Remove the three screws fastening the two halves of the wheel casing together.
-
-
-
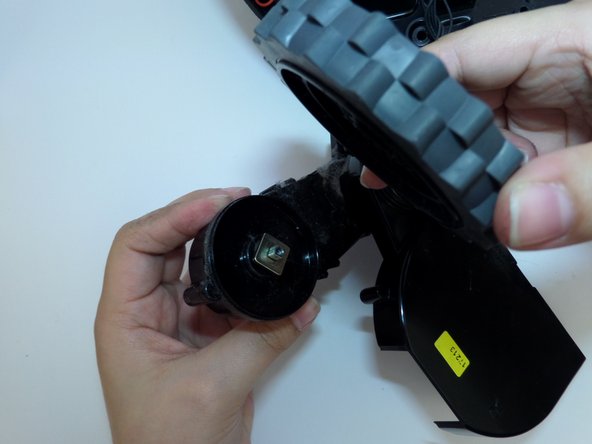
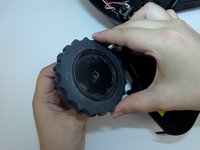
Separate the unsecured half of the wheel casing, exposing the wheel.
-
-
-
Remove the three screws on the remaining half of the wheel casing.
-
-
-
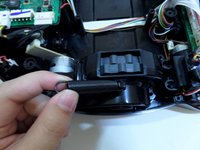
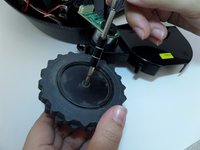
Unscrew the black 1 cm screw securing the center of the wheel.
-
Remove the wheel.
-


To reassemble your device, follow these instructions in reverse order.
To reassemble your device, follow these instructions in reverse order.
crwdns2935221:0crwdne2935221:0
crwdns2935229:07crwdne2935229:0
crwdns2915084:0crwdne2915084:0

CSU Fullerton, Team S2-G8, Bruce Fall 2017 crwdns2935289:0CSU Fullerton, Team S2-G8, Bruce Fall 2017crwdne2935289:0
CSUF-BRUCE-F17S2G8
crwdns2931471:03crwdne2931471:0
crwdns2935297:010crwdne2935297:0
crwdns2947412:03crwdne2947412:0
Where can you find the replacement left driving wheel? are all the model the same?
Very helpful, thank you.
Just beware of the rubber vacuum part and it’s placement after taking apart the vacuum.
Very clear and helpful. Thank you
Able to replace the wheel quickly. Did not need to do steps 16-19 because new part came complete with new wheel.